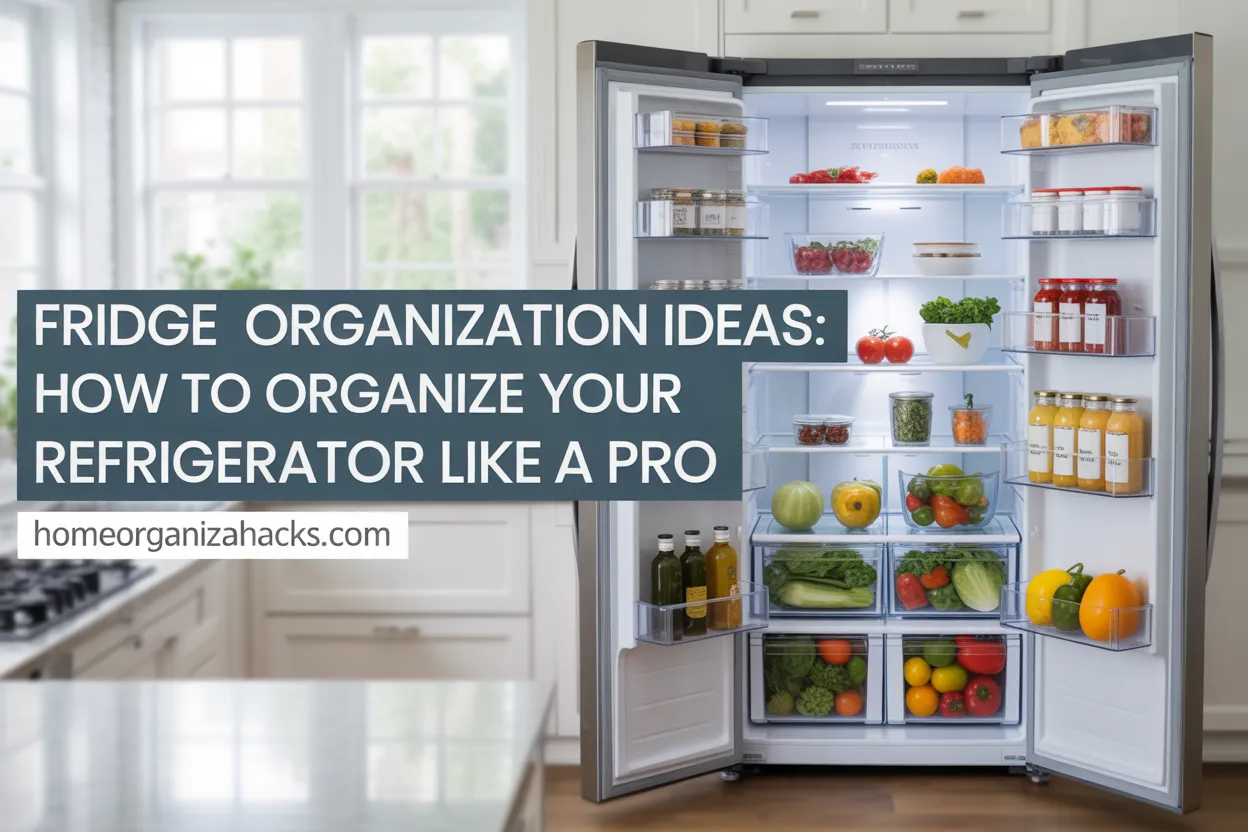
Fridge Organization Ideas: How to Organize Your Refrigerator Like a Pro
I’ll never forget the moment I opened my fridge last summer and a jar of salsa literally fell out and shattered on my kitchen floor. Red splattered everywhere — the walls, the cabinets, my white socks. That was my breaking point. My refrigerator had become a graveyard for forgotten leftovers, mystery containers, and produce I swore I’d eat “tomorrow.”
If your fridge feels more like a game of Tetris than an organized food storage system, you’re not alone. According to the USDA, the average American family throws away roughly 30-40 percent of their food supply — and a messy, disorganized refrigerator is one of the biggest culprits behind that waste.
The good news? You don’t need a brand new refrigerator or expensive gadgets to fix this. With the right fridge organization strategy, you can turn your chaotic icebox into a clean, functional, and yes — even aesthetic — space that saves you time, money, and a whole lot of stress.
In this guide, I’m walking you through everything I’ve learned about refrigerator organization ideas that actually stick. Not just the “make it look pretty for Instagram” kind, but the practical, everyday kind that’ll still look good three weeks after grocery day.
Why Fridge Organization Actually Matters (It’s Not Just About Looks)
Let’s get something out of the way — organizing your fridge isn’t just a Pinterest-worthy flex. There are real, tangible benefits that go way beyond aesthetics.
First, there’s the money angle. When you can actually see everything in your fridge, you stop buying duplicates. How many times have you grabbed a second bottle of mustard because the first one was hiding behind the milk? An organized fridge eliminates that problem instantly.
Then there’s food safety. Your refrigerator isn’t just a cold box — it’s a temperature-gradient system where different zones have different temperatures. The bottom shelf is coldest, the door is warmest, and where you place your food directly affects how long it stays fresh and safe to eat. The FDA recommends keeping your fridge at or below 40°F (4°C), and proper shelf organization helps maintain those temperatures consistently.
And honestly? There’s a mental health benefit too. Opening a clean, organized fridge just feels better. It makes cooking feel less like a chore and more like something you actually want to do. If you’ve already tackled your pantry organization, the fridge is the natural next step to a fully functional kitchen.
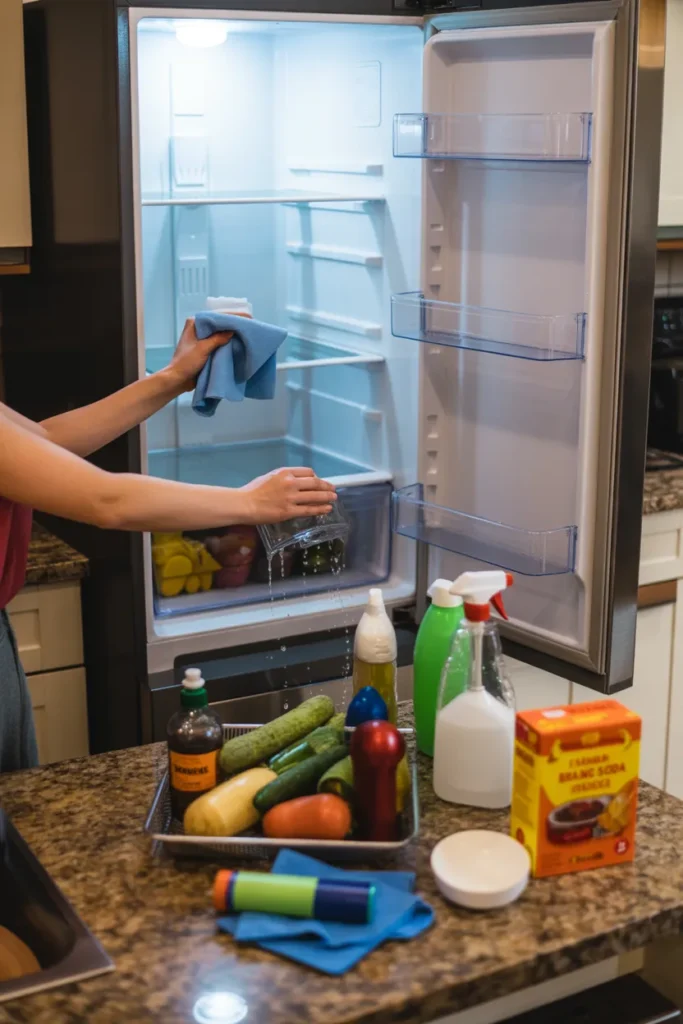
Step 1: The Complete Fridge Cleanout (Don’t Skip This)
Before you even think about buying bins or containers, you need to start with a total cleanout. I know it’s not the fun part, but trust me — this is where the magic actually begins.
Pull everything out of your fridge. Yes, everything. Put perishable items in a cooler with ice packs to keep them safe while you work. Now check every single expiration date. That salad dressing from 2024? Gone. The leftover pasta from who-knows-when? Toss it. Be ruthless here.
Once the fridge is empty, give it a proper deep clean. Mix a tablespoon of baking soda with warm water and wipe down every shelf, drawer, and wall. This removes odors, sticky spills, and bacteria buildup. Remove the drawers and shelves if you can — wash them in the sink with warm soapy water and let them air dry completely before putting them back.
This cleanout process ties directly into a broader home refresh. If you’re on a decluttering kick, you might want to pair this with a full Sunday reset routine to get your entire home feeling fresh.
Step 2: Map Out Your Fridge Zones Like a Pro
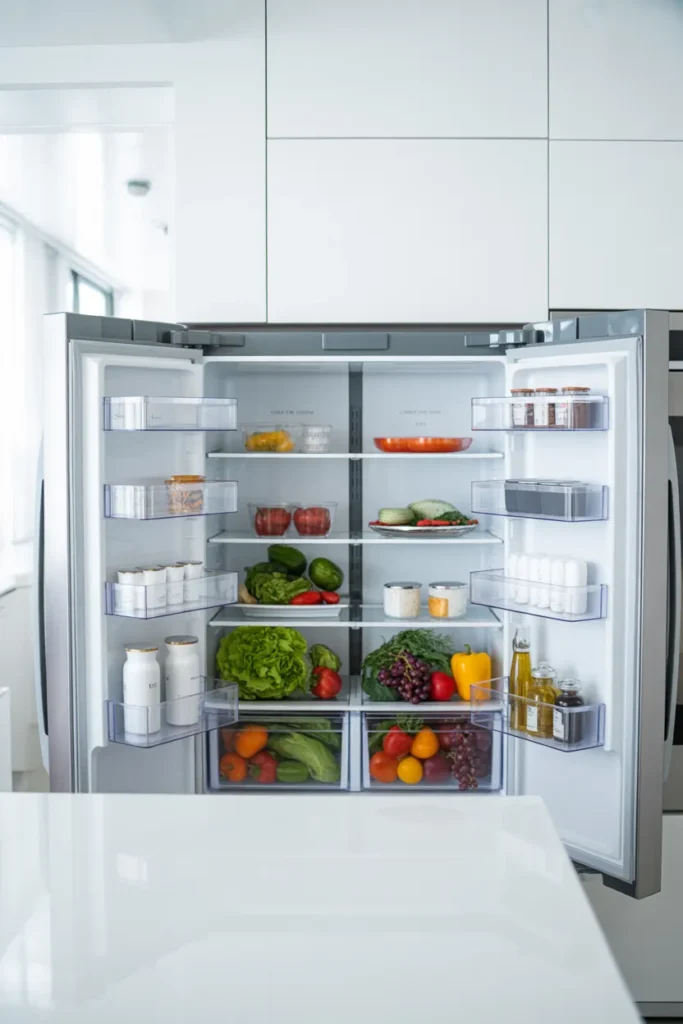
Here’s the secret that professional organizers and restaurant kitchens have known forever — your fridge should be organized by zones, not just shoved full wherever things fit.
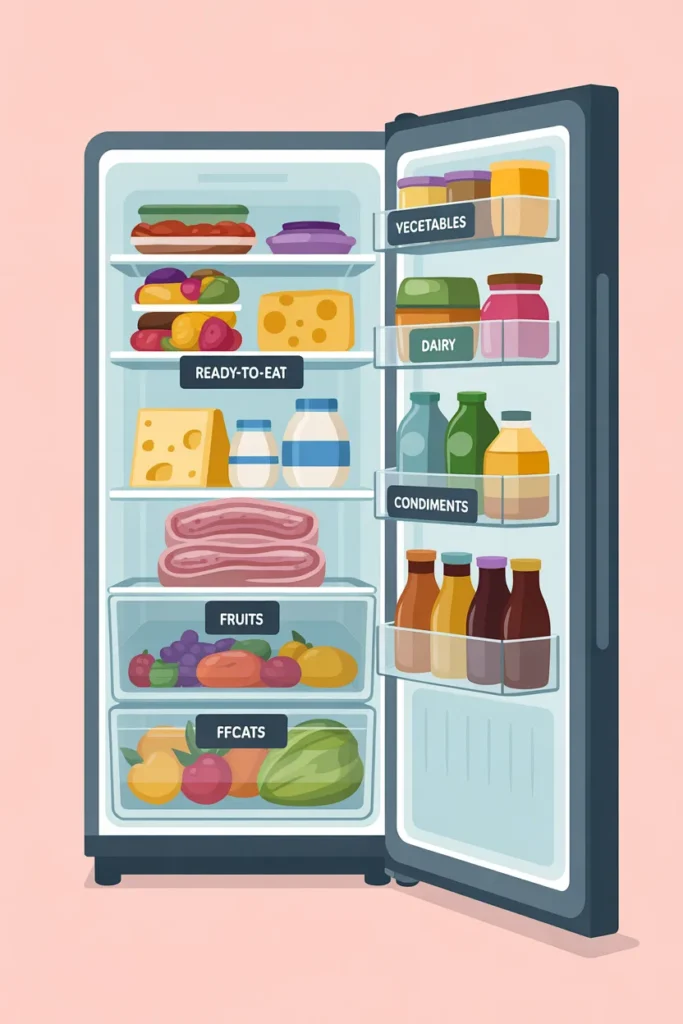
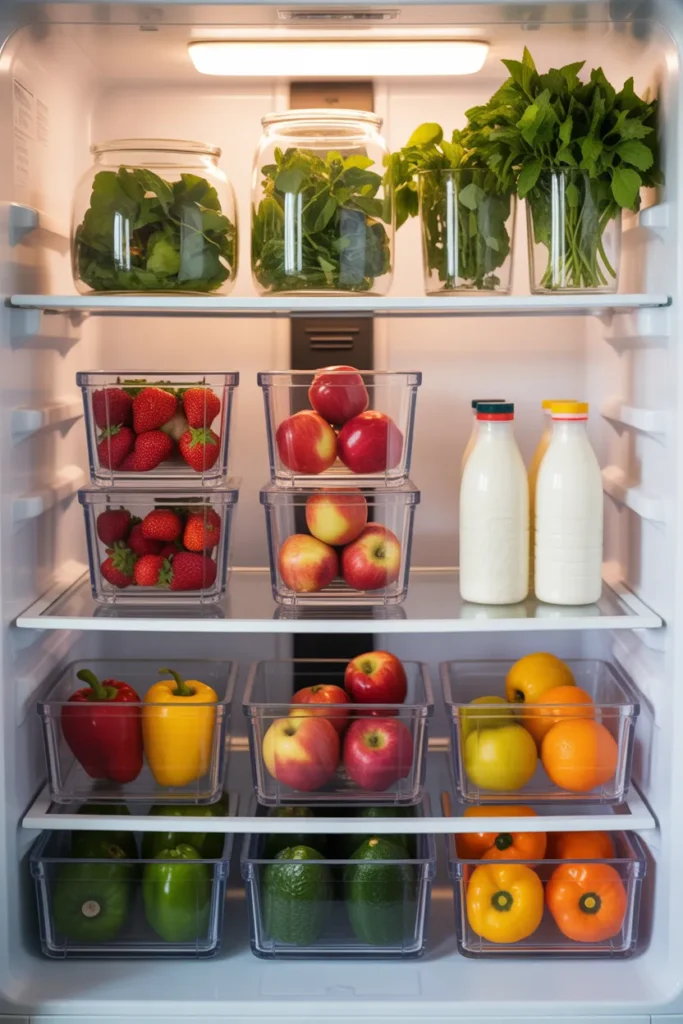
Think of your refrigerator as having five distinct areas, each with a specific purpose:
Upper Shelves: This is your ready-to-eat zone. Leftovers, deli meats, hummus, yogurt, drinks, and anything that doesn’t require cooking goes here. These shelves have the most consistent temperature, making them ideal for foods you’ll grab and eat directly.
Middle Shelves: Dairy headquarters. Milk, cheese, eggs (keep them in the original carton, not the door), butter, and cream belong here. The middle provides stable cold temperatures that dairy products need to stay fresh longer.
Lower Shelves: This is the coldest part of your fridge and should be reserved for raw meat, poultry, and fish. Always store these in sealed containers or on a plate to prevent any drips from contaminating the foods below. This isn’t just a tip — it’s a food safety rule that prevents cross-contamination.
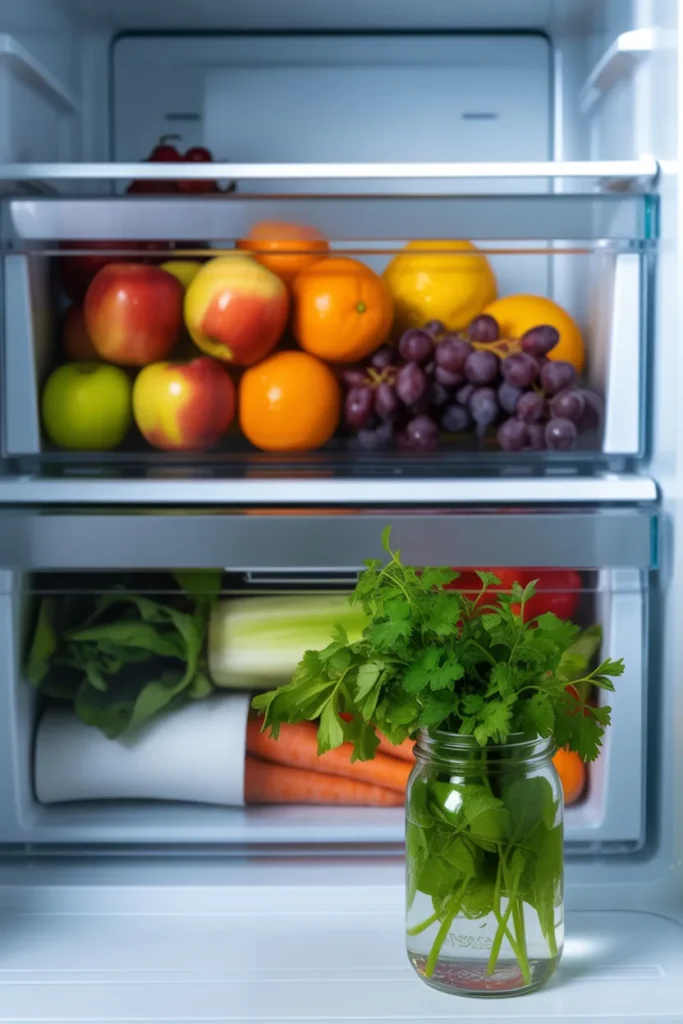
Crisper Drawers: One drawer for fruits, one for vegetables. If your drawers have humidity controls, set the vegetable drawer to high humidity and the fruit drawer to low humidity. This simple adjustment can extend the life of your produce by days.
Door Shelves: The warmest part of your fridge. Store condiments, sauces, jams, dressings, and beverages here. Despite what many of us have been doing for years, milk and eggs should never live on the door — the temperature fluctuates too much every time you open it.
Step 3: Invest in the Right Fridge Organization Products
You don’t need to spend a fortune, but a few key products will completely transform how your fridge functions. Here’s what actually works (and what’s just a waste of money):
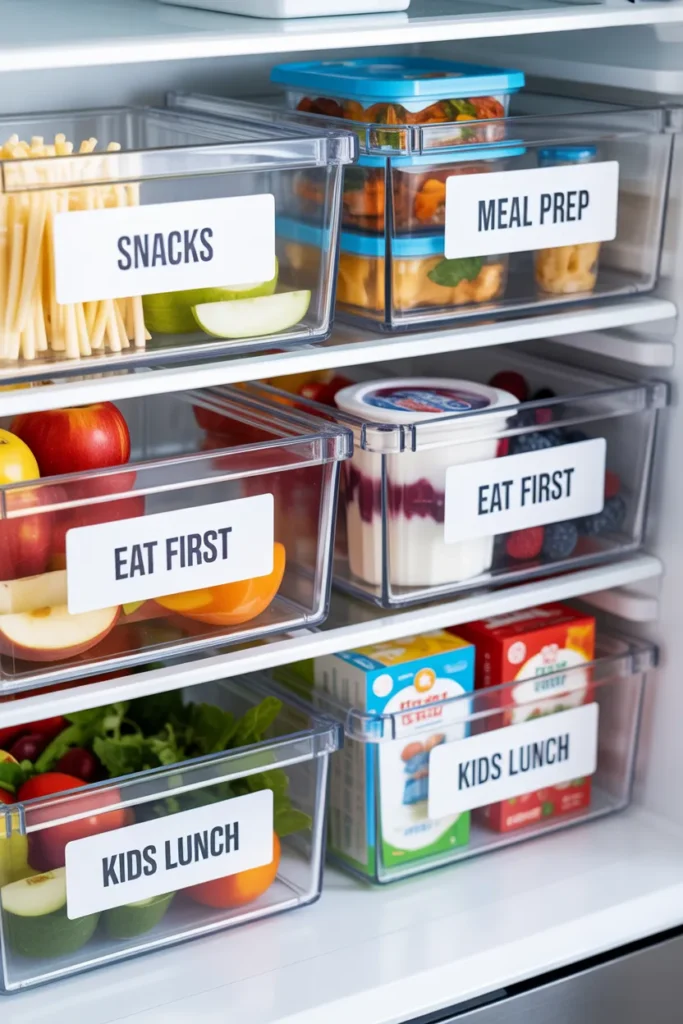
Clear Stackable Bins are the single best investment you can make. They create defined sections, let you see exactly what’s inside, and pull out like drawers so nothing gets lost in the back. Group similar items together — one bin for breakfast items, one for snacks, one for lunch prep ingredients. This is the foundation of any good fridge organization aesthetic.
A Lazy Susan sounds like a weird fridge accessory, but it’s genuinely life-changing for condiments and small jars. Place one on a middle or upper shelf and spin it around instead of digging behind bottles. It’s especially brilliant for those deep refrigerator shelves where things tend to disappear.
Shelf Liners protect your glass shelves from spills and make cleanup ten times easier. Look for wipeable, BPA-free liners with ridges that allow air circulation. When something inevitably leaks, you just pull out the liner, wipe it, and put it back — instead of scrubbing dried sticky patches off glass shelves.
Produce Keepers with Ventilation are worth every penny if you’re tired of throwing away slimy lettuce and moldy berries. The ones with built-in drain trays keep moisture away from your greens and can extend their freshness by nearly a week.
Skip the fancy egg holders, built-in can dispensers, and over-the-door hanging organizers — they take up more space than they save and usually end up collecting dust. According to Taste of Home, the most effective fridge organization products are simple, stackable, and transparent.
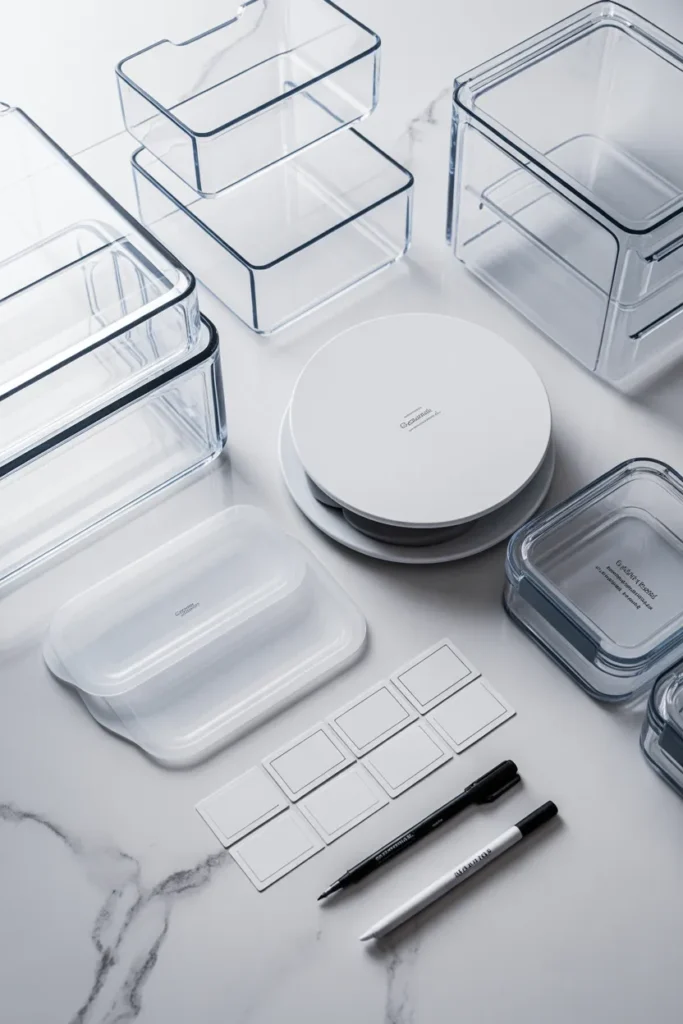
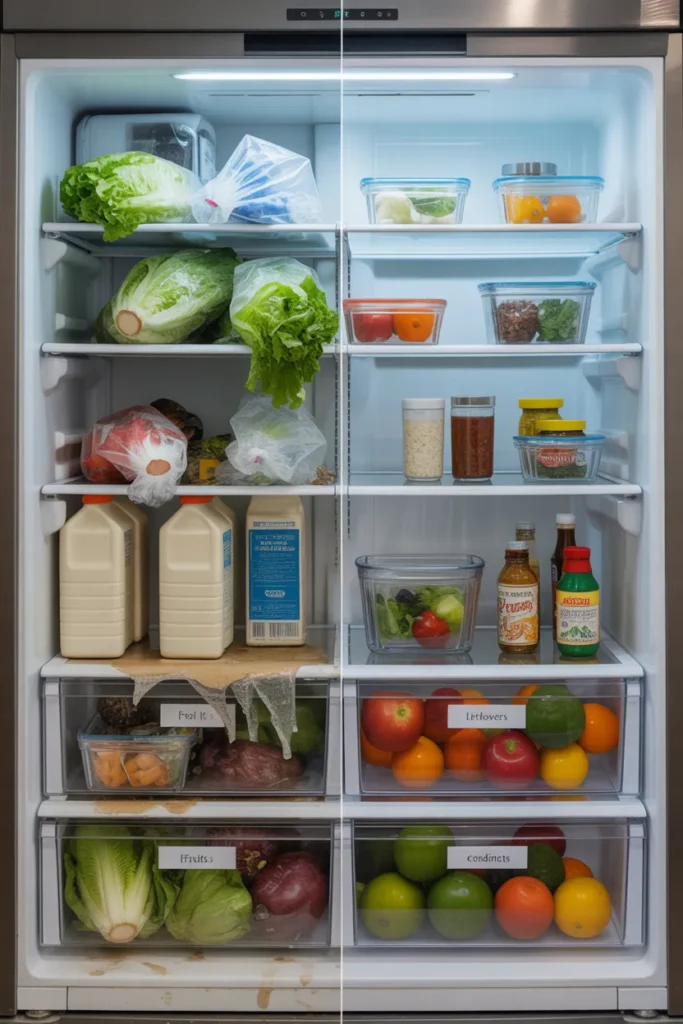
Step 4: The Labeling System That Keeps Everything in Place
Labels might feel like overkill, but hear me out — they’re the reason your fridge stays organized past day three. Without labels, everyone in your household will put things back wherever they feel like it, and you’ll be reorganizing every week.
You don’t need a fancy label maker (though they do look great). A simple piece of masking tape and a marker works perfectly fine. Label each bin or section: “Snacks,” “Meal Prep,” “Kids’ Lunches,” “Eat First,” “Condiments.” The “Eat First” bin is my personal favorite — it’s where anything that’s close to expiring goes, so your family checks there before grabbing anything else.
This one small habit saves so much food from being wasted. I started doing this about a year ago, and I swear we cut our grocery bill by at least 15 percent just by actually eating what we already had.
Step 5: Fridge Organization Aesthetic — Making It Look as Good as It Functions
Let’s talk about the fun part — making your fridge actually look beautiful. The fridge organization aesthetic trend on Pinterest isn’t just about vanity. When your fridge looks good, you’re more motivated to maintain it. It’s psychology, plain and simple.
Here’s how to nail that clean, curated look:
Use uniform containers. Ditch the mismatched takeout containers and invest in a matching set of glass or BPA-free plastic storage containers. When everything stacks evenly and looks consistent, your fridge instantly appears more polished and intentional. Glass containers are especially great because you can see exactly what’s inside without opening them.
Group by color. This is a trick straight from Pinterest that actually works in real life. Keep your green produce together, group red and orange fruits in the same area, and store white dairy items near each other. It creates a visual rhythm that’s calming to look at and surprisingly practical — you’ll spot what you need faster.
Leave breathing room. An overstuffed fridge doesn’t just look messy — it actually prevents proper air circulation, which means uneven cooling and faster spoilage. The USDA recommends not overloading your refrigerator to maintain consistent temperatures throughout.
Decant when it makes sense. Transfer items like berries, deli meats, and cheese into clear containers instead of leaving them in bulky store packaging. This immediately frees up space and creates that “edited” look that makes organized fridges so satisfying on social media.
Step 6: Smart Produce Storage Hacks That Save Real Money
Produce is usually the first thing to go bad in a disorganized fridge, and that’s basically money rotting in your crisper drawer. Here are some hacks that genuinely extend the life of your fruits and vegetables:
Store herbs like bouquets. Trim the stems of fresh herbs like cilantro, parsley, and basil, place them in a small jar with a bit of water, and loosely cover the tops with a reusable bag. They’ll last up to two weeks instead of three sad days.
Keep berries dry until you eat them. Don’t wash berries before refrigerating — moisture accelerates mold growth. Store them unwashed in a container lined with a paper towel to absorb excess moisture. Wash them right before eating instead.
Separate ethylene producers from sensitive items. Apples, bananas, avocados, and tomatoes release ethylene gas that speeds ripening in nearby produce. Keep them away from leafy greens, broccoli, and cucumbers, or store them in separate drawers.
Wrap your greens. Wrap lettuce and leafy greens loosely in a damp paper towel before placing them in the crisper. The towel maintains just enough moisture to prevent wilting without creating the soggy conditions that lead to slime.
If you’re working with limited space, many of these produce hacks pair perfectly with the strategies I shared in our guide to under sink organization — where space-saving thinking applies just as much to the kitchen.
Step 7: Maintaining Your Organized Fridge (The 5-Minute Weekly Habit)
Here’s the truth nobody tells you about fridge organization — it’s not a one-and-done project. But the maintenance is way simpler than you think. I spend about five minutes once a week keeping my fridge in shape, and that’s all it takes.
Pick one day each week (I do it right before grocery shopping) and do a quick sweep. Pull out anything expired or questionable. Wipe down any sticky spots. Push items forward so nothing hides in the back. Restock your “Eat First” bin with anything that needs attention.
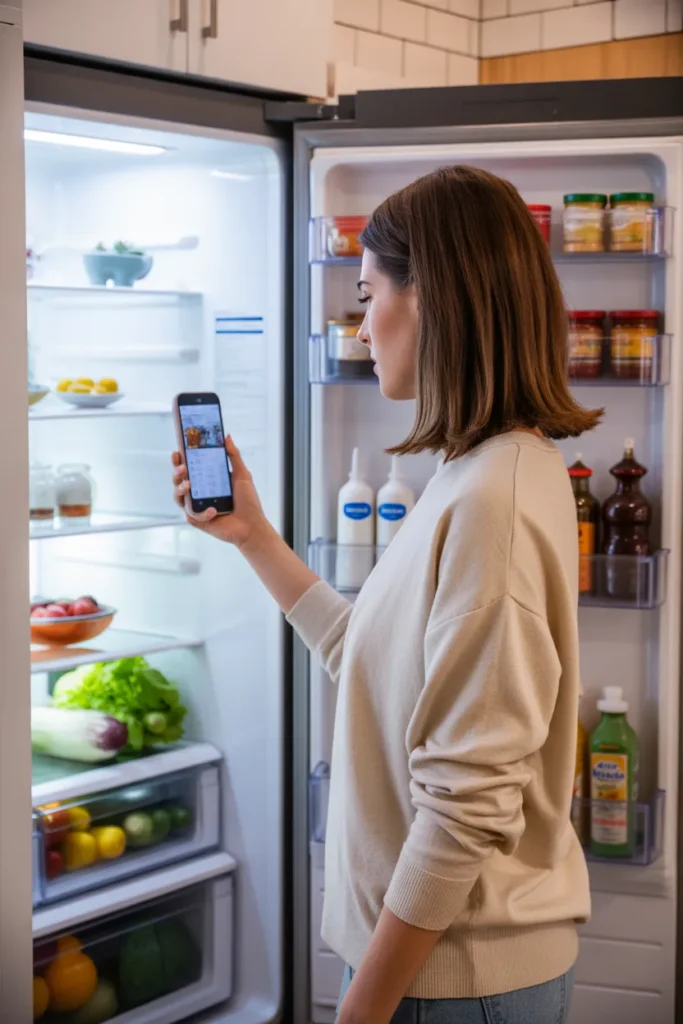
Do a quick inventory before shopping. Snap a photo of the inside of your fridge before heading to the store. This simple habit prevents you from buying things you already have — which is one of the biggest sources of food waste and unnecessary spending.
Get your family on board. The labels help, but you might also need a quick family chat. Show everyone where things go. Make it easy — if the snack bin is at kid-height, they’ll actually put things back. If the condiment turntable is easy to spin, your partner will actually use it instead of shoving the ketchup behind the milk.
Bonus: Quick Fridge Organization Ideas for Small Refrigerators
Not everyone has a giant French-door fridge to work with. If you’re dealing with a smaller apartment-sized refrigerator, here are a few tailored tips:
Use stackable bins that are narrow and tall rather than wide and shallow — they maximize vertical space in compact fridges. Magnetic containers on the side walls can hold small items like tubes of ginger paste or single-serve condiment packets. A small turntable in the back corner keeps everything accessible without pulling the entire shelf apart.
Consider a door-mounted organizer specifically designed for narrow fridge doors — they add extra compartments without taking up shelf space. And above all, keep less in the fridge at any given time. Smaller fridges work best when they’re about 70% full, leaving room for air to circulate properly.

Final Thoughts
Organizing your fridge isn’t about being perfect. It’s about building a system that works with your real life — your family’s eating habits, your grocery schedule, your kitchen layout. Start with the cleanout, set up your zones, grab a few clear bins, and label the basics. That’s honestly 90 percent of the battle.
The best fridge organization system is one you can actually maintain without stress. So don’t aim for Pinterest perfection on day one. Aim for a fridge that makes cooking dinner feel a little easier, wasting food a little harder, and opening that door a little more satisfying.
And once your fridge is handled? You might be ready to tackle the rest of your kitchen. Check out our complete guide to decluttering your home room by room for the full roadmap.
Now go open that fridge and take the first step. Future you will be so glad you did.
Have a fridge organization tip that changed your life? Drop it in the comments — I’d love to hear what’s working for you!