

Craft Room Organization on a Budget That Actually Sticks
Craft room organization on a budget sounds like a contradiction, right? It isn’t. You can turn a chaotic pile of ribbon, paint, and half-finished projects into a room you actually want to create in, and you can do it for less than the cost of one fancy storage cabinet. Here’s the promise: twelve real ideas, a plan to start for under $50, and a reset routine so it stays tidy past week one.
Most craft spaces get messy for one reason. Supplies are small, they multiply fast, and they have nowhere permanent to live. Fix that, and the room mostly runs itself.
Let’s get into it.
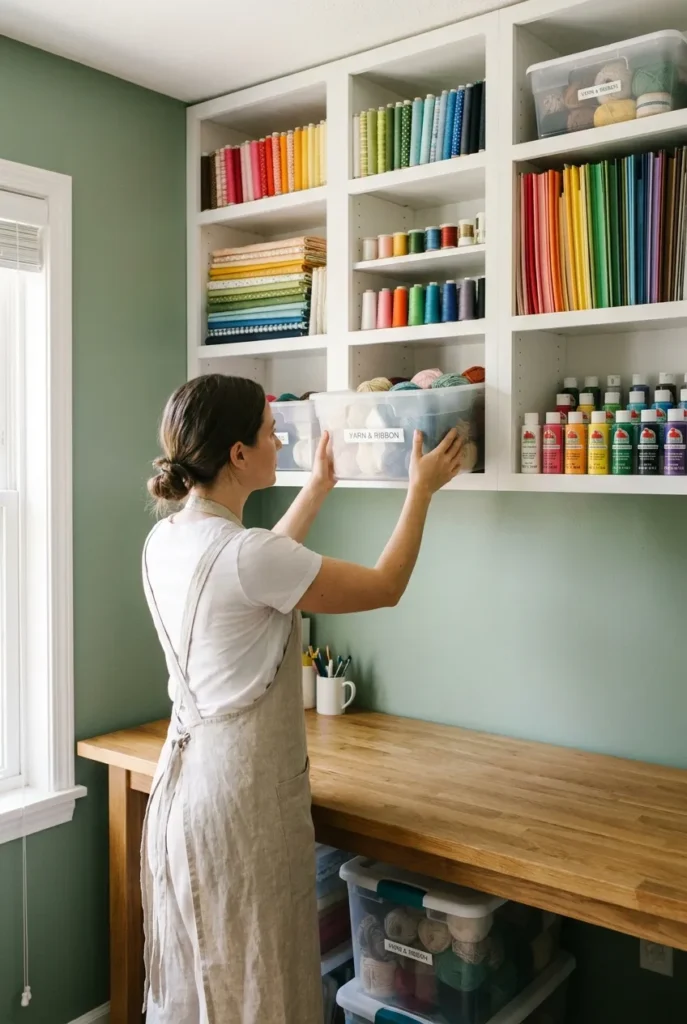
Start With a Sort, Not a Shopping Cart
The biggest budget mistake is buying bins before you know what you own. You end up with the wrong sizes and a receipt full of regret.
Pull everything out first. Every drawer, every bag, every mystery box. Then sort into four piles: keep, donate, sell, and recycle or trash. University extension programs recommend this exact category-first approach because it stops you from shuffling clutter around instead of clearing it. The University of Illinois Extension suggests using a timer and a decision buddy so you keep momentum, and Penn State Extension recommends tackling one small area at a time so the job never feels huge.
Here’s the honest part. You probably have three glue guns and enough scrap paper for a small country. Sorting first means you buy storage for what you keep, not for what you meant to use in 2019.

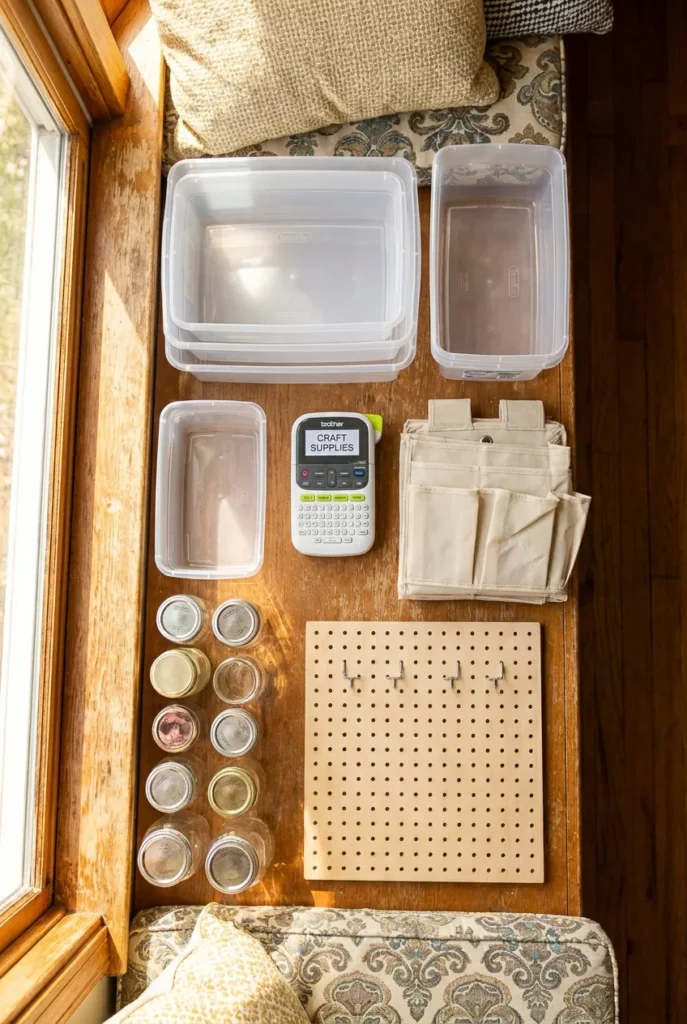
The $50 Craft Room Starter Kit
You don’t need a Pinterest budget. You need the right five things. Front-load your money here, because these do the heaviest lifting.
Grab a value pack of clear stackable bins (Sterilite or Amazon Basics run about $2 to $4 each), a roll of adhesive labels or a cheap label maker, one over-the-door pocket organizer (around $12 to $18), a set of small glass jars you already own or thrift for a dollar, and a single pegboard panel (roughly $15 to $20 at a hardware store). That’s a functional system for right around $50.
Want more cheap wins that ship fast? These best Amazon organizers under $25 cover bins, drawer trays, and cart options that hold up.
Where to spend versus where to save
Spend on clear bins and labels. You’ll use them daily and see everything at a glance. Save on decorative baskets and matching jars, because thrift stores, Dollar Tree, and your own recycling bin cover those for pennies.
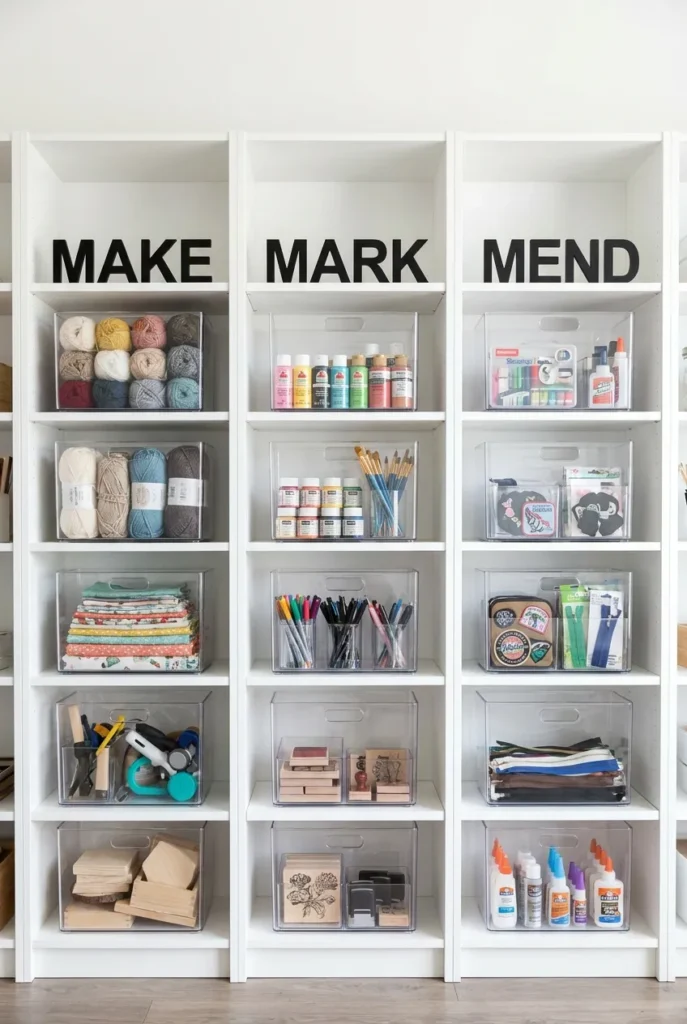
Organize by Category (The 3-Bin Craft Zoning Rule)
Here’s the framework I lean on for every craft space: the 3-Bin Craft Zoning Rule. Group everything into three zones, Make, Mark, and Mend. Make holds building supplies (paper, glue, cutting tools). Mark holds anything that colors or writes (markers, paint, ink). Mend holds sewing and repair gear (thread, needles, patches). Three zones, three clearly labeled bin groups, and you always know where a stray item belongs.
Why three and not ten? Because a system you can remember is a system you’ll actually keep. Most people abandon a 12-category setup by the second week.
Sort your keep pile into those three zones before anything goes back on a shelf. It takes twenty minutes and it’s the step that makes the whole room click.
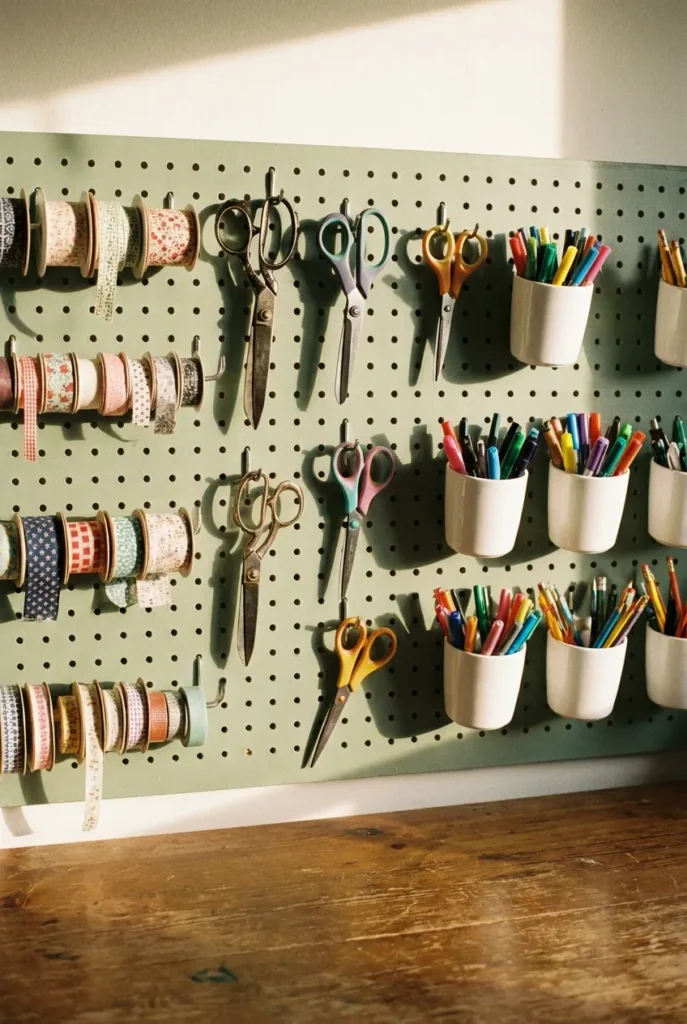
Go Vertical With a Pegboard Wall
Wall space is free real estate. A single pegboard turns a blank wall into storage for scissors, ribbon spools, washi tape, and tools you reach for constantly.
Paint it to match your room so it looks styled, not industrial. Add a few hooks, a small shelf, and a couple of cheap cups for pens. Suddenly your desk surface is clear because everything hangs at eye level.
For renters, this matters: mount the board on a French cleat or use heavy-duty adhesive strips so you skip the drill and keep your deposit.
Use Clear Bins So You Actually See Your Stuff
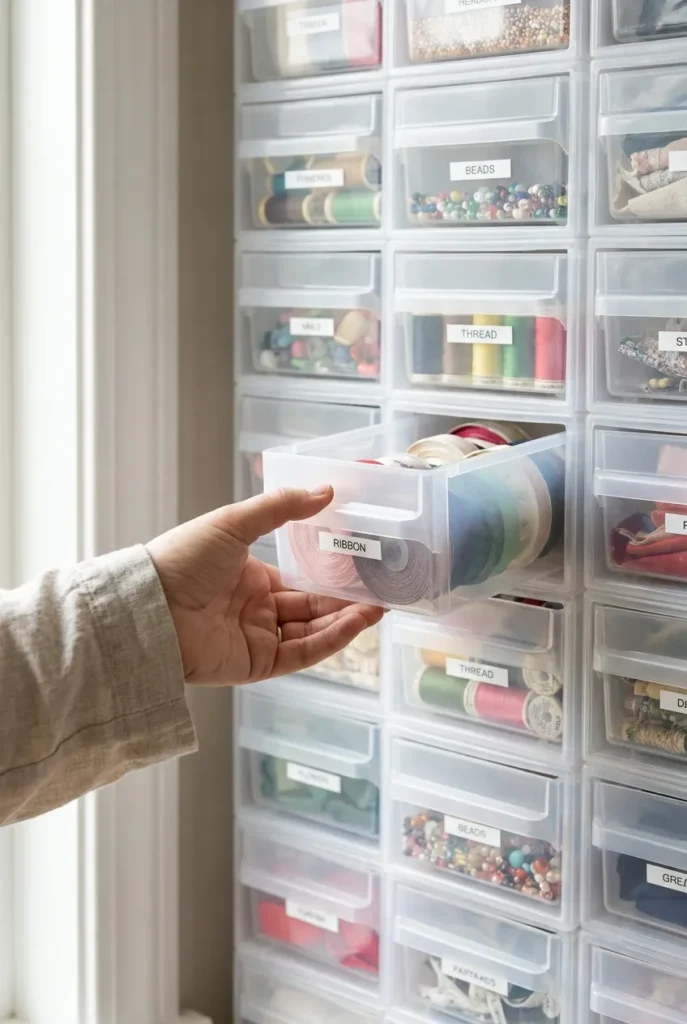
Opaque bins hide clutter, but they also hide supplies you forget you own, so you buy duplicates. Clear stackable bins solve both problems. You see everything, you stack them tall, and you reclaim floor space.
Label the front of each one. A dollar label maker or even masking tape and a marker works fine. The point is that future-you can grab the right bin in two seconds without opening five.
Group like with like inside each bin. All the paint in one, all the yarn in another. Simple beats clever here.
Thrift and Repurpose Before You Buy
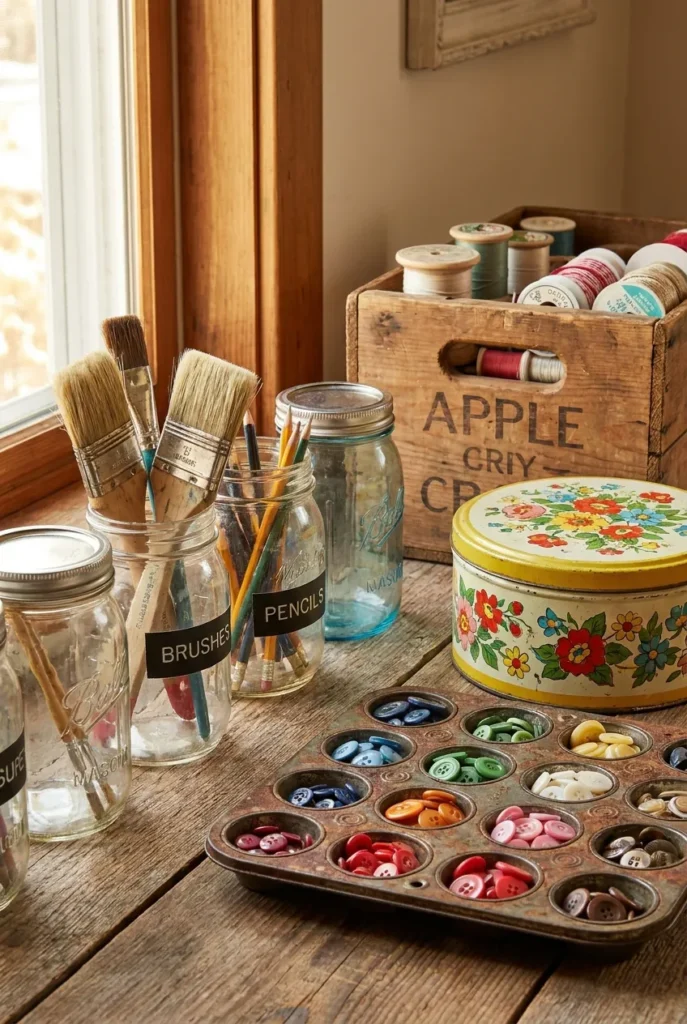
This is where a budget craft room gets fun. Old jars, cookie tins, muffin pans, a wooden crate, even a vintage suitcase can all store supplies with real charm. Mason jars hold brushes and pens. A muffin tin sorts buttons and beads. A magnetic strip on the wall grabs scissors and metal tools.
Check thrift stores, Dollar Tree, and your own cabinets first. Half the “expensive” organized look on Pinterest is just clever reuse with a coat of spray paint.
Honestly, the cigar-box-and-glass-jar look often photographs better than a wall of identical plastic bins anyway.
Tame the Drawers With Dividers
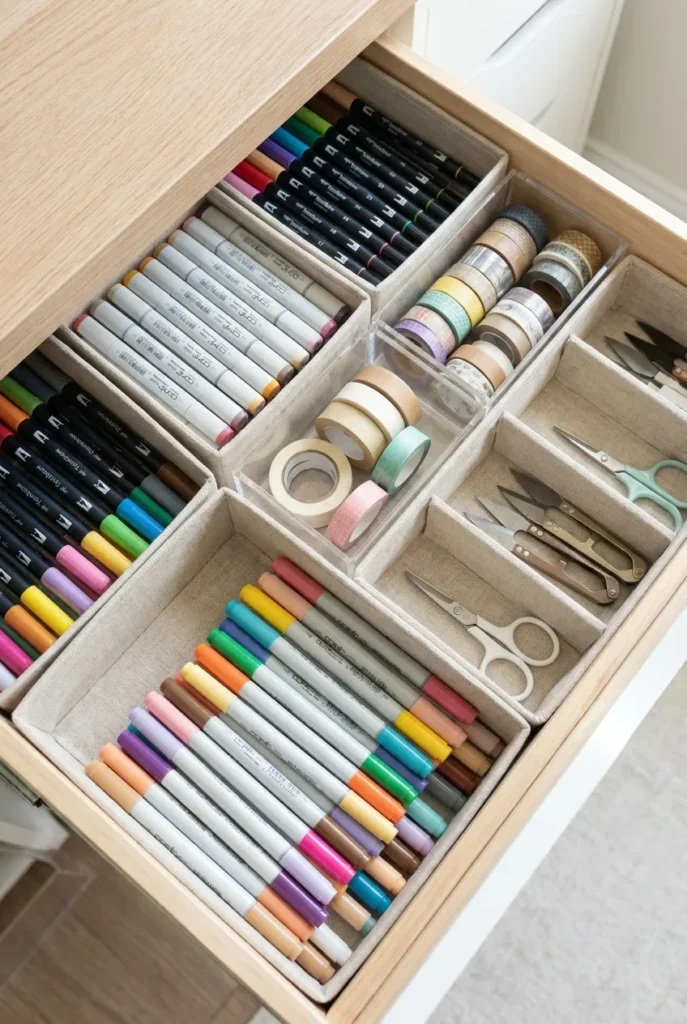
Craft drawers become junk drawers fast. Dividers stop the slide. You can buy adjustable acrylic ones, or make your own from cut-down cardboard boxes and a little tape.
Which is worth it? We broke down the real cost and durability in this DIY drawer dividers versus store bought comparison, and the short version is that DIY wins for deep supply drawers while store-bought wins for shallow, high-use ones.
Measure your drawer depth first. Standard craft drawers run about 2 to 4 inches deep, so pick dividers that match or you’ll waste vertical space.
Hang a Door Organizer for Overflow
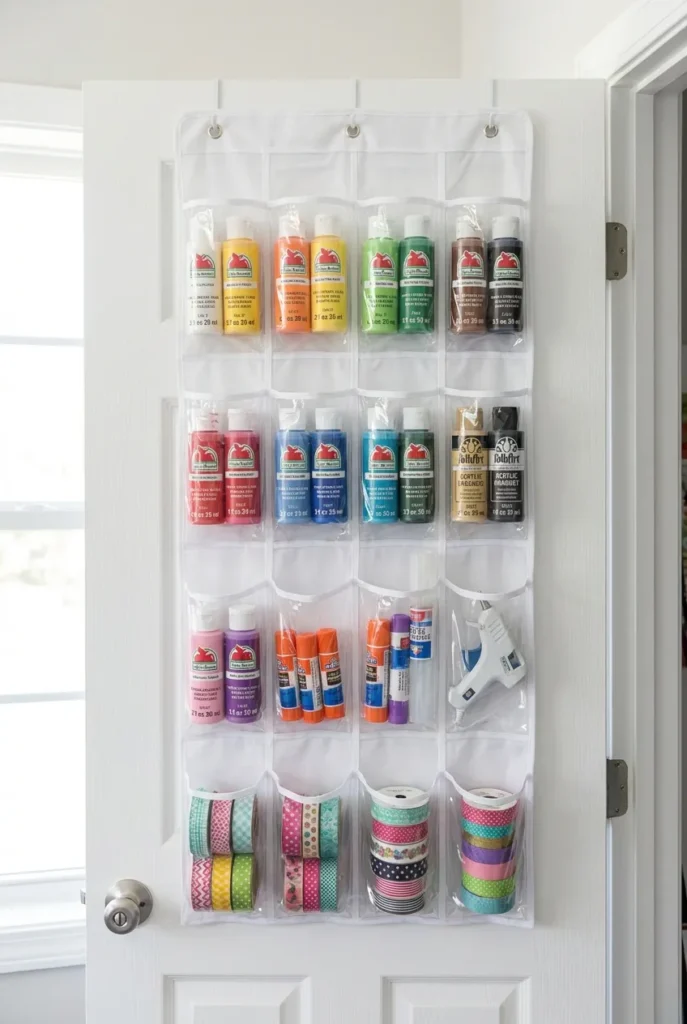
The back of your craft room door is prime storage most people ignore. A clear pocket organizer, the kind made for shoes, holds paint bottles, glue sticks, spools, and small tools where you can see each one.
We rounded up 25 uses for these, including a dedicated craft supply setup, in our guide to an over the door pocket organizer. It’s one of the cheapest square footage upgrades in the whole room, usually under $18.
Hang it on the existing door hooks so there’s no hardware and nothing to patch later.
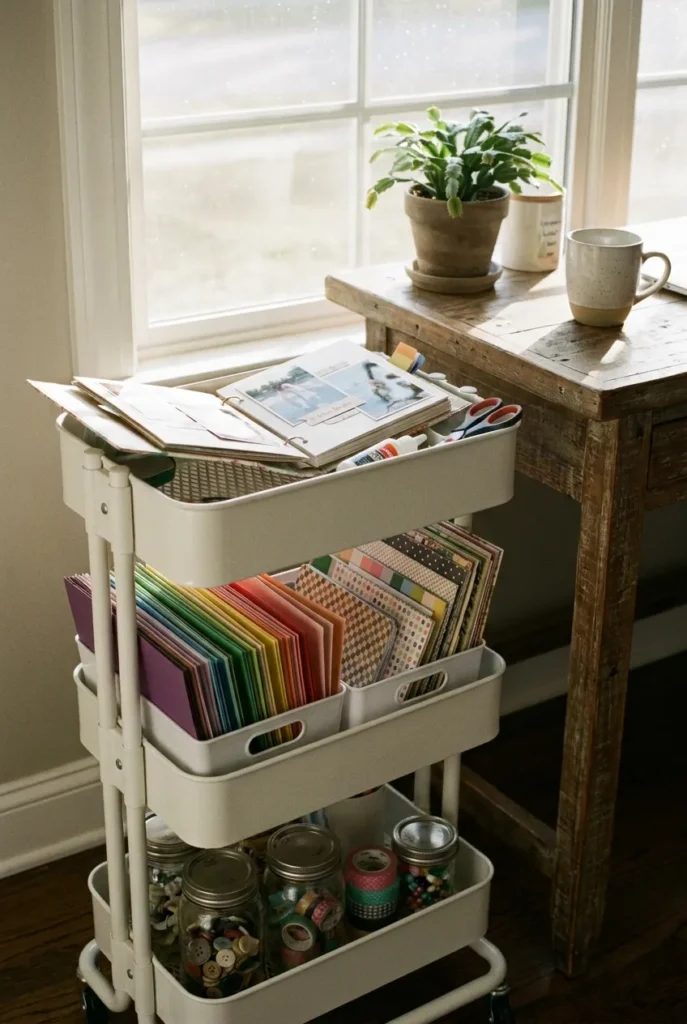
Add a Rolling Cart for Active Projects
A cheap three-tier rolling cart (IKEA’s RÅSKOG is the famous one, around $35, but budget dupes run $25 to $30 at Walmart and Amazon) keeps your current project mobile. Load it with what you’re using right now, roll it to the table, roll it back when you’re done. Your main storage stays untouched and your desk stays clear.
It doubles as a great kids-craft station too, since little ones can reach the lower tiers and you keep the sharp stuff up top.
Keep It That Way: The 10-Minute Craft Reset
A makeover is easy. Staying organized is the real trick, and it’s the piece those big Pinterest lists skip. Here’s the fix: the 10-Minute Craft Reset. Every time you finish a session, set a timer for ten minutes and do three things. Put active supplies back on the cart, drop strays into their zoned bin, and wipe the work surface.
That’s it. Ten minutes beats a four-hour re-organize every single time.
Do a slightly longer version, maybe twenty minutes, on Sunday to reset the whole room for the week ahead. Small and often always wins over big and rare.
Frequently Asked Questions
How do I set up a craft room on a budget?
Sort your supplies first, then buy only what you need: clear stackable bins, labels, an over-the-door organizer, thrifted jars, and one pegboard. You can build a working system for around $50.
How do I organize a craft room step by step?
Empty everything out, sort into keep, donate, sell, and recycle, group your keep pile into three zones (Make, Mark, Mend), assign each zone a labeled bin group, then add wall and door storage for overflow.
What is the cheapest way to store craft supplies?
Repurpose what you already own. Glass jars, cookie tins, muffin pans, and cardboard box dividers cost little to nothing, and Dollar Tree fills the gaps for a dollar each.
How do I organize a small craft room?
Go vertical. A pegboard, over-the-door organizer, and tall clear bins use wall and door space so your limited floor and desk stay clear.
How do I keep my craft room organized long term?
Use a quick 10-minute reset after every session and a slightly longer weekly reset. Category-first storage plus a habit is what keeps it from sliding back into chaos.
Are Dollar Tree containers good for craft storage?
For lightweight supplies like buttons, beads, and washi tape, yes. For heavy or frequently handled items, spend a little more on sturdier Sterilite or Amazon Basics bins that won’t crack.
Your Turn
Craft room organization on a budget really comes down to three moves: sort before you shop, store by category, and reset in ten minutes. Start with one shelf or one drawer this weekend and let the momentum carry you.
If this helped, save the pin so you can come back to the starter kit list, and tell me in the comments which zone in your craft room is the messiest right now.


