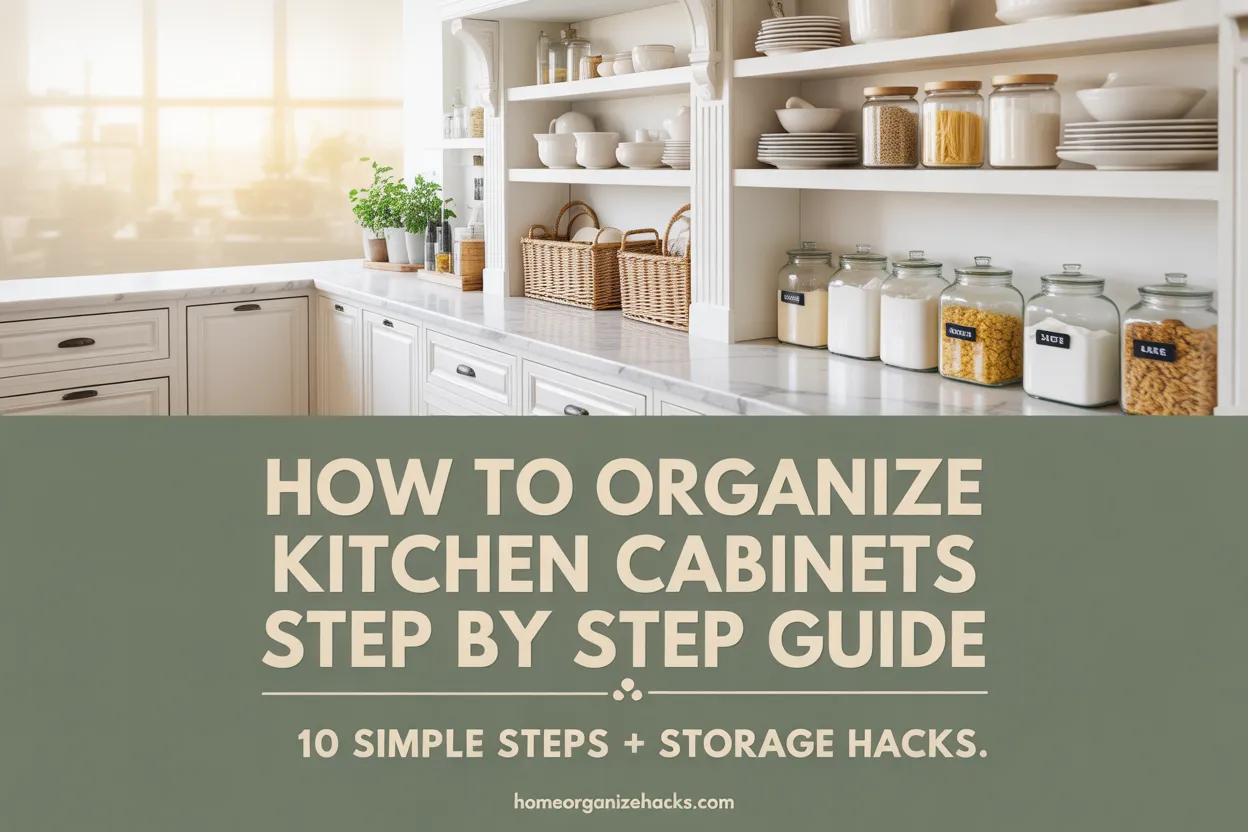
How to Organize Kitchen Cabinets: Step by Step Guide
I used to dread opening my kitchen cabinets. Every single time, something would fall out. A plastic lid I couldn’t match, a half empty bag of rice with the clip missing, that one mug from a college I never even attended. Sound familiar?
If you’ve been searching for how to organize kitchen cabinets without spending a fortune or doing a full renovation, you are in exactly the right place. I spent one rainy Saturday tearing my entire kitchen apart, and what came out on the other side actually changed how I cook. Meals got faster. Grocery shopping got cheaper because I could finally see what I had. And honestly, my whole brain just felt quieter.
This step by step guide walks you through everything I learned, plus the kitchen cabinet organization tricks that real people on Pinterest swear by. Grab a coffee. Let’s get your cabinets sorted.
Why Organizing Your Kitchen Cabinets Actually Matters
Before we dive into the how, let me tell you why this is worth your weekend. A messy cabinet is not just an eyesore. According to research published in the Journal of Environmental Psychology, cluttered home environments are linked to higher cortisol levels, the stress hormone. So when you walk past that overflowing cabinet, your body is literally reacting to it.
Then there is the money side of things. When you cannot see what you own, you buy duplicates. I once found three opened jars of cinnamon. Three. An organized kitchen helps you use what you have, throw out less food, and save real money every single month.
And finally, there is the simple joy of cooking in a space that works with you instead of against you. That alone is worth the effort.
Step 1: Empty Every Single Cabinet (Yes, All of Them)
I know this sounds dramatic, but trust me. You cannot reorganize what you cannot see.
Pull everything out. Place it on your countertops, your kitchen table, even the floor if you need to. Spread out so each item has its own little spot. This is the moment where you will gasp at how many lids you own without matching containers, and that is completely normal.
Take this opportunity to wipe down the inside of every shelf with warm soapy water or a vinegar mix. Cabinets collect crumbs, grease, and dust over the years, especially the ones above the stove. A clean cabinet is the foundation of an organized one.

Step 2: Declutter Without Mercy
This is where most people get stuck, so I want you to follow one rule. If you have not used it in a year, it goes. Donate, recycle, or trash. No exceptions for that fondue set someone gifted you in 2019.
Sort everything into four piles as you go:
- Keep, items you actually use weekly or monthly
- Donate, things in good condition you do not need
- Toss, anything broken, expired, or chipped
- Maybe, items you are unsure about, which we will deal with last
For pantry goods, check expiration dates ruthlessly. Old spices lose flavor after about a year, and stale flour can attract pests. If you are not sure where to start with the bigger picture, my full room by room declutter guide walks you through every space in your home with the same approach.
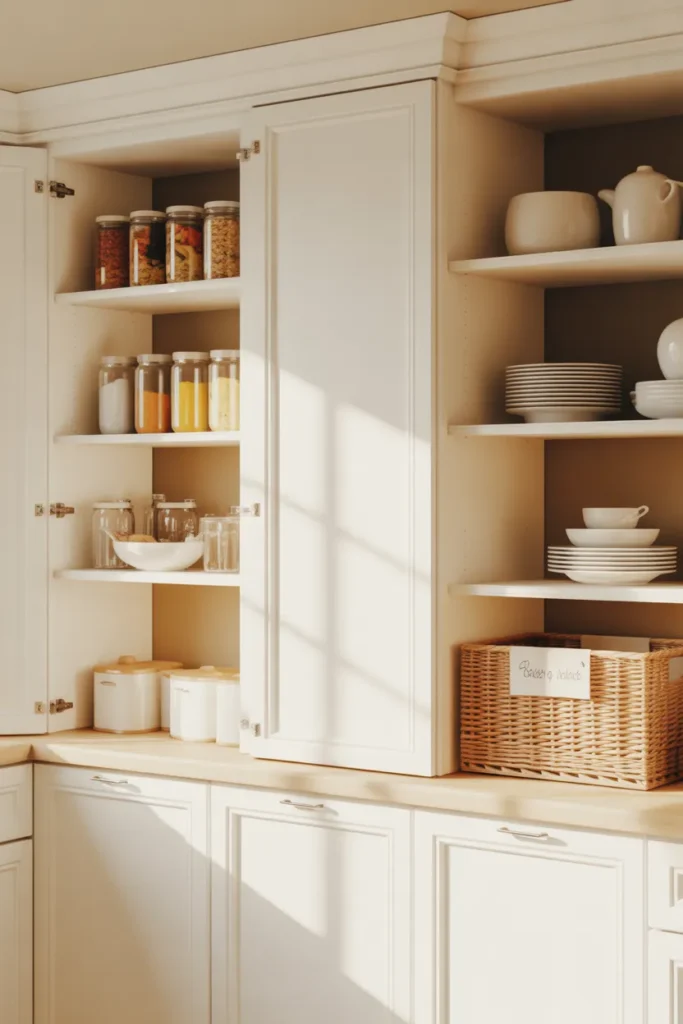
Step 3: Group Similar Items Together
Now look at what is left. Start grouping things by what they are and how you use them. All the baking supplies in one pile. All the everyday dishes in another. Coffee and tea things together. Cooking oils and vinegars side by side.
This is sometimes called the like with like rule, and it is honestly the secret behind every Pinterest worthy kitchen you have ever scrolled past. When similar items live together, your brain knows exactly where to look.
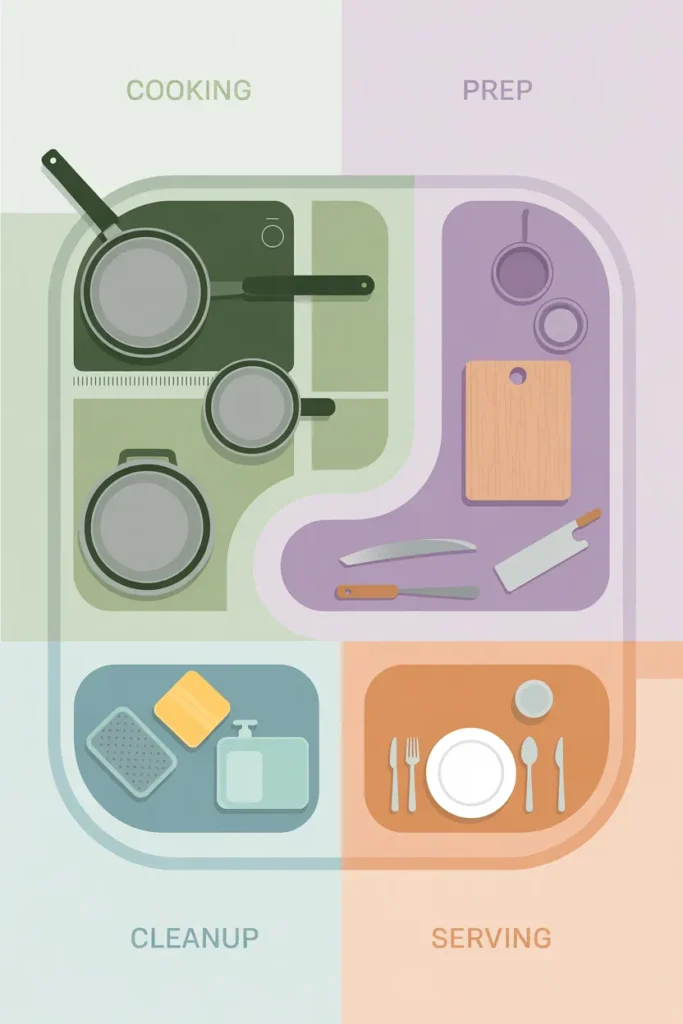
Step 4: Plan Your Kitchen Zones
This is where the magic happens. Smart kitchen cabinet organization is all about zones. Think of your kitchen as having four main work areas, and store items where you actually use them.
The cooking zone is the cabinets and drawers around your stove. Pots, pans, cooking utensils, oils, and frequently used spices belong here. You should never have to walk across the kitchen mid stir fry.
The prep zone is your main counter space. Mixing bowls, cutting boards, knives, and measuring cups all live in nearby drawers and cabinets.
The cleanup zone is around your sink and dishwasher. Dish soap, sponges, dish towels, and trash bags belong in this area, ideally in the cabinet directly under the sink. For brilliant ideas on conquering that messy under sink space, take a look at my under sink organization guide packed with clever hacks.
The serving zone is where you eat or plate food. Everyday plates, bowls, glasses, and silverware should be stored close to the dining area or dishwasher for the easiest unloading.
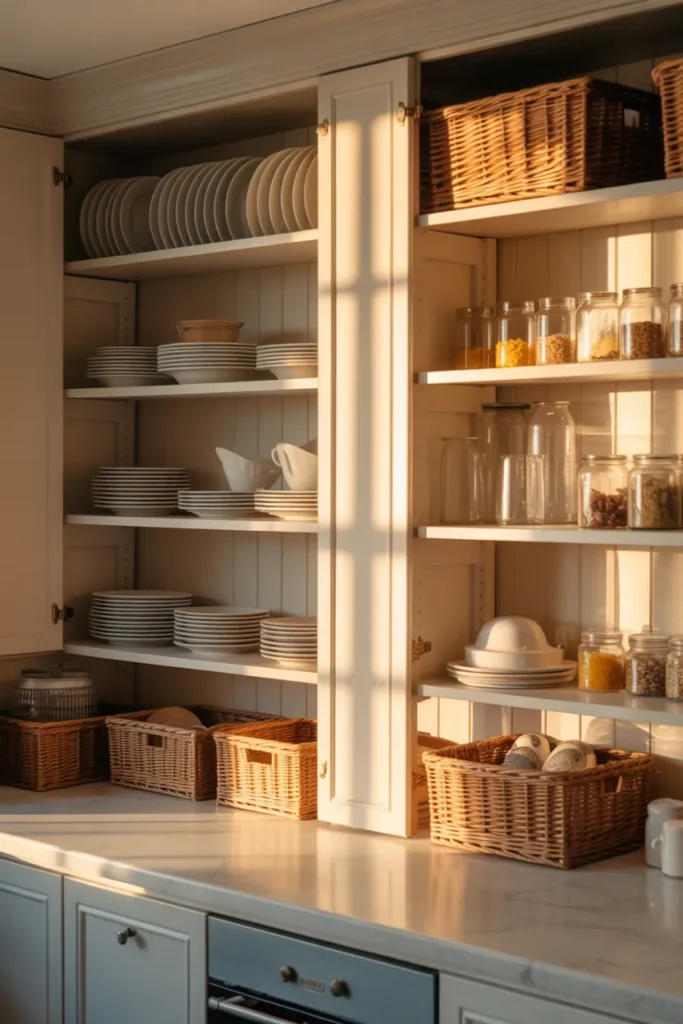
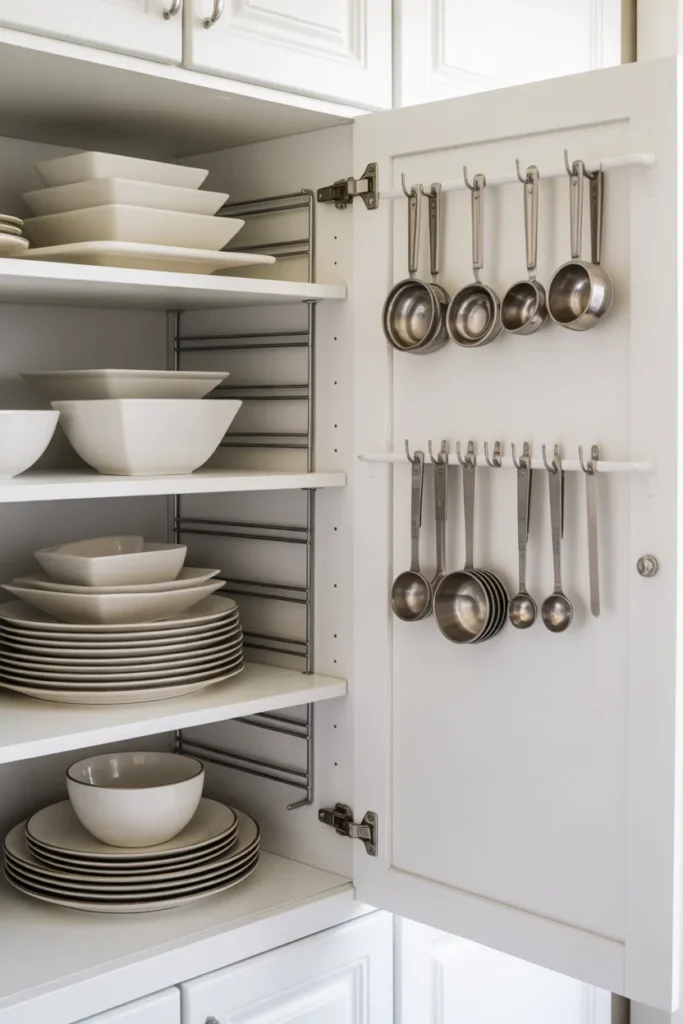
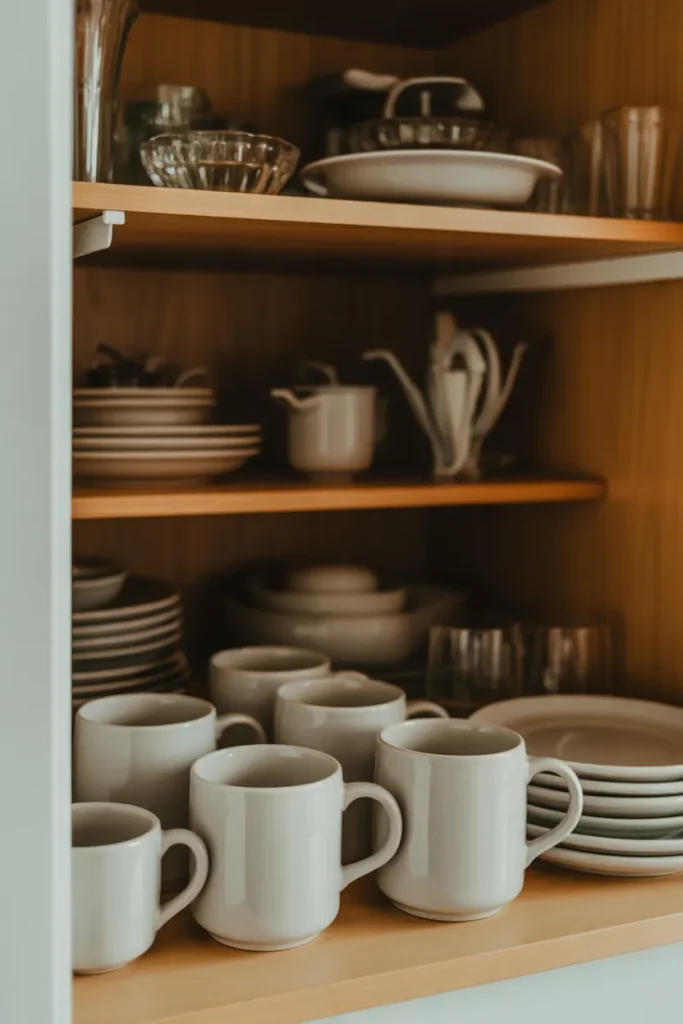
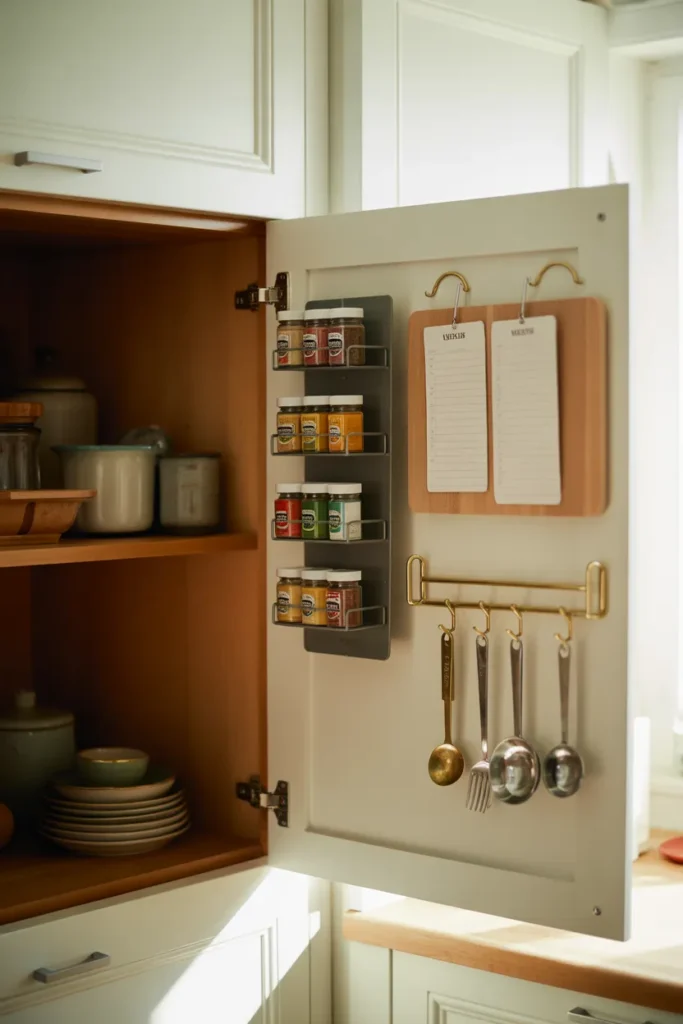
Step 5: Use Vertical Space Like a Pro
Most people only use about half the space inside their cabinets. The rest is just air. Here are the kitchen storage hacks that quite literally double your space:
- Shelf risers create a second level inside tall cabinets, perfect for stacking plates or mugs
- Tension rods turned vertically separate baking sheets, cutting boards, and pan lids
- Stick on hooks on the inside of cabinet doors hold measuring spoons, oven mitts, and pot holders
- Stackable bins for the deep dark abyss of corner cabinets where Tupperware goes to die
- Lazy Susans for spices and condiments so nothing gets lost in the back
I recently raved about all of these gadgets in my roundup of the best Amazon organizers under twenty five dollars if you want my exact recommendations with links.
Step 6: Store Heavy Items Low, Light Items High
This sounds obvious until you realize half of us store the cast iron skillet on the top shelf. Here is the rule that keeps you safe and saves your back:
Heavy items like cast iron pans, stand mixers, slow cookers, and large stockpots go in lower cabinets. Light everyday items like cereal boxes, lightweight bowls, and snack containers belong at eye level. Special occasion serveware and items you rarely touch can live on the very top shelves.
This rule alone prevents about ninety percent of kitchen accidents and makes daily cooking smoother.
Step 7: Make Your Most Used Items the Easiest to Reach
Open your cabinet doors and ask yourself one question. Are the things I use every single day right at the front, at eye level, easy to grab?
If your favorite mug is buried behind seven others you never use, you have a problem. Reorganize so that daily items are front and center. Weekly items go just behind them. Monthly items move to upper or lower shelves. Yearly items, like the turkey roaster or holiday platters, get banished to the highest cabinet or another storage area entirely.
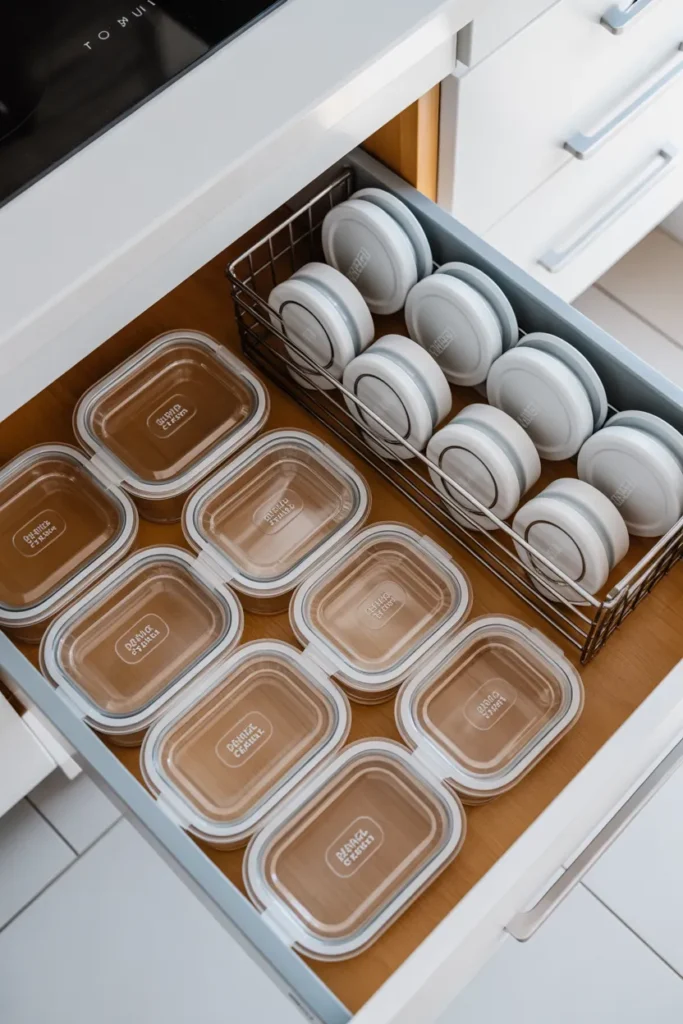
Step 8: Tame the Tupperware Drawer
Let’s talk about the most chaotic cabinet in every home. The dreaded plastic container situation.
Here is what works. First, match every container with its lid. If a lid has no container, toss the lid. If a container has no lid, toss the container. Be brutal.
Then store containers and lids separately. Stack the bases inside one another like nesting dolls. Use a small bin or tension rod system to stand the lids vertically so you can flip through them like file folders. This single trick alone changed my life.
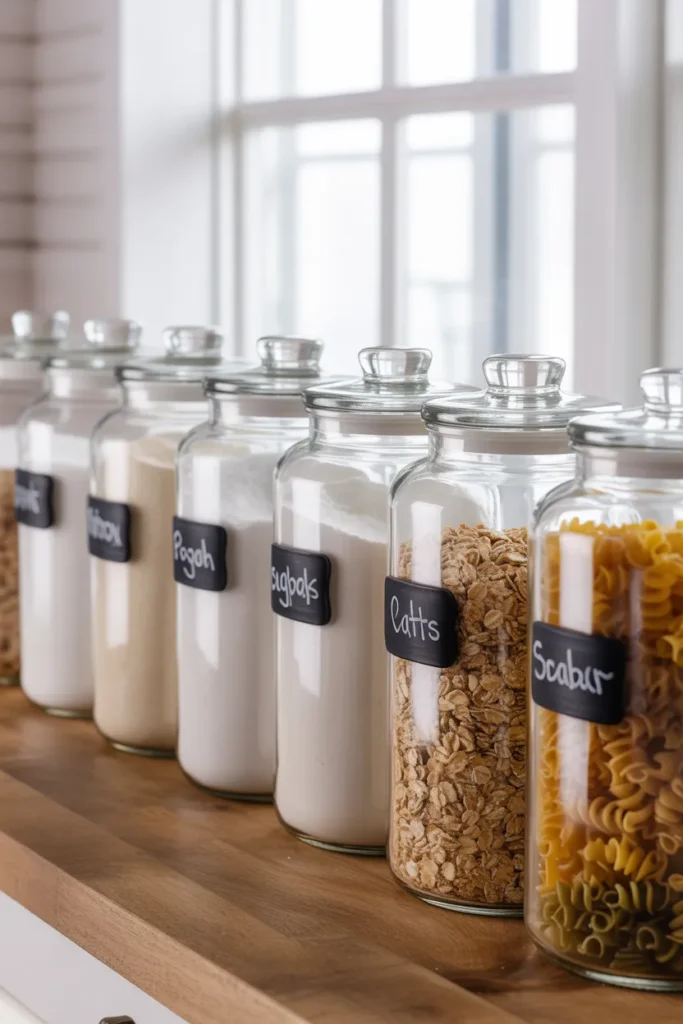
Step 9: Label Everything (Even If You Live Alone)
Labels are not just for Instagram aesthetic. They are the secret to maintaining your organization long term. When everyone in your home knows where things go, things actually go back where they belong.
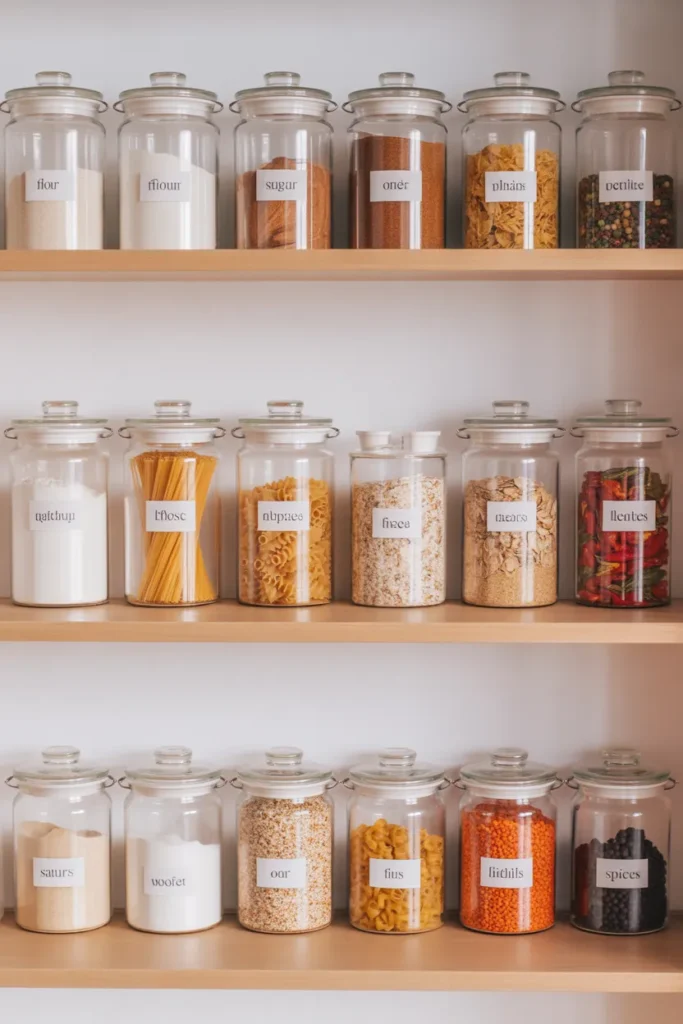
Use a simple label maker, chalkboard tags, or printable labels for jars, bins, and shelf edges. Pantry containers benefit massively from labels because you can transfer flour, sugar, rice, and pasta into matching clear jars and instantly see what you have. This is the look that performs the best on Pinterest, by the way. Clean, uniform jars with simple black or white labels get pinned over and over again. According to Pinterest Predicts trend reports, home organization searches consistently rank among the top categories year after year, and the aesthetic photos always involve clear containers and visible labels.
Step 10: Build a Maintenance Routine
Here is the truth nobody talks about. Organization is not a one time event. It is a habit.
The good news is the upkeep is easy once your system is set up. Spend five minutes each evening returning items to their proper home. Once a week, do a quick wipe down of one cabinet. Once a month, check expiration dates in your pantry. Once a season, do a mini reset where you pull out one zone and refresh it.
If you love checklists, my Sunday reset routine folds kitchen maintenance into a simple weekly habit that takes the thinking out of it.
Bonus Kitchen Storage Hacks From Real Home Organizers
Before we wrap up, here are a few extra kitchen cabinet organization tricks I have collected from years of testing:
- Use the inside of cabinet doors for spice racks, recipe holders, or a magnetic strip for knives
- Add under shelf baskets that clip onto existing shelves to instantly create a second tier
- Drawer dividers for utensils, cutlery, and even pot lids
- Pull out drawers retrofitted into deep lower cabinets so you never lose anything in the back again
- Magnetic spice tins stuck to the inside of a cabinet door for major space savings
- Hooks under shelves to hang mugs, freeing up serious cabinet real estate
Common Kitchen Cabinet Organization Mistakes to Avoid
Even with the best intentions, people slip into the same traps. Here are the ones to watch for:
Cramming too much into one cabinet just because there is space. Leave breathing room. Buying organizers before decluttering. Always declutter first or you are just organizing junk. Storing items by category instead of by use. Your spices belong near the stove, not in a separate spice cabinet across the room. Skipping the maintenance step. A perfect cabinet on Sunday means nothing if it is chaos by Friday.
Frequently Asked Questions
How long does it take to organize kitchen cabinets? For an average kitchen, expect four to six hours if you do it all at once. If you break it into zones, you can do one cabinet at a time over a week or two and never feel overwhelmed.
What is the best way to organize a small kitchen with limited cabinet space? Use vertical space aggressively with shelf risers, tension rods, and over the door organizers. Get rid of duplicate items and consider open wall shelving to take pressure off your cabinets.
Should I store dishes in upper or lower cabinets? Either works, but if you have small children or want easier access, lower drawers with dividers are a brilliant option. Upper cabinets near the dishwasher work well for adults because they make unloading effortless.
How often should I reorganize my kitchen cabinets? A full reorganization once a year is plenty if you maintain it weekly. Most people find that a quick seasonal refresh keeps things running smoothly without major effort.
What is the cheapest way to organize kitchen cabinets? Shop your house first. Use shoeboxes, glass jars from spaghetti sauce, and cardboard dividers before buying anything. Then visit the dollar store for basic bins. You can fully organize a kitchen for under twenty dollars if you are creative.
Final Thoughts on Organizing Your Kitchen Cabinets
Learning how to organize kitchen cabinets is honestly less about the cabinets and more about giving yourself a kitchen that feels good to walk into. The first time I opened my newly organized cabinets, I just stood there smiling like a weirdo. That feeling is real, and it is waiting for you on the other side of one focused weekend.
Start small if the whole kitchen feels too much. Pick one cabinet today. Empty it, clean it, declutter it, and put things back with intention. Then do another tomorrow. Before you know it, your entire kitchen will feel calmer, your cooking will be faster, and you will stop buying that fourth jar of cinnamon.
You absolutely have this.