
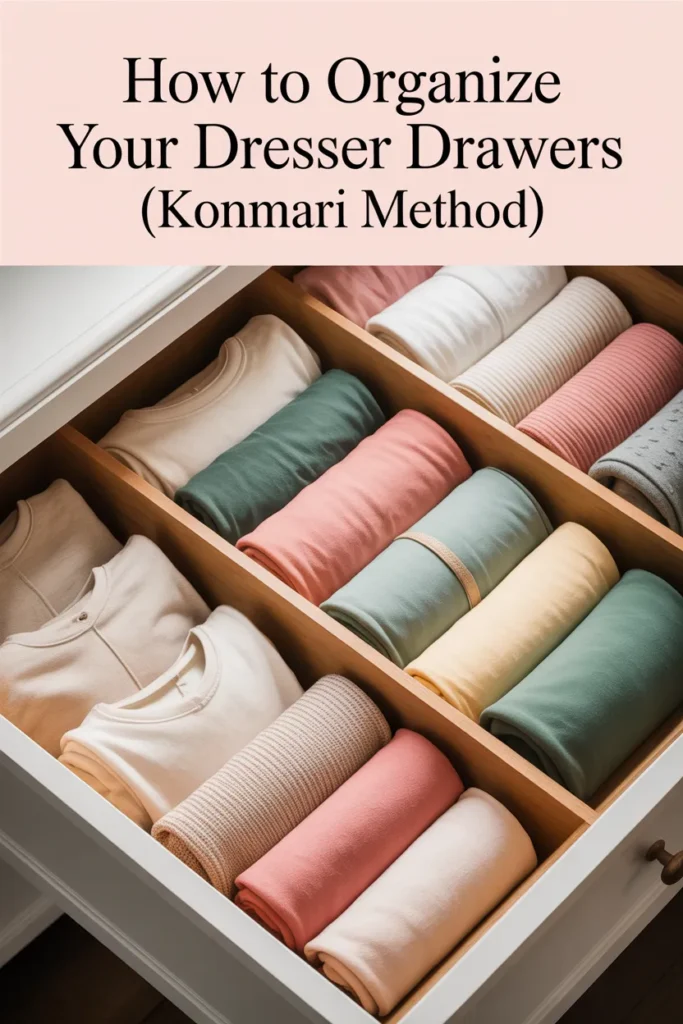
How to Organize Your Dresser Drawers Using the KonMari Method
Introduction
Okay, I have a confession. For about six years straight, my top dresser drawer was basically a graveyard. A tangled pile of socks, three hair ties I thought I had lost, a receipt from 2022, and somehow, a single AirPod. Every single morning I would yank something out, and the whole drawer would explode like a tiny fabric volcano. I told myself I needed more storage. More bins. A bigger dresser. A different apartment, maybe.
Turns out I just needed to learn how to fold.
If you have landed on this post, I am guessing your drawers look a little like mine did, and you have heard whispers of this magical thing called the KonMari method. Good news. It works. Not in a perfect, Pinterest influencer, everything matches sort of way, but in a real “I can actually see my clothes and pick an outfit in under 30 seconds” sort of way. This guide walks you through exactly how to organize your dresser drawers using the KonMari folding method, step by step, with the stuff nobody tells you until you have already made the mistakes.

What Is the KonMari Method (And Why Your Dresser Needs It)
Marie Kondo, the organizing expert behind the Netflix series Tidying Up, built her method around one deceptively simple question: does this item spark joy? But KonMari is not just about tossing what you do not love. It is about tidying by category instead of location, committing to the process, and giving every item that stays a clear home.
For dresser organization, two rules change everything. First, you tackle all your clothes at once, not just one drawer. Second, you store clothing vertically, which professional organizers and The Container Store call “file folding” because each piece stands up like a file in a filing cabinet.
The benefit? You can actually see every piece you own the moment you open the drawer. No more digging. No more forgetting about that cute striped shirt hiding at the bottom of a stack. And according to Organized Interiors, vertical folding can save you up to 50% more drawer space, which is wild if you stop to think about it.

Step 1: Empty Every Single Drawer (Yes, All of Them)
I know. This feels dramatic. But it is non-negotiable.
Pull everything out of your dresser and pile it on your bed. All of it. Every sock, every tank top you forgot you owned, every pair of pajama bottoms hiding in the back. Why your bed? Because you have to finish before you sleep, which means you will not abandon this project halfway through and leave a clothes mountain for future you to deal with. Trust me, I learned this the hard way.
Seeing everything at once is the point. You will be genuinely shocked by how many black t-shirts you own. (I had eleven. Eleven.) This visual pile is what makes the next step easier.
If you are just getting started on decluttering in general, it might help to pair this with a plan like the 30 day declutter challenge, which breaks the whole home down into bite-sized daily tasks.
Step 2: Pick Up Each Item and Ask “Does This Spark Joy?”
This sounds cheesy. It is a little cheesy. But it works.
Pick up each piece of clothing, hold it for a second, and notice how you feel. Not how you think you should feel about that sweater your aunt gave you in 2019, but how it actually lands. If you light up, it stays. If your stomach sinks or you feel a tiny “ugh”, it goes.
Some quick permission slips as you sort:
- It is okay to let go of clothes that fit five years ago.
- It is okay to donate pieces that were expensive.
- It is okay to keep something purely because you love the color, even if you rarely wear it.
Thank each item you are letting go of, set it in a donate bag, and keep moving. Do not second guess. The first instinct is almost always right.

Step 3: Learn the KonMari Folding Method (The Game Changer)
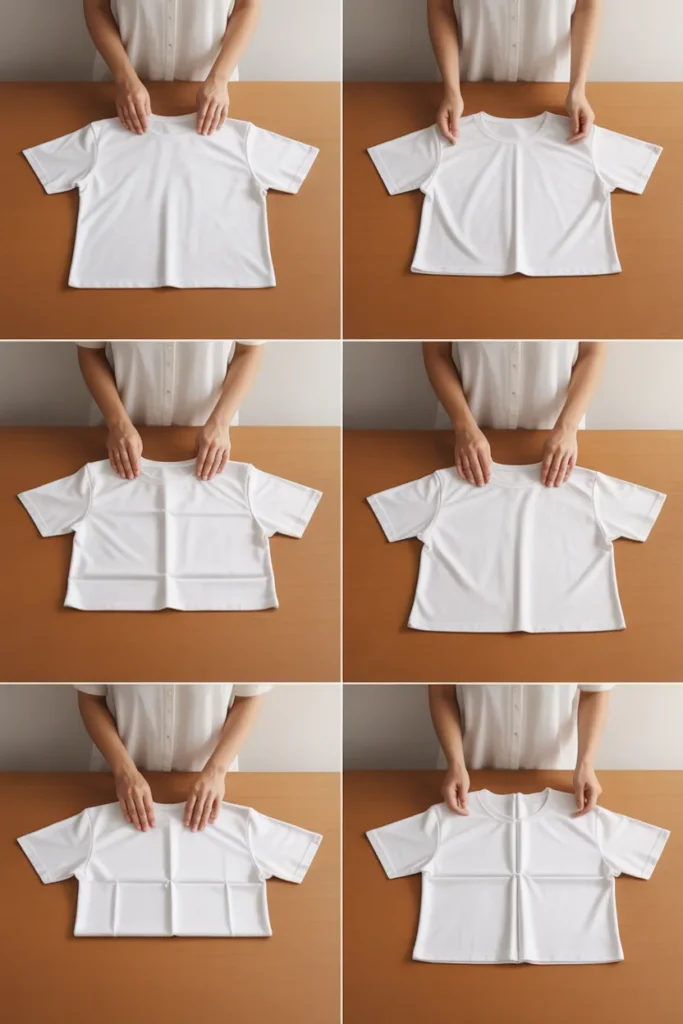
Here is where the magic actually happens. The goal of the KonMari folding method is simple: every piece of clothing becomes a small, self-standing rectangle.
Here is how to do it with a basic t-shirt:
- Lay the shirt flat on a hard surface, like a table or your (now empty) bed.
- Smooth out the wrinkles with your hand.
- Fold one side in toward the center, about a third of the way, and tuck the sleeve back so it lies flat.
- Do the same with the other side. You should now have a long rectangle.
- Fold the bottom up toward the collar, stopping about an inch short.
- Then fold the whole thing in half, or in thirds if the fabric is thin.
- Stand it up. If it falls over, refold it tighter. The rectangle should be sturdy enough to stand on its own like a little fabric book.
Once you have got the rhythm, it takes maybe 15 seconds per shirt. I promise.
Step 4: Folding Different Clothing Types
Not every piece folds the same way, and this is the part that trips people up. Here are quick rules for the trickier stuff.
Pants and jeans: Zip them up, fold in half lengthwise, tuck in the little crotch bump, then fold in half or thirds until they stand.
Socks: Please, for the love of everything, stop balling your socks. Marie Kondo calls this “potato socks” and says the elastic deserves a break. Lay one sock on top of the other, fold them in thirds, and stand them up.
Underwear: Fold into small rectangles, same concept. Thongs can be folded in half and tucked. Bras? Do not fold bras with padding. Stack them upright in a divider instead so they keep their shape.
Bulky sweaters: These are harder to stand up. Fold them into wider rectangles and lay them flat in a dedicated drawer, or fold them thinner by doing extra folds on the length.
Tank tops and camisoles: Fold the same way as t-shirts, but you may need an extra fold since they are usually smaller.
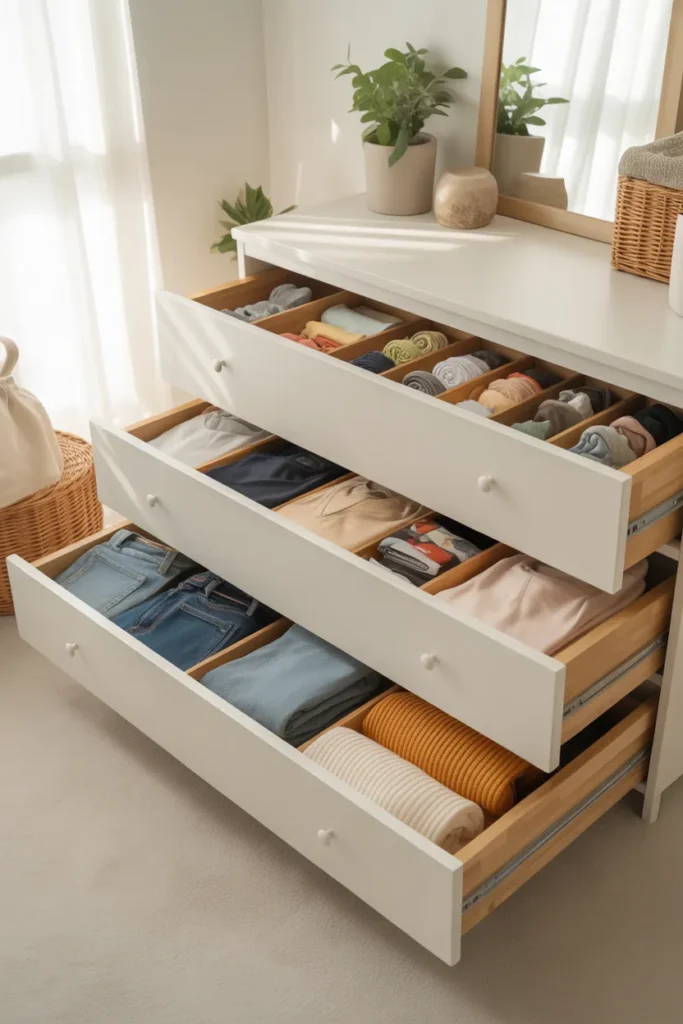
Step 5: Assign One Category Per Drawer
This is the step most people skip, and it is why drawers fall back into chaos within a week.
Each drawer gets a clear identity. For example:
- Top drawer: socks, underwear, bras
- Second drawer: t-shirts and tank tops
- Third drawer: pants, jeans, loungewear
- Bottom drawer: sweaters, pajamas, or workout gear
Within each drawer, group by subcategory. All the black socks together. All the workout tees together. It sounds excessive until you experience the bliss of getting dressed in the dark without grabbing a sock that does not match.
Step 6: Add Drawer Dividers (But Only After Folding)
Here is a mistake I see all the time. People buy 14 drawer organizers before they declutter, then stuff them with clothes they do not even want. Dividers come last.
Once you know exactly what you are keeping and how much space it takes, then you can shop. Good options include bamboo expandable dividers, fabric cube organizers, or even shoe boxes if you are on a budget. The goal is to keep your vertical folds upright so they do not slump sideways after a few uses.
If you are trying to keep costs down, there are plenty of affordable picks in our roundup of the best Amazon organizers under $25 that work beautifully inside dresser drawers.

Step 7: Place Each Item Vertically, Like Files in a Cabinet
This is the step that makes everything feel like magic.
Take your folded rectangles and stand them up in the drawer, side by side, so you can see the top edge of every piece when you open the drawer. Arrange them by color if that makes your heart happy (mine does, gradients from light to dark are my thing).
The file folding method, as Homes and Gardens explains, works because no garment gets buried under another. You see your whole wardrobe at once, and you stop forgetting about that navy shirt you love.
Step 8: Maintain It (The Part Everyone Skips)
Here is the truth nobody wants to hear. Organizing your dresser is the easy part. Keeping it that way takes maybe five minutes a week, but you have to actually do it.
A few things that helped me:
- Refold clean laundry the KonMari way before putting it in the drawer, not after.
- Do a quick tidy every Sunday while watching something on TV.
- If something does not fit back in the drawer easily, that is your signal something new came in and something old probably needs to go.
Pair this with a calmer morning setup and the whole rhythm of your day shifts. If that sounds like something you want, our guide on bedroom organization hacks for a calmer morning routine pairs beautifully with a freshly KonMari’d dresser.

Common Mistakes That Wreck Your KonMari Dresser Organization
A few things to watch out for, because I have made all of these.
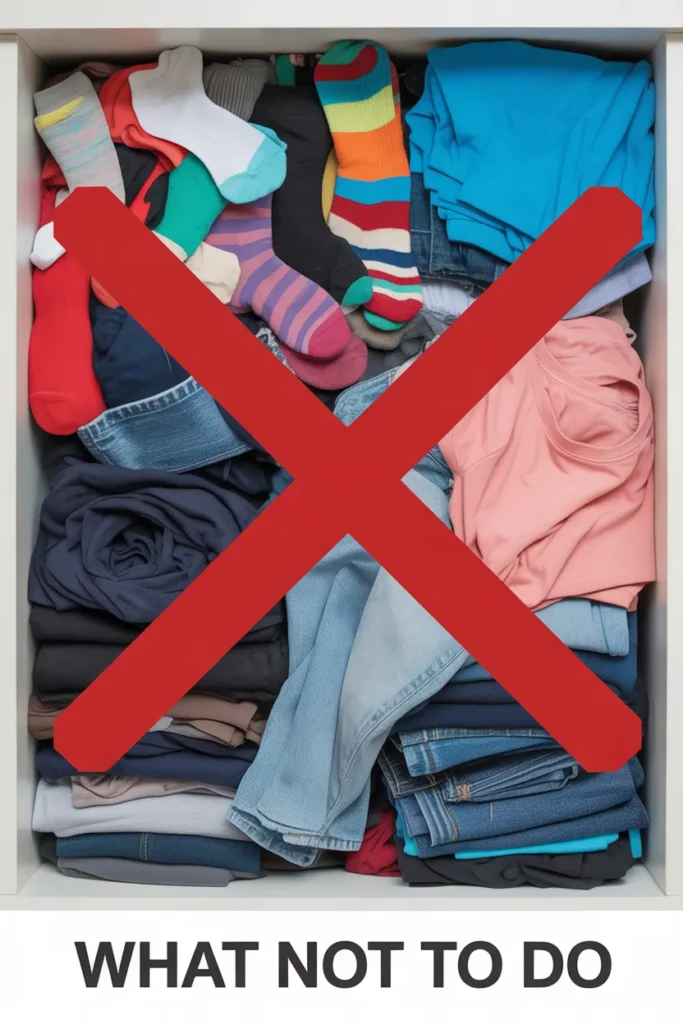
Folding too loose. If your rectangle will not stand up on its own, it will not stand up in the drawer either. Fold tighter.
Mixing too many categories in one drawer. Socks and t-shirts should never live together. It creates visual chaos that makes the drawer feel messy even when it is technically organized.
Skipping the decluttering step. You cannot organize clutter. You can only rearrange it. Let go first.
Buying organizers before folding. Fold first. Measure the space. Then buy.
Why the KonMari Method Works Long Term
Most organizing methods fail because they focus on stuff. KonMari works because it focuses on you. When every piece in your drawer is something you chose, something you love, something that fits the person you are right now, maintenance becomes almost effortless. You stop over shopping because you can see everything you own. You stop losing things. You stop starting your day in a bad mood because you could not find your favorite sweater.
A tidy dresser is never just about the dresser. It is about giving your future self fewer tiny battles to fight before 8 am. And that, honestly, might be the real “spark of joy” Marie Kondo was talking about all along.

Final Thoughts
You do not need a Pinterest-perfect house to feel at peace in your home. You just need drawers that open without chaos spilling out, and a wardrobe you can actually see. The KonMari folding method is less about being tidy and more about being intentional, and once you feel the difference, there is no going back.
Start tonight. Pick one drawer. Empty it. Fold it. Stand everything up like little books. Close the drawer and open it again, just to enjoy it. That quiet little “ahh” you feel? That is the whole point.
FAQ: KonMari Dresser Organization
How long does it take to organize a dresser using the KonMari method? For one dresser, plan on two to four hours from start to finish. That includes emptying, decluttering, folding, and placing everything back vertically.
Do I need drawer dividers to make KonMari folding work? Not always, but they help a lot for small items like socks and underwear. For t-shirts and pants, tightly folded rectangles usually stand on their own.
Will the KonMari folding method wrinkle my clothes? No, and actually less than stacking. Vertical folding keeps pressure off individual pieces, so fewer crease lines form.
What if I do not have time to do my whole dresser in one day? Start with just one drawer. It is better than nothing, and the momentum from seeing one finished drawer usually carries you into the rest within a few days.