Drawer Dividers: The DIY vs Store Bought Comparison No One Did
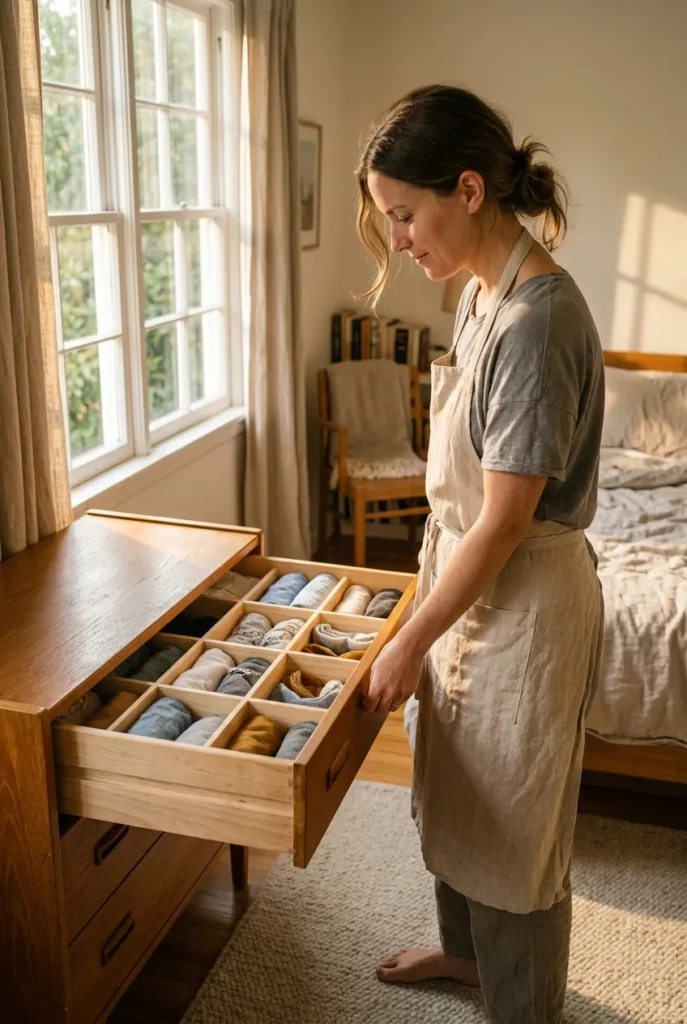
Open your sock drawer right now. Go on. We will wait.
If what greeted you was a tangled pile instead of neat little rows, you already know why drawer dividers diy projects are taking over Pinterest this year. Here is the part nobody tells you upfront: the store bought option and the homemade option solve different problems, and picking the wrong one wastes both your money and your Saturday afternoon. We spent three weekends testing both sides in a real kitchen, a real closet, and a cluttered junk drawer that had been ignored since the move, so you can skip the guesswork and pick the system that actually fits your drawer.
The Real Case for Drawer Dividers DIY (And When Store Bought Wins Instead)
Store bought organizers are not bad. They are just built for an average drawer, and your drawer is not average. A 2 dollar pack of plastic dividers from the dollar aisle works fine if your drawer is a standard 17 inches wide. The minute your drawer runs shallow, extra deep, or an odd 14.5 inches, those plastic trays either rattle around with gaps or refuse to fit at all.
That gap is exactly where drawer dividers diy projects earn their keep. You measure your actual drawer, not a manufacturer’s average drawer, and you build to that number. The tradeoff is time. A drawer dividers diy cardboard build takes about 20 minutes once you have a box on hand. A wood version with mitered or half lap joints can eat an entire afternoon if it is your first one.
Here is the quick gut check we use now, call it the Fit First Rule: if your drawer is a totally standard size and you do not care about exact compartment widths, buy the tray. If your drawer is irregular, if you want compartments sized to specific items like jewelry or spice jars, or if you are working with a strict budget, build it yourself.
What You Actually Need (And What You Can Skip)
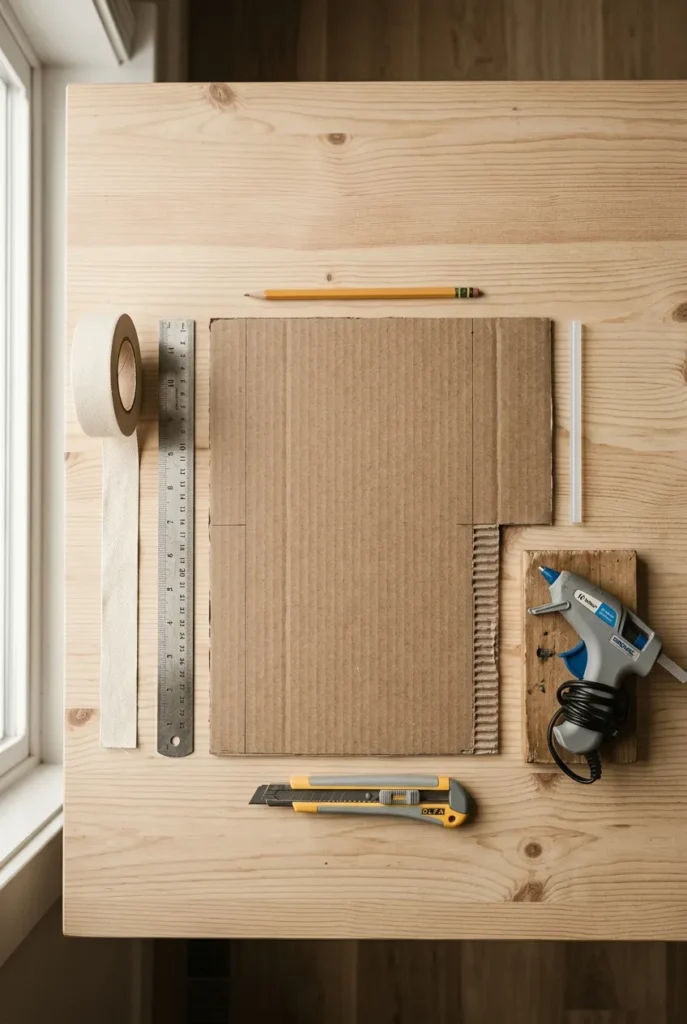
You do not need a miter saw or a workshop to make this work. Most of the drawer dividers diy cardboard and foam board builds we tested used things already sitting in a recycling bin.
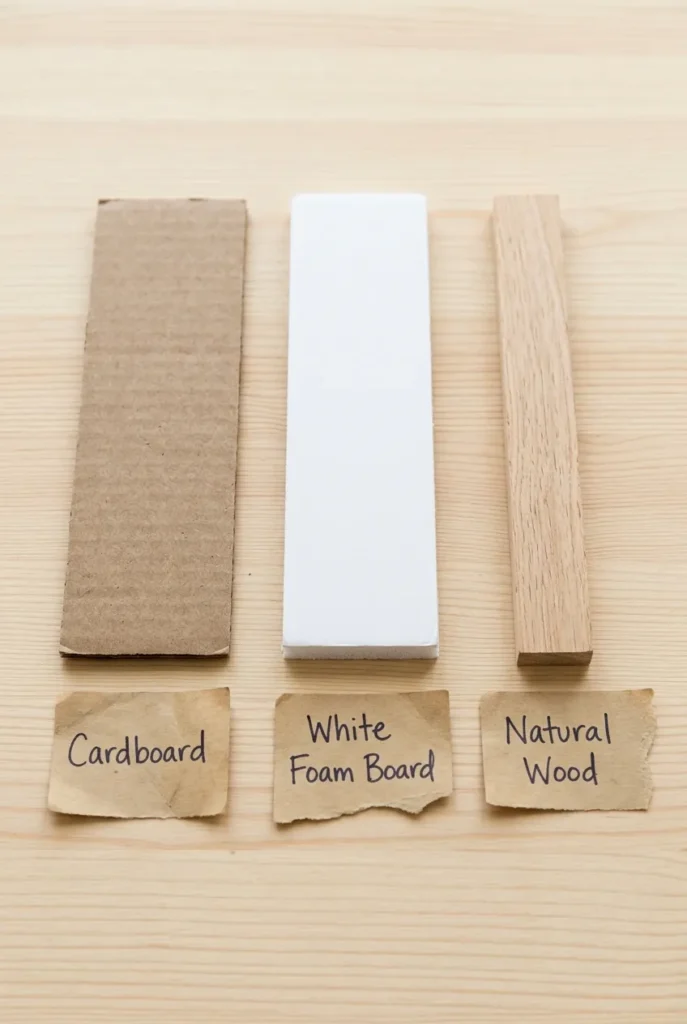
For a no tools cardboard build you need a sturdy box (an Amazon shipping box works great), a ruler, a pencil, a box cutter, and either hot glue or strong tape. For a slightly more polished foam board version, swap the cardboard for quarter inch foam board, which holds a cleaner edge and survives longer under heavier items like utensils. For a wood version, thin craft plywood or leftover quarter round trim, wood glue, and a small hand saw will get you there without buying a single power tool.
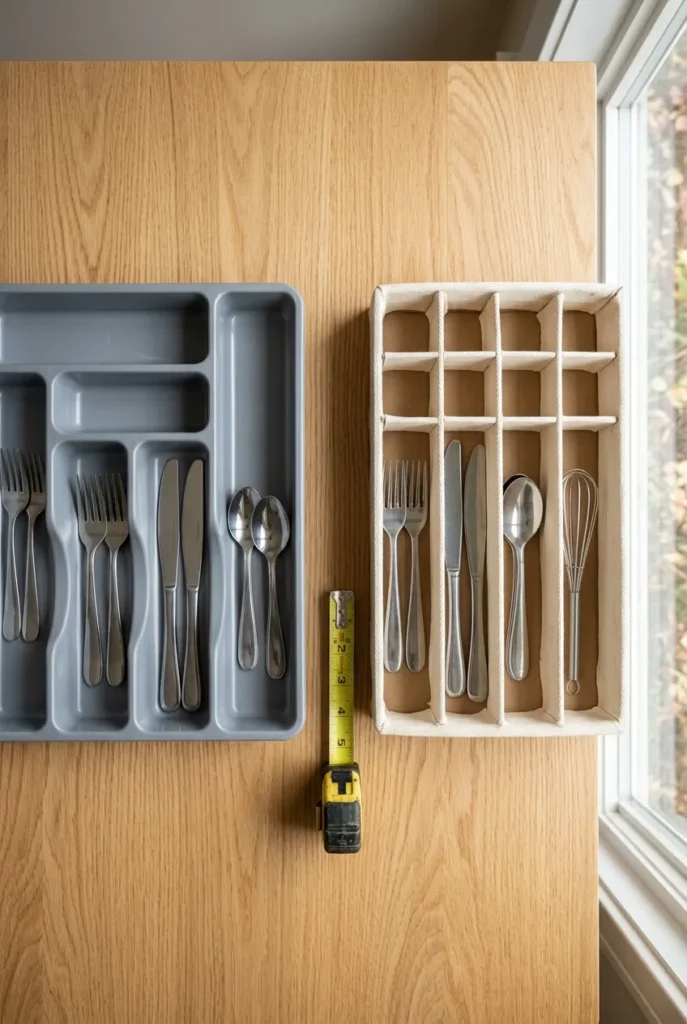
Skip buying specialty drawer divider kits before you try this. We tested a 35 dollar adjustable kit against a 4 dollar cardboard version cut to the exact same compartments, and once both were lined with the same cream contact paper, you could not tell them apart in a photo.
Measure First, Build Second: The 3-Number Rule
Most failed drawer dividers diy attempts trace back to one mistake: someone measured the drawer opening instead of the inside cavity. The opening lies. The drawer often widens slightly or narrows near the back, especially in older dressers.
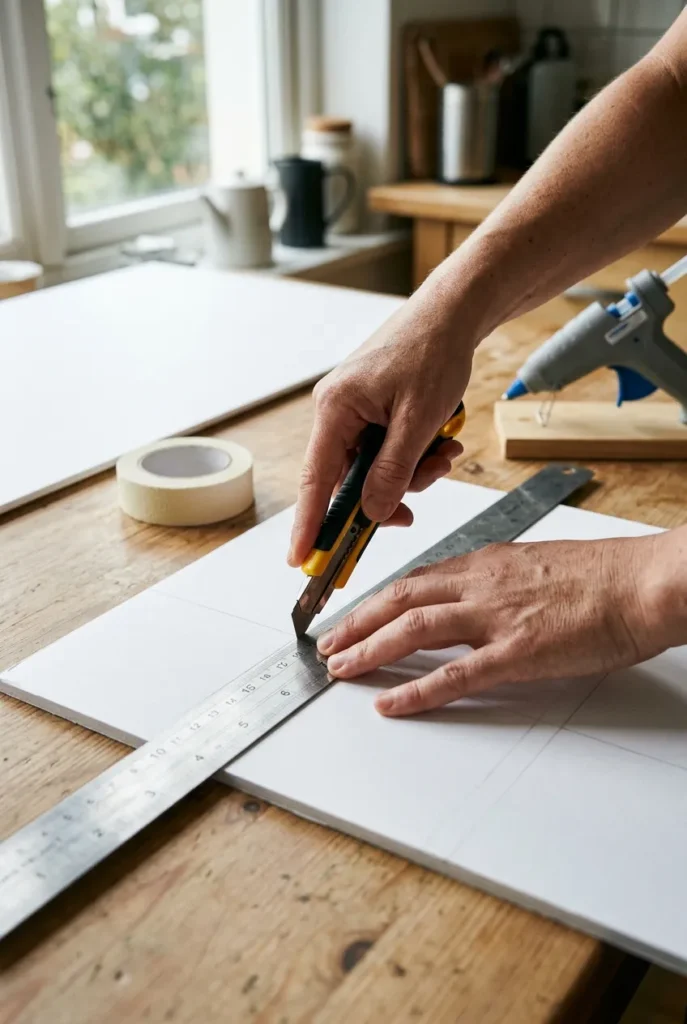
Use what we call the 3-Number Rule. Measure the inside width at the very front of the drawer. Measure it again at the very back. Use the smaller of the two numbers for your divider length, since a divider that is a hair too short can be shimmed with tape, but one that is too long will not sit flat at all. Third, measure the usable depth, meaning the drawer’s inside height, so your divider walls do not poke above the rim and jam the drawer above it.
Write all three numbers down before you cut anything. We learned this the hard way on a 1.5 inch difference between the front and back of an old IKEA dresser drawer that nearly ruined an entire foam board panel.
Three Drawer Systems, Three Different Builds
A junk drawer, a kitchen utensil drawer, and a closet drawer all need different divider shapes, so do not use one template for every drawer in the house.
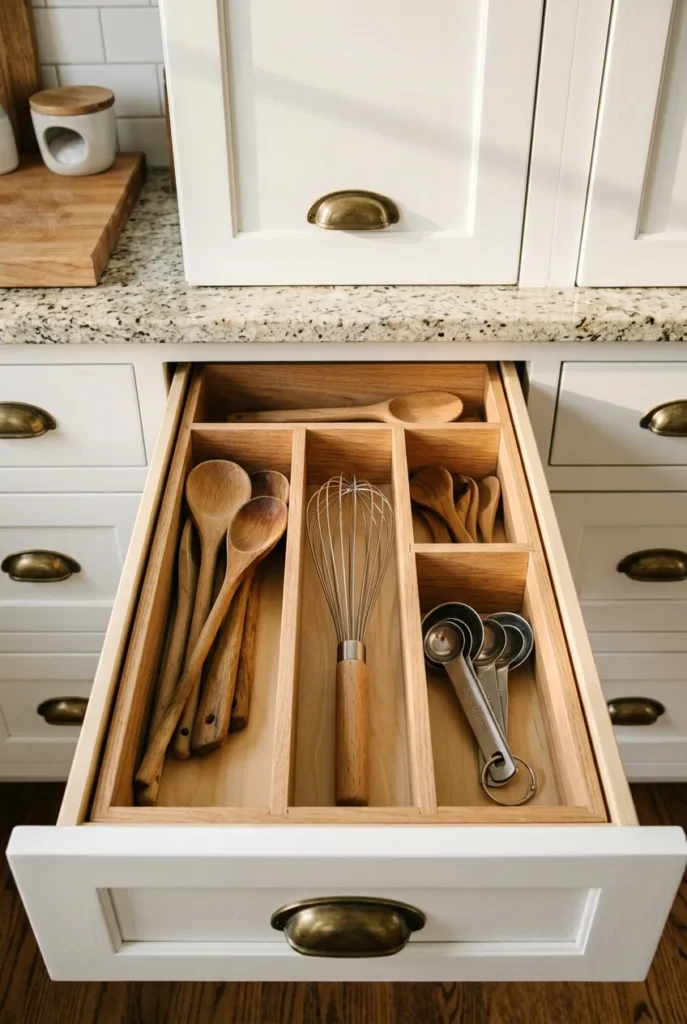
The kitchen utensil drawer. This is where drawer dividers diy utensils projects shine. Use a simple grid of 6 to 8 compartments sized by the items you actually own, not a generic template. Measure your largest spatula and biggest knife handle first, then build the two end compartments slightly larger to fit them.
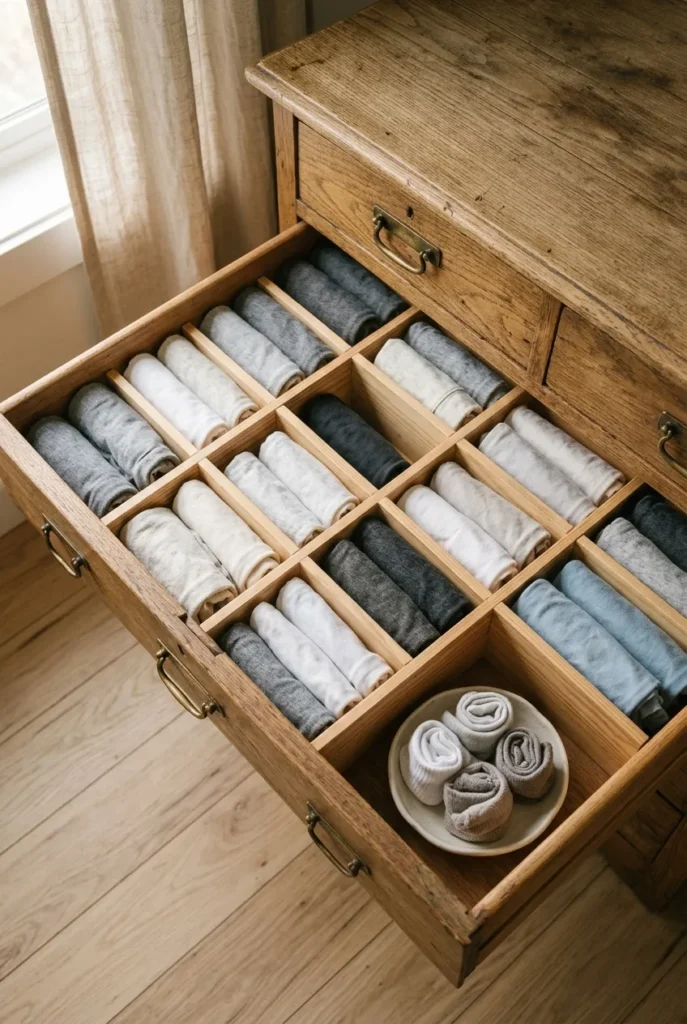
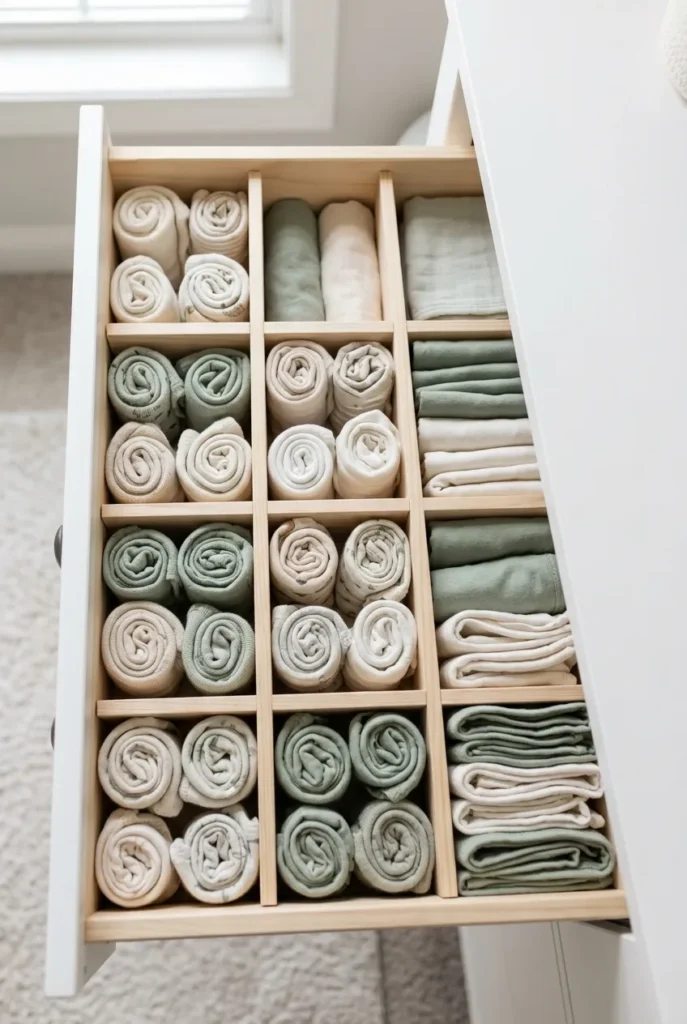
The closet or dresser drawer. Vertical folding (the file fold method popularized by KonMari) pairs perfectly with taller dividers spaced 3 to 4 inches apart, which is enough room for a folded t-shirt to stand upright without toppling.
The junk or office drawer. This drawer needs small, irregular compartments rather than a uniform grid, because pens, tape, and loose batteries are all different shapes. We use a mix of compartment widths here: two narrow 1.5 inch slots for pens, one wide 4 inch slot for a notepad, and a few small 2 inch squares for loose odds and ends.
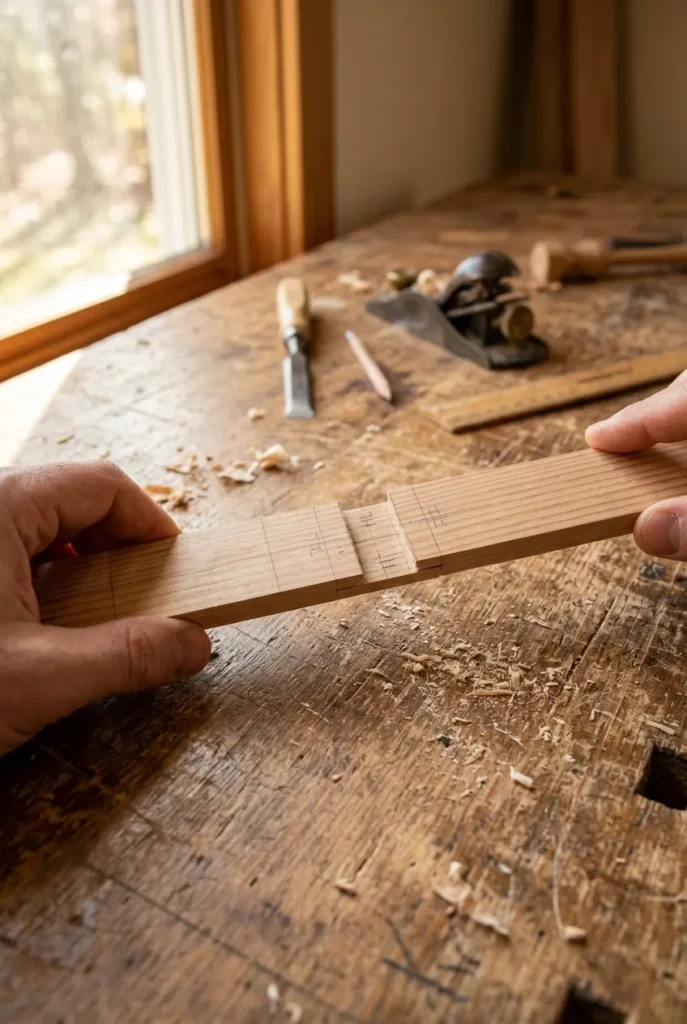
How to Build the Half Lap Joint Version (Without a Workshop)
If you want dividers that will outlast a dorm room move, a half lap joint is worth the extra 15 minutes. It is simpler than it sounds: you are just cutting a notch halfway through each strip so two pieces lock together flush instead of stacking on top of each other.
Cut your strips to length first, using the smaller front-to-back number from your 3-Number Rule. At every point where two strips will cross, mark a notch equal to half the strip’s thickness. Cut that notch out with a small hand saw or a sharp utility knife if you are working with thin wood. Slide the notched strips together so they sit flush, then add a small dot of wood glue at each joint and let it sit for an hour before placing it in the drawer.
Honestly, the first one we built took 40 minutes because we measured twice and still cut one notch backward. The second one took 12.
Are Drawer Separators Worth It?
For most drawers, yes, but worth it depends on what you are protecting. A drawer holding 200 dollars of jewelry or a full spice collection earns its dividers fast. A drawer of mismatched plastic bags probably does not need a custom build.
What Are Some Common Drawer Divider Mistakes?
The most common one is measuring once instead of using the 3-Number Rule above. The second is building compartments all the same size out of habit, which wastes space on small items and crowds large ones. The third is skipping a liner, which means cardboard or wood edges can snag delicate fabric over time.
How Do I Choose the Right Drawer Divider?
Match the material to the drawer’s job. Cardboard and foam board are fine for closets and junk drawers. Kitchen drawers that take daily wear hold up better with wood or a sealed foam board edge, since steam and spills near a kitchen sink can soften plain cardboard over months.
What Are Some Alternatives to Drawer Dividers?
Shoeboxes cut down to drawer height work in a pinch, as do small dollar store baskets lined up side by side. Neither gives you the same custom fit as a measured build, but both beat a drawer with no system at all.

Best Materials for DIY Drawer Dividers
Cardboard wins on cost and speed but softens with moisture, which matters if a drawer sits in a humid bathroom or near a kitchen sink. Foam board holds a crisper edge and resists moisture slightly better, while thin wood lasts the longest but takes the most time to cut. One detail worth knowing if you are repurposing scrap furniture pieces for this project: composite materials like particleboard and MDF can off gas formaldehyde, and the EPA regulates emission limits for medium-density fiberboard, particleboard, and hardwood plywood under Title VI of the Toxic Substances Control Act.
Oklahoma State University Extension notes that emissions from high-quality composite panels are low and dissipate over time, so new, certified scrap is fine, but older uncertified offcuts are worth skipping for a project that lives inside a closed drawer near clothing or food.
The No Wood Option: Cardboard and Foam Board Builds
If “how to make drawer dividers without wood” is the exact question that brought you here, you are in good company; it is one of the most searched variations of this topic. Cardboard and foam board builds skip every power tool entirely. Cut your panels with a box cutter against a metal ruler for a straight edge, score before you bend, and reinforce any T-shaped joint with a strip of packing tape on the underside where it will not show.
A Dollar Tree run can fully stock this build. Foam board, a roll of washi tape for finishing edges, and a glue gun together run under 10 dollars for a drawer dividers diy dollar tree setup that handles two or three drawers.
Frequently Asked Questions
Are drawer separators worth it? For drawers holding small or high value items, yes, almost always. For drawers of bulky single category items like towels, a separator adds less benefit.
What are some common drawer divider mistakes? Skipping the 3-Number Rule, building uniform compartments regardless of what is actually stored, and forgetting a liner on raw cardboard or wood edges.
How do I choose the right drawer divider? Match material to the drawer’s environment. Wood or sealed foam board for kitchens and bathrooms, cardboard for closets and low moisture spaces.
What are some alternatives to drawer dividers? Cut down shoeboxes, small dollar store bins, or repurposed jewelry boxes placed directly inside the drawer.
Can I use Dollar Tree materials for this? Yes. Foam board, bins, and contact paper from Dollar Tree cover most drawer dividers diy dollar tree builds for well under 10 dollars.
Do drawer dividers work for clothes, not just small items? Yes, taller dividers spaced 3 to 4 inches apart support upright folded shirts using the same vertical folding method many closet organizers already use.
How long does a DIY build actually take? A cardboard build takes about 20 minutes per drawer. A half lap wood version takes closer to 40 minutes for your first one and under 15 once you have done a few.
The Fit First Rule, Final Thoughts
We went into this expecting the DIY side to win on every measure, and it mostly did, but not because store bought trays are poorly made. They are just built for a drawer that does not exist in most real homes. The Fit First Rule gets you to the right answer fast: measure your actual drawer, decide if it is a standard size, and only then choose your material.
If your drawer system worked, the next logical spot to apply the same custom-fit thinking is the rest of the dresser. A renter-friendly toiletry drawer system follows the same clear-bin, no-drill logic if you want to keep the momentum going into the bathroom. The same goes for that hallway closet makeover, which usually has the same irregular-depth problem your drawer just solved. And if you are short on horizontal storage anywhere in the kitchen, the wasted space above your cabinets sits unused in nearly every US kitchen and is worth a look next.
What’s the most chaotic drawer in your house right now? Save this for the next free Saturday and go fix it.