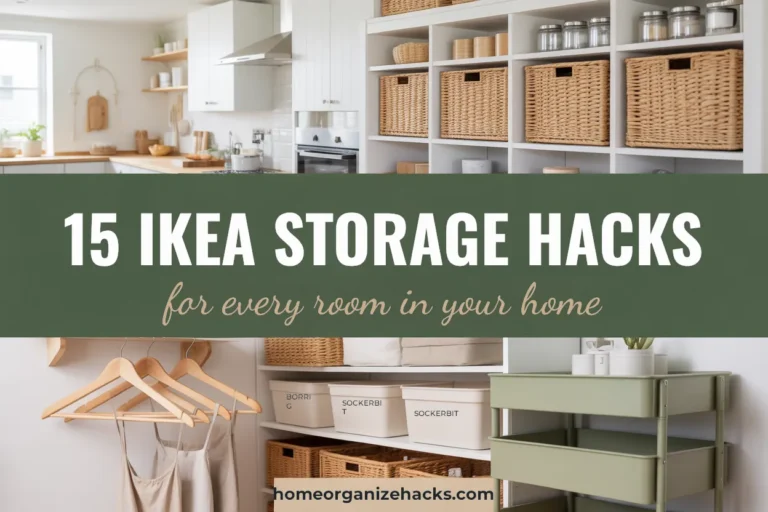
Medicine Cabinet Organization: How to Declutter and Organize Yours in 15 Minutes
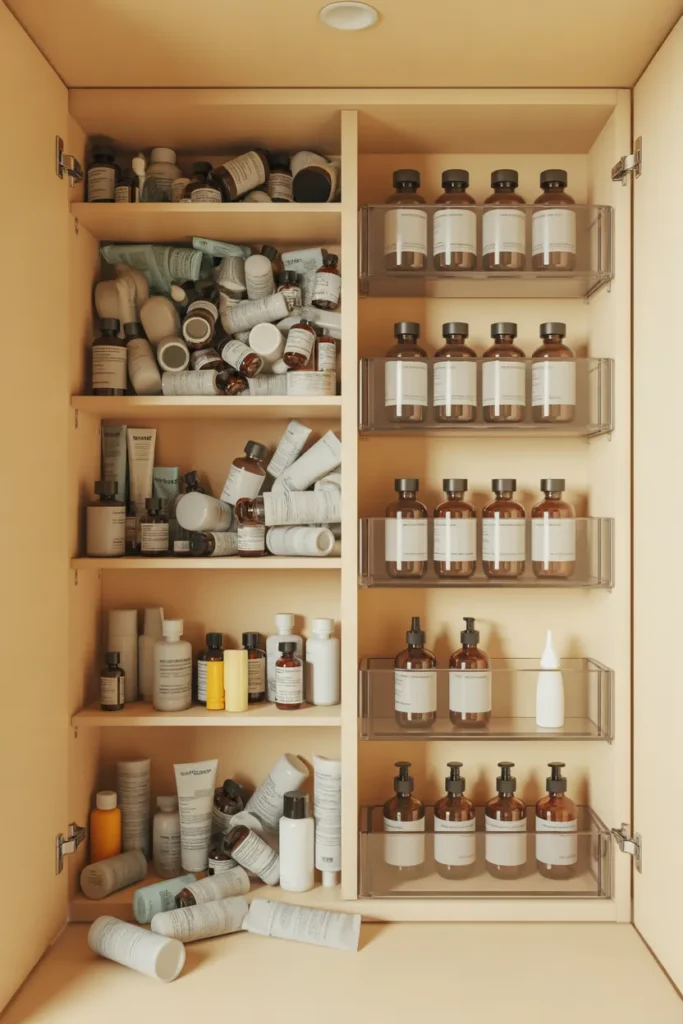
You open the cabinet to grab Tylenol, and three expired allergy bottles, a crusty tube of something unidentifiable, and a half-empty bottle of cough syrup from 2019 tumble into the sink. Sound familiar? Mine looked exactly like that last spring before I finally sat down with a trash bag and a timer.
Here’s the good news. You don’t need a weekend, a label maker, or a Pinterest-perfect bathroom to fix this. With the right system, you can sort, toss, and reset your entire cabinet in 15 minutes flat. We’ve organized this whole guide by the 5-Zone Method, a hybrid system I built after testing every other approach and finding them all incomplete. You’ll get the speed-clean steps first, then category breakdowns, then specific product picks at three price points so you can stop right where your budget says to stop.
Who This Guide Is For
This article is built for you if you fall into any of these buckets:
- Renters who can’t drill into cabinet walls or replace built-in shelving
- Small-space dwellers working with cabinets as narrow as 14 inches
- Busy parents who need a child-safe, grab-and-go system
- Budget-conscious organizers who want results under $25
- Aesthetic-driven readers who want their cabinet to look as good as it functions
- Anyone who’s opened their cabinet in the last year and felt instant overwhelm
If that’s you, keep scrolling. If you’re looking for custom built-in millwork, this isn’t your article.
Why Your Medicine Cabinet Always Ends Up a Mess
Three reasons, every single time.
One, the cabinet is too small for the volume. Most standard medicine cabinets are 16 to 20 inches wide and 24 to 30 inches tall, with shelves only 4 inches deep. That’s not a lot of real estate for a household’s full medicine inventory.
Two, no one ever taught us a system. We toss things in as we buy them. New cough syrup goes on top of old cough syrup. A year later, you have nine bottles and no idea which is current.
Three, bathroom humidity destroys what’s inside. Steam from showers can degrade pills, capsules, and liquid medications faster than you’d think. The American Medical Association and the FDA both recommend storing most medications in a cool, dry place, which the bathroom is not.
That last point is why some readers actually move their core medicine stash to a kitchen or linen closet cabinet and reserve the bathroom medicine cabinet for daily-use toiletries, first aid, and short-term meds. We’ll cover that decision below.
The 5-Zone Medicine Cabinet Method (Your New Framework)
This is the spine of the entire system. Memorize these five zones and you’ll never lose 20 minutes hunting for ibuprofen again.
Zone 1: Daily Reach Zone (eye-level shelf) What you grab every single morning or night. Daily prescriptions, daily vitamins, contact solution, prescription eye drops. These get the prime real estate because you’re touching them 365 days a year.
Zone 2: Family First Aid Zone (one labeled bin) Bandages, antibiotic ointment, hydrocortisone cream, antiseptic wipes, gauze, medical tape, tweezers. Everything you reach for when someone scrapes a knee or burns a finger. One bin, one zone, one grab.
Zone 3: Seasonal Rotation Zone (top shelf or back row) Cold and flu meds in October through March. Allergy meds in March through June. Sunscreen and after-sun in June through September. Rotate twice a year so the front of the cabinet always reflects what you actually need this month.
Zone 4: Backup Stock Zone (separate from main cabinet, ideally a linen closet) Unopened backup bottles, the second pack of bandages, the spare ibuprofen. This is your overflow. It does not live in the main cabinet because the main cabinet should only hold what’s open and in use.
Zone 5: Emergency Grab Zone (small zip pouch on the door or top shelf) A pre-built mini kit with travel-size pain reliever, anti-diarrheal, allergy meds, motion sickness tablets, electrolyte packets, and a small pack of bandages. Grab it for road trips, flights, hotel stays, or middle-of-the-night emergencies. This is the zone competitors completely miss, and it’s the one readers tell me changed their entire household.
That’s the framework. The rest of this article is execution.
Step One: The 5-Minute Expiration Audit
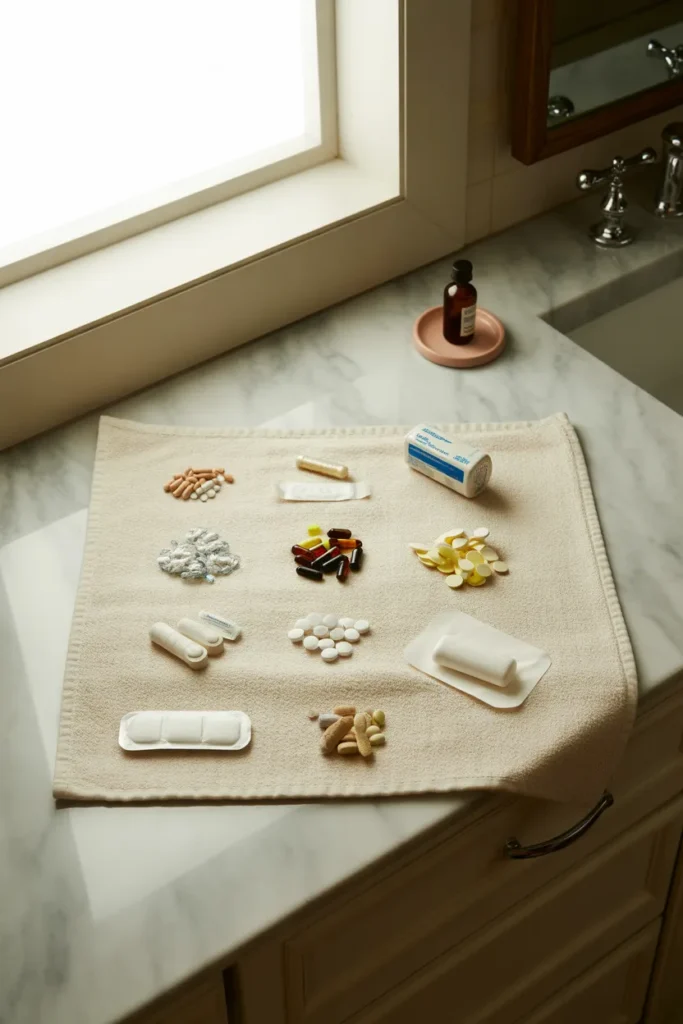
Before you organize a single thing, you have to purge. Set a timer for 5 minutes and pull everything out of the cabinet onto a towel on your bathroom counter.
Now check three things on each bottle, tube, and box:
- The expiration date. Anything past it goes in a “dispose” pile.
- The condition. Caked, crusted, separated liquids, or discolored pills go in the dispose pile even if technically not expired.
- The relevance. That antibiotic from a 2022 sinus infection? You don’t need it. Toss it.
Safe disposal matters. Don’t just dump pills in the trash or flush them down the toilet (most medications shouldn’t be flushed). Use one of the FDA-recommended methods. The FDA provides clear guidance on safe medication disposal, including drug take-back programs and home disposal procedures for the small list of medications that are flush-approved. Most pharmacies also offer free take-back drop-off bins.
If you don’t have a take-back location nearby, the FDA-approved home method is to mix pills with something unappealing like used coffee grounds or kitty litter, seal the mixture in a bag, and throw it in your household trash. Scratch out personal information on the prescription label before recycling the empty bottle.
Source: FDA Drug Disposal Guidelines
Step Two: The 7-Minute Sort by Category
Once the expired stuff is out, you’ll be shocked how much room you’ve recovered. Now sort what’s left into these seven categories on your towel:
- Daily prescriptions and vitamins (Zone 1)
- Pain and fever (acetaminophen, ibuprofen, aspirin)
- Cold, flu, and allergy (decongestants, antihistamines, cough syrup)
- Stomach and digestion (antacids, anti-diarrheal, fiber)
- First aid (bandages, ointments, antiseptic)
- Skin and topical (hydrocortisone, calamine, anti-itch)
- Eye, ear, and dental (drops, ear cleaning, oral pain relief)
Seven piles, seven categories. This is the same logic I used for our pantry organization on a $50 budget, and it works the same way: when every category has a home, every item knows where to go.
Step Three: The 3-Minute Reset (Putting It All Back)
Now you place the categories back into the cabinet using the 5-Zone Method.
- Top shelf: Seasonal rotation (current season front, off-season behind)
- Eye-level shelf: Zone 1 daily reach items
- Bottom shelf: First aid bin and skin/topical bin
- Cabinet door (if it has one): Emergency grab pouch and small items in a command-strip caddy
- Linen closet or hallway cabinet: Zone 4 backup stock
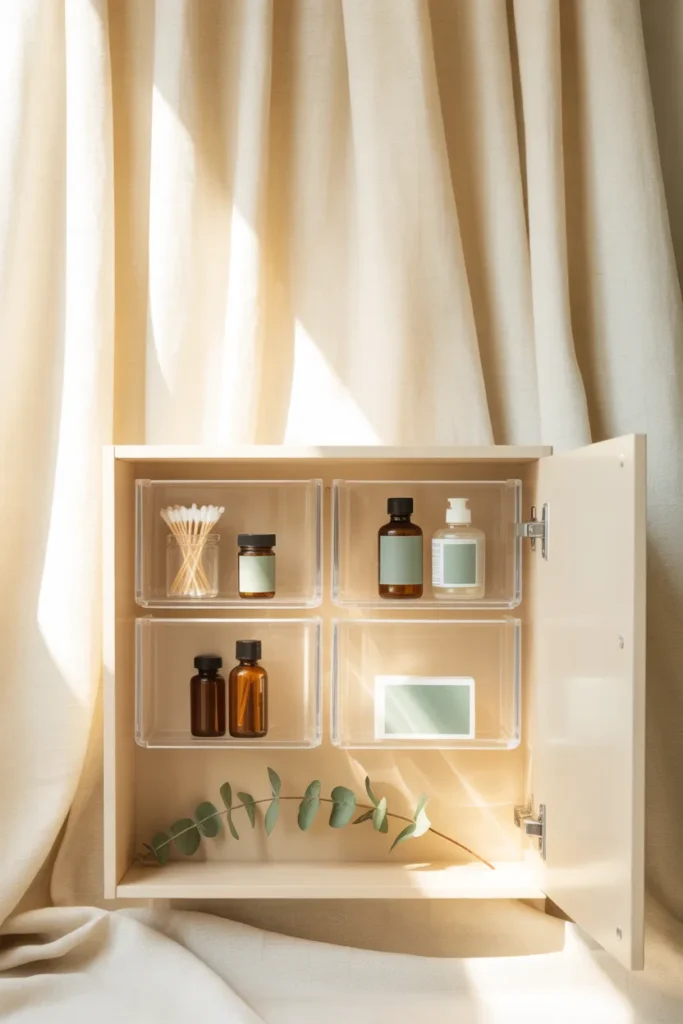
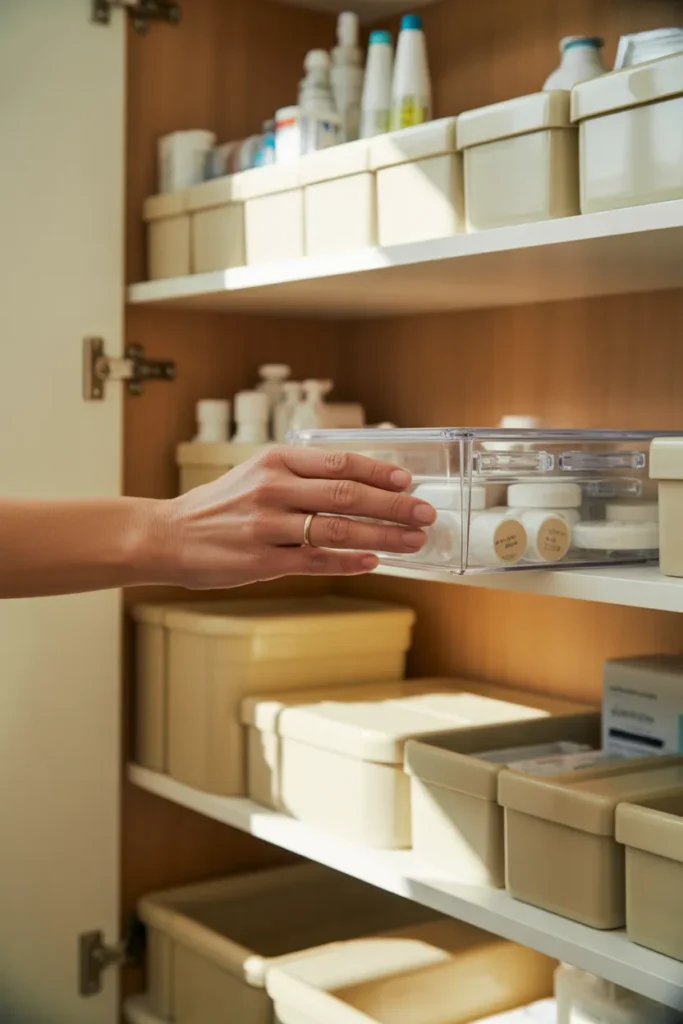
Group like with like. Use small clear bins so you can see what’s in each one without pulling it out. Front-label each bin with what’s inside. Done. You just reset your medicine cabinet in 15 minutes.
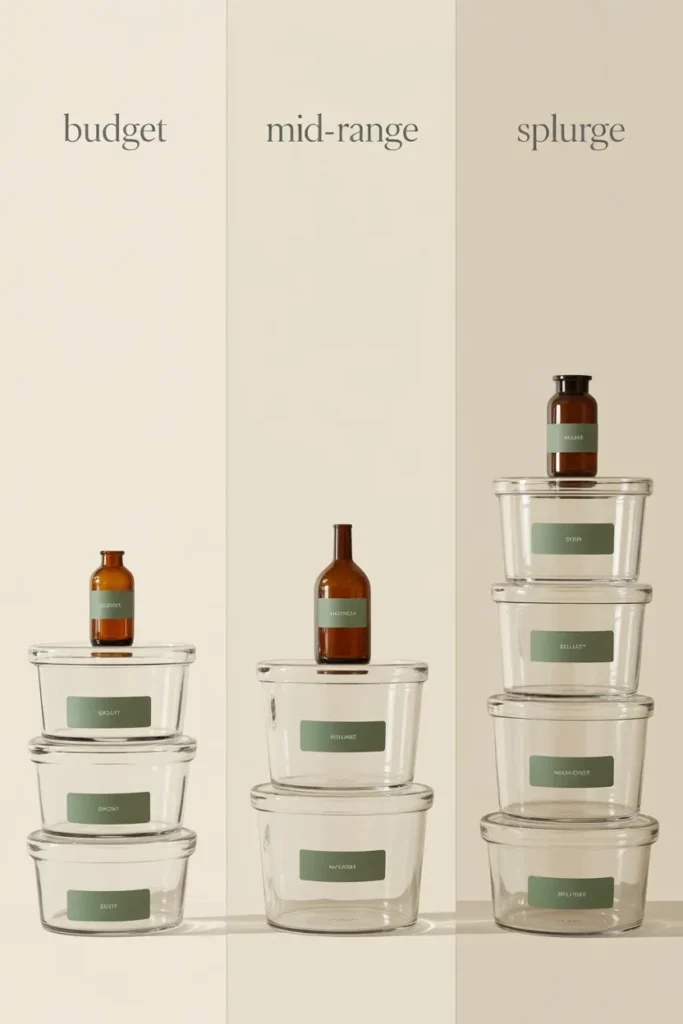
Best Bins and Organizers by Price Tier
Here’s where I get specific. I’ve tested products at every price point, and these are the ones that actually earn their shelf space.
Budget Tier (Under $25 Total)
You can absolutely do this for under $25. I’ve done it twice.
- Dollar Tree clear acrylic bins ($1.25 each, run between 4 and 6 inches wide). Buy 4 to 6 of these and you’ve covered every category for under $10. They’re not as thick as the splurge versions, but they hold up fine in a cabinet.
- Mason jars or small glass jars for cotton swabs, cotton balls, and dental floss picks. Many readers already have these in the kitchen.
- Free printable labels from a Google Doc. Print on white sticker paper from any office supply store ($6 for 25 sheets at Target).
- A black Sharpie to write expiration dates on the front of every bottle in big numbers so you can see at a glance.
Total cost: Roughly $15 to $20.
Mid-Range Tier ($25 to $100)
This is where most readers land, and where the best value lives.
- mDesign clear stackable bins from Amazon (around $12 to $18 for a 4-pack). Thicker plastic, deeper bins, fit a standard cabinet shelf nicely.
- iDesign Clarity drawer organizers from Target ($8 to $15 each). Specifically designed for medicine cabinet depths.
- OXO Good Grips small storage canisters ($10 to $14 each) for decanting cotton swabs, bandages, and small items into a uniform look.
- Brother P-touch label maker ($25 to $40). The single best long-term investment for any organizer.
- Amber glass dropper bottles (4-pack around $15 on Amazon) for decanting eye drops or essential oils into a Pinterest-worthy aesthetic finish.
Total cost: Roughly $60 to $90 depending on your bin count.
Splurge Tier ($100+)
If you want a Container Store-level finish.
- The Container Store Stackable Acrylic Drawer Organizers ($15 to $40 per piece, but the quality is unmatched).
- Open Spaces small bins ($28 for a 3-pack) come in muted neutrals that photograph beautifully.
- Custom under-shelf risers from Container Store ($20 to $35 each) double your usable space inside a single shelf.
- Marie Kondo-branded Hikidashi drawer boxes from KonMari ($89 set) for the Japandi aesthetic crowd.
Total cost: $150+ depending on cabinet size.
Budget vs Splurge: Which One Wins?
Honestly? For pure function, the budget tier and the mid-range tier perform almost identically. The difference is aesthetic and durability over time. If you’re a renter or this is a temporary fix, go budget. If this is your forever home and you want it to look catalog-worthy in photos, the mid-range tier (especially mDesign + a label maker) is the sweet spot. The splurge tier is purely for readers who genuinely value the visual upgrade and plan to keep the system for 5+ years.
Aesthetic Upgrades for Pinterest-Worthy Results
If you want your cabinet to look as good as it functions, these are the four upgrades that move the needle.
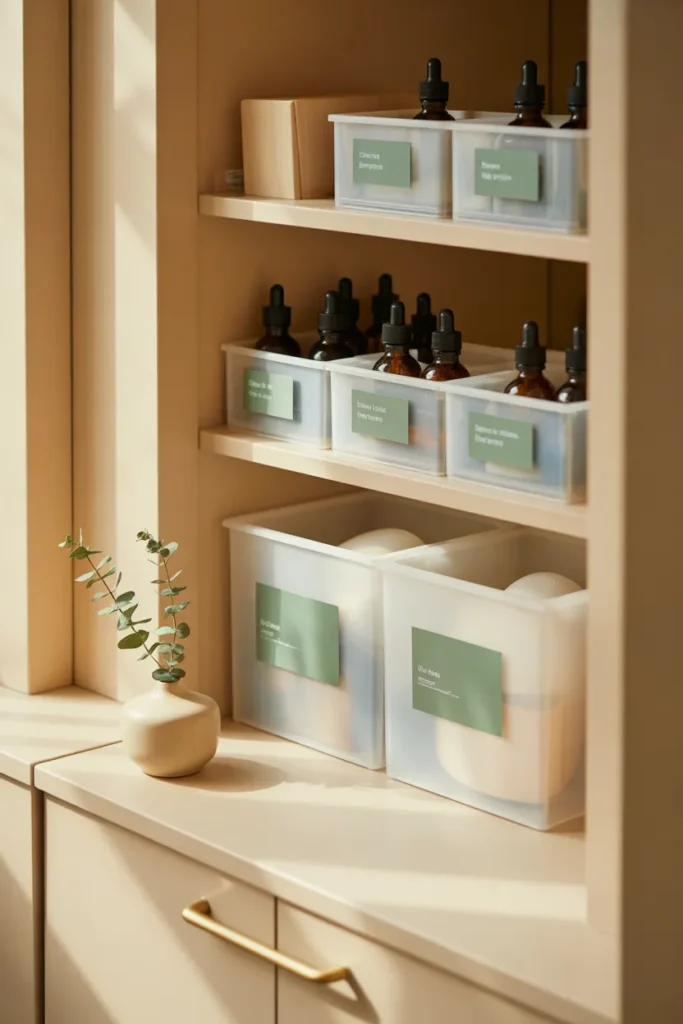
Decant into amber glass bottles. Take eye drops, mouthwash, and liquid meds out of their loud commercial packaging and pour them into matching amber dropper bottles or 4-ounce amber jars. Label each one in a thin sans-serif font. Instant calm.
Match your label fonts and colors. Pick one font and one color. I use a thin sans-serif in matte black on white labels. Cohesion is what makes the cabinet feel curated instead of just clean.
Add one natural element. A single small eucalyptus sprig in a bud vase on the bottom shelf, or a small piece of beach driftwood. One organic texture in a sea of clear plastic transforms the whole feel.
Use a single accent color. Pull one tone from your bathroom (sage, terracotta, dusty blue, soft black) and let it appear in your label tape, your hand towels, and one bin. Repetition equals intention.
This is the same minimalist styling philosophy I used in our budget closet makeover, and it works in any small space.

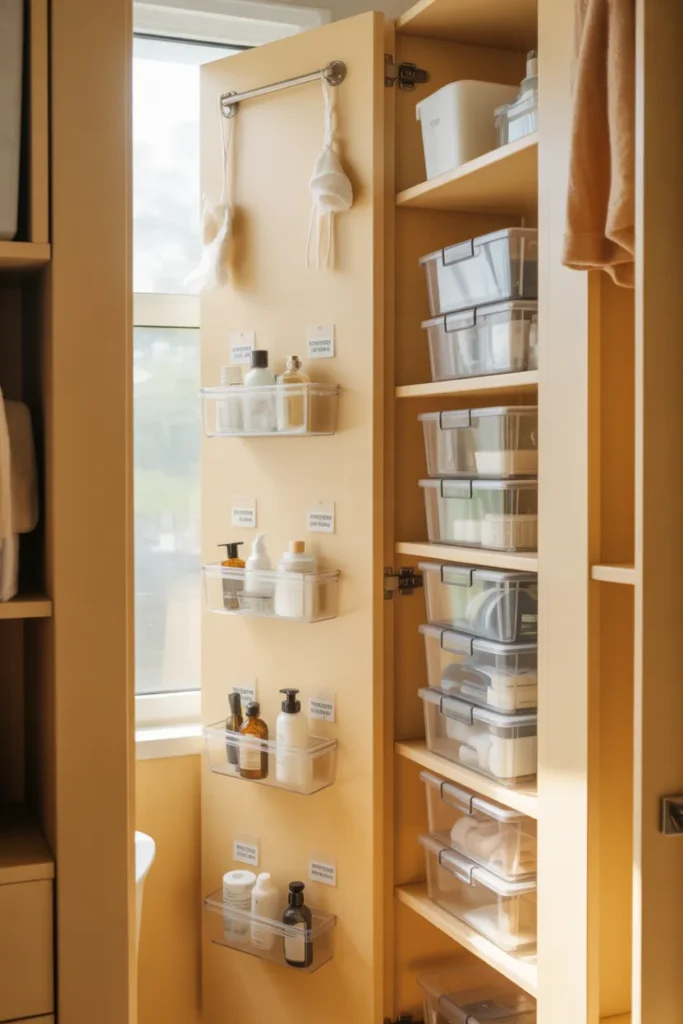
Small Space and Rental Solutions
If your bathroom cabinet is 14 inches wide or your landlord said no holes in the wall, you still have options. Plenty of them.
Tension rod inside the cabinet. A 12-inch tension rod placed near the top of the cabinet creates a hanging row for spray bottles, dental floss containers, and small toothbrush cups.
Command-strip door caddies. The 3M Command Bath Caddy line attaches to the inside of the cabinet door without a single screw. Holds toothbrushes, small tubes, and bandage boxes.
Stick-on shelves. YouCopia and iDesign both make peel-and-stick magnetic strips and small shelves rated for cabinet interiors. Fully removable.
Stackable bins. When you can’t go wider, go up. Stackable 4-inch bins double your vertical capacity.
Over-the-door pocket organizers. A small canvas or clear-pocket organizer hung over the entire cabinet door (where applicable) holds 20 to 30 small items.
For tiny RV or boat bathroom cabinets, the same logic applies. Tension rod, command-strip caddy, and one shallow stackable bin will fit a cabinet as narrow as 12 inches.
Childproofing and Pet-Proofing Your Cabinet
This is the safety section every other organization article skips, and it’s the one that matters most.
According to the CDC, more than 50,000 children under age 5 are seen in emergency rooms every year for accidental medication ingestion. The single best protection is keeping medications up high, locked, and out of sight.
Childproof steps:
- Move all medications to a cabinet at least 5 feet off the ground (the standard medicine cabinet usually clears this, but vanity drawers do not)
- Add a magnetic safety lock ($10 to $20 for a 4-pack on Amazon) to the cabinet
- Keep the child-resistant cap on every bottle, every time, even between doses
- Never tell children that medicine is “candy” to make it easier to take
- Store vitamins and gummies with the same security as prescription meds (kids overdose on these too)
Pet-proof steps:
- Acetaminophen is highly toxic to cats and dogs, even small doses
- Sugar-free gum and any product with xylitol is fatal to dogs
- Keep cabinet doors closed and consider a child-safety latch even if you don’t have kids, because curious cats absolutely can open cabinet doors
Source: CDC Medication Safety
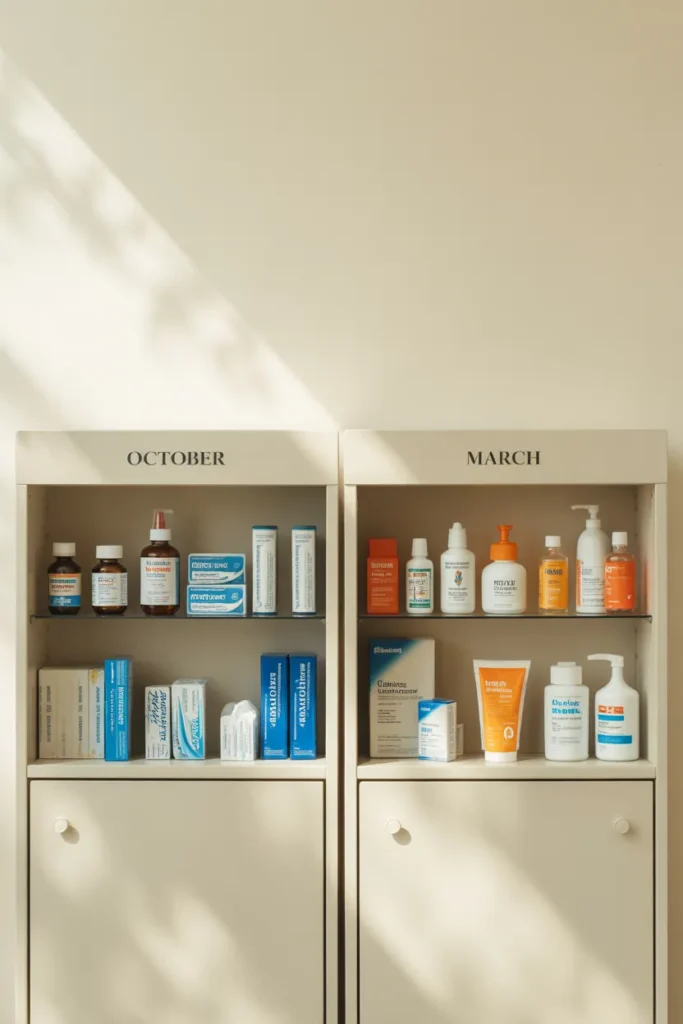
Seasonal Rotation: The System That Saves You Every October
Most people don’t think about cold and flu medicine until they’re sick at midnight. Don’t be most people.
Twice a year, do a 5-minute rotation:
Early October (cold and flu prep):
- Move cold and flu meds, decongestants, cough drops, throat lozenges, and a thermometer to the front
- Move sunscreen and after-sun to the backup zone
Late March (allergy and sun prep):
- Move antihistamines, eye drops, and sunscreen to the front
- Move heavy cold meds to the backup zone
I tag this rotation onto our printable weekly cleaning schedule so it never gets forgotten. Two times a year, 5 minutes each time, and you’re never the parent at 11pm hunting for children’s Tylenol.
Common Mistakes to Avoid
I’ve seen these mistakes wreck even beautifully organized cabinets.
Storing medicine in the bathroom long-term. Humidity is the enemy. Your bathroom medicine cabinet is fine for daily-use items and short-term meds, but long-term prescription stockpiles belong in a cool, dry kitchen or linen closet cabinet.
Removing pills from original bottles. Never decant prescription medication out of its labeled, child-resistant bottle. You can decant cotton swabs and bandages, never pills.
Mixing different medications in one bin. When you grab in a hurry, you can pull the wrong thing. Keep categories separate.
Skipping the expiration audit. Doing a fresh organization without first throwing out expired meds is like making your bed without changing the sheets. Audit first, organize second.
Buying bins before measuring. Measure every shelf width, depth, and height before you buy a single bin. Most disappointment comes from a bin that’s a quarter-inch too tall.
Forgetting the labels. A perfectly organized cabinet without labels reverts to chaos within 3 weeks because no one else in the house knows the system. Labels lock it in.
How to Maintain Your System (the 30-Second Weekly Reset)
Once a week, on whatever day you do your bathroom wipe-down, spend 30 seconds on this:
- Glance at every category bin. Anything in the wrong spot? Move it back.
- Quick visual check on any bottle you used heavily this week. Running low? Add to the shopping list.
- Toss any single empty box or bottle.
That’s it. 30 seconds, weekly, forever. The hard work was the original 15 minutes. Maintenance is nothing.
FAQ: Medicine Cabinet Organization
How do you organize a small medicine cabinet?
Use the 5-Zone Method scaled down. Even a 14-inch cabinet has room for one daily reach shelf, one first aid bin, and one seasonal top shelf. Add command-strip caddies to the door and a tension rod up top to nearly double your usable space without drilling.
What should you not store in a medicine cabinet?
Avoid storing long-term prescription medications, hormone-based meds, antibiotics, and inhalers in the bathroom medicine cabinet because of humidity. These belong in a cool, dry place like a kitchen or linen closet cabinet. Also keep nail polish, perfume, and anything alcohol-based out of direct contact with heat or steam.
Where is the best place to store medicine in your house?
A high cabinet in the kitchen, linen closet, or bedroom away from windows, heat vents, and humidity. The bathroom is fine for daily-use items but not ideal for long-term storage. Aim for a cabinet that stays consistently between 59 and 77 degrees Fahrenheit and below 40% humidity.
How do you categorize medicine?
Use seven categories: daily prescriptions and vitamins, pain and fever, cold and flu and allergy, stomach and digestion, first aid, skin and topical, and eye, ear, and dental. One bin per category keeps the system simple enough to stick.
What are the best medicine cabinet organizers?
For most readers, mDesign clear stackable bins ($12 to $18 for a 4-pack on Amazon) and iDesign Clarity drawer organizers (around $10 each at Target) hit the best balance of durability and price. For pure budget, Dollar Tree clear acrylic bins at $1.25 each work fine.
How do I do this in a small space or rental?
Skip anything that requires drilling. Use command-strip door caddies, a 12-inch tension rod inside the cabinet, stackable bins instead of wider ones, and over-the-door pocket organizers. All of it removes cleanly when you move.
What is the budget version of this idea?
Six Dollar Tree clear bins ($7.50), printable labels from a Google Doc on Target sticker paper ($6), and a Sharpie to date everything. Total under $20 and the function is identical to a $90 setup.
What if I don’t have a label maker?
Print labels from a free Google Doc template on standard sticker paper. Or write directly on small white masking tape strips with a fine-tip black marker. The labels don’t have to be machine-printed to lock in the system. They just have to be legible and consistent.
How long does this project take?
Fifteen minutes for the initial declutter and reset. Add another 10 minutes if you’re decanting into amber bottles or adding labels. Twice-a-year seasonal rotation takes 5 minutes each time.
Save This Post and Pin Your Favorite Cabinet Style
Here’s the truth nobody tells you about medicine cabinet organization. The system is easy. The hard part is committing to 15 minutes today instead of pushing it off another six months.
If you grab one thing from this post, let it be the 5-Zone Method. Memorize the five zones and your cabinet will basically organize itself from here forward. If you grab two things, add the twice-a-year seasonal rotation tagged to October and March.
Save this post to your bathroom inspiration board so you have the framework next time you reach for that expired allergy bottle. And while you’re refreshing the small spaces in your home, our budget pantry makeover for under $50 uses the exact same 5-zone logic and might be your next 15-minute win.
What zone is the messiest in your cabinet right now? That’s the one to start with.