A Small Pantry Makeover for $50 (That Actually Looks Expensive)
You opened the pantry door, sighed, and shut it again. The wire shelves sag under mismatched cereal boxes, a half-empty bag of rice is leaning on a ranch dressing bottle, and there’s a sticky ring you’ve been ignoring since February. We’ve all been there. The good news is you can give that whole space a makeover this weekend without spending more than a takeout dinner.
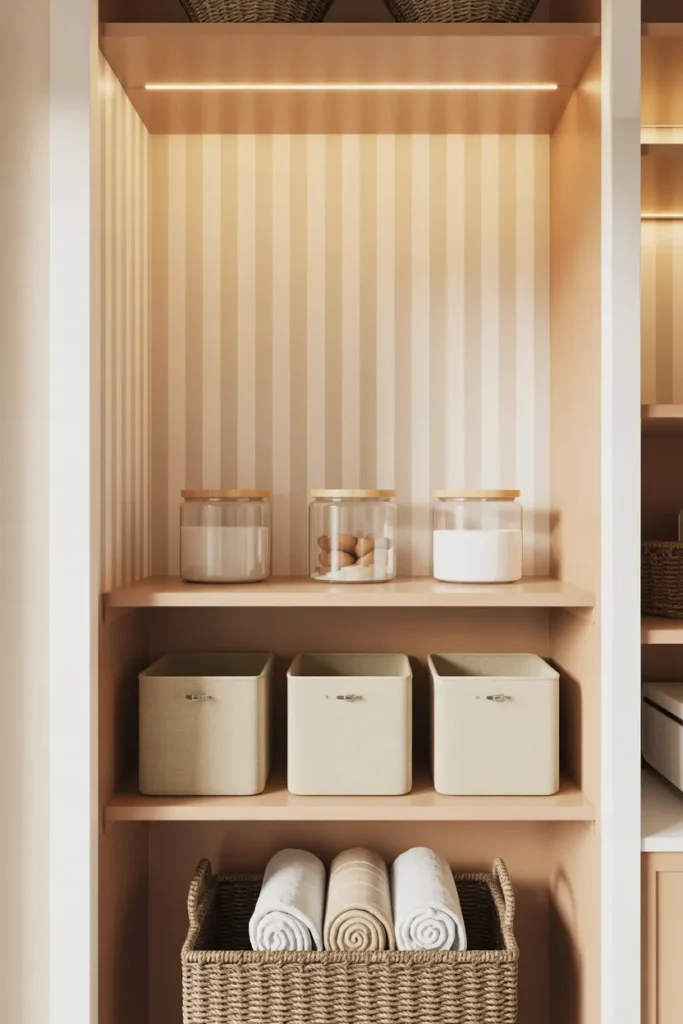
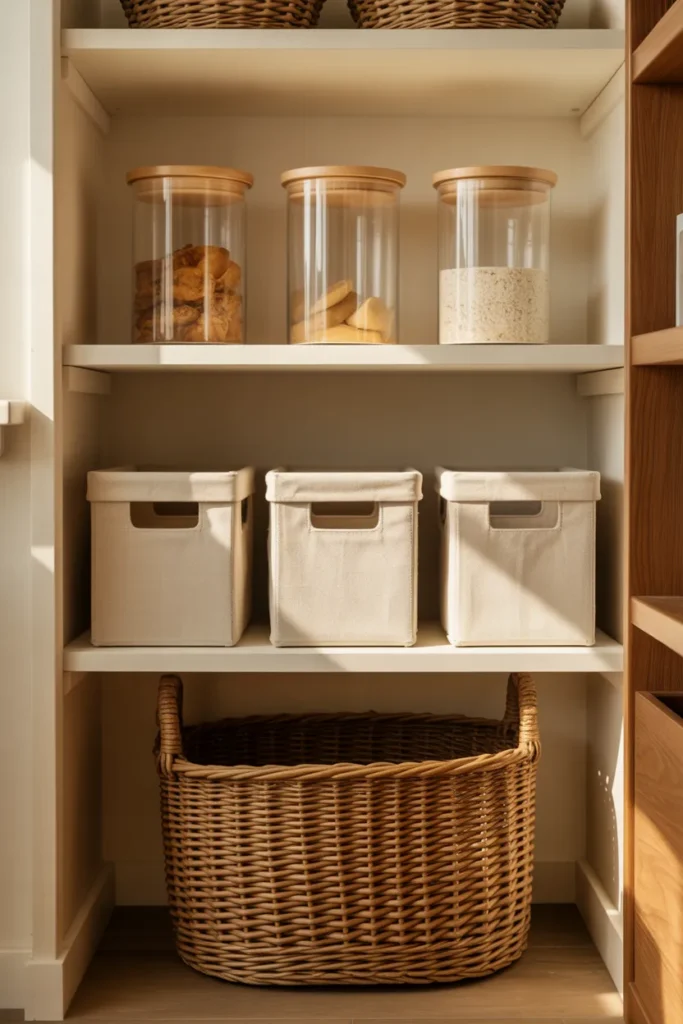
This pantry makeover is built around one rule: nothing costs more than the $50 ceiling, and we’re organizing every idea by price tier so you can stop scrolling at any point and still walk away with a finished space. We’re leaning into a Modern Farmhouse aesthetic with light Japandi touches (think cream, warm oak, linen, simple ceramics) because that look photographs beautifully and pairs with the budget-friendly products you can actually buy at Dollar Tree, Target, and Amazon.
Who This Pantry Makeover Is For
This guide is for you if any of these sound familiar:
- You rent and can’t drill, paint, or rip out wire shelving.
- Your pantry is tiny (under 36 inches wide or a single closet).
- You’ve got builder-grade white wire shelves and zero patience for a full demo.
- You want the look of a $2,000 custom pantry without spending the money or the weekends.
- You’ve tried organizing before and it fell apart in three weeks.
If you own your home and want a full custom-cabinet build with face frames and produce drawers, this is not that post. We linked our studio apartment organization guide at the bottom because the same principles apply to any tight space.
How We’re Organizing This Pantry Makeover
Every idea below is sorted by price tier inside the $50 budget. You can mix and match, or work top-down until you run out of money. The tiers are:
- Free or almost-free: stuff you already own, plus dollar-store finds.
- Under $10: Dollar Tree multipacks and basic Amazon adds.
- Under $25: Target and IKEA mid-range pieces that punch above their price.
- Your budget splurge: the one $20 to $30 item worth blowing the rest of the cash on.
Each idea answers three things: what it is, why it works, and how to do it this weekend.
Step 1: Empty the Whole Pantry (Free)
What it is: Take everything out. Floor, counter, dining table, wherever it fits.
Why it works: You can’t redesign a space you can’t see. Half the pantry “problem” is usually 14 expired items and three empty boxes you’ve been storing for no reason. I did this in my own galley kitchen pantry last spring and tossed nine things before the kettle even boiled.
How to do it: Pull every item, wipe the shelves with a 50/50 white vinegar and water mix, check expiration dates, and group survivors by category on the counter (baking, breakfast, snacks, grains, canned goods). Don’t put anything back yet.
Step 2: Free and Almost-Free Wins You Can Knock Out Today
These cost nothing or almost nothing and they make the biggest visual difference for the effort.
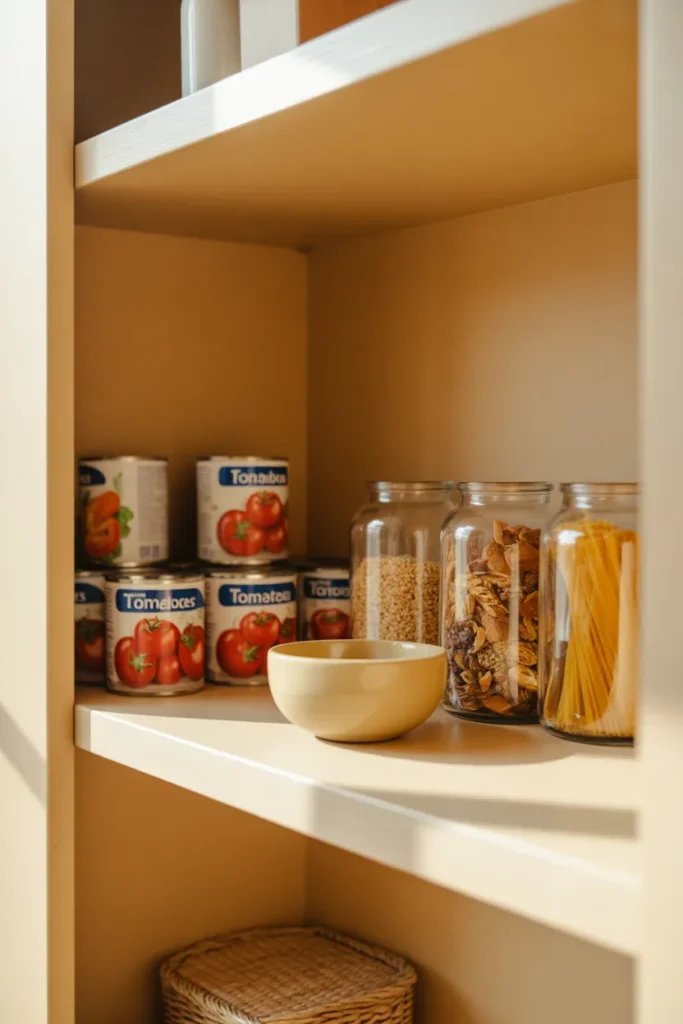
Turn cans label-out and front-facing
Why it works: a row of soup cans facing the same way reads as “organized” before you’ve spent a dollar. It’s the cheapest visual upgrade in the entire pantry.
How: face every label forward, group by type (tomato, beans, broth), and stack with the tallest in back.
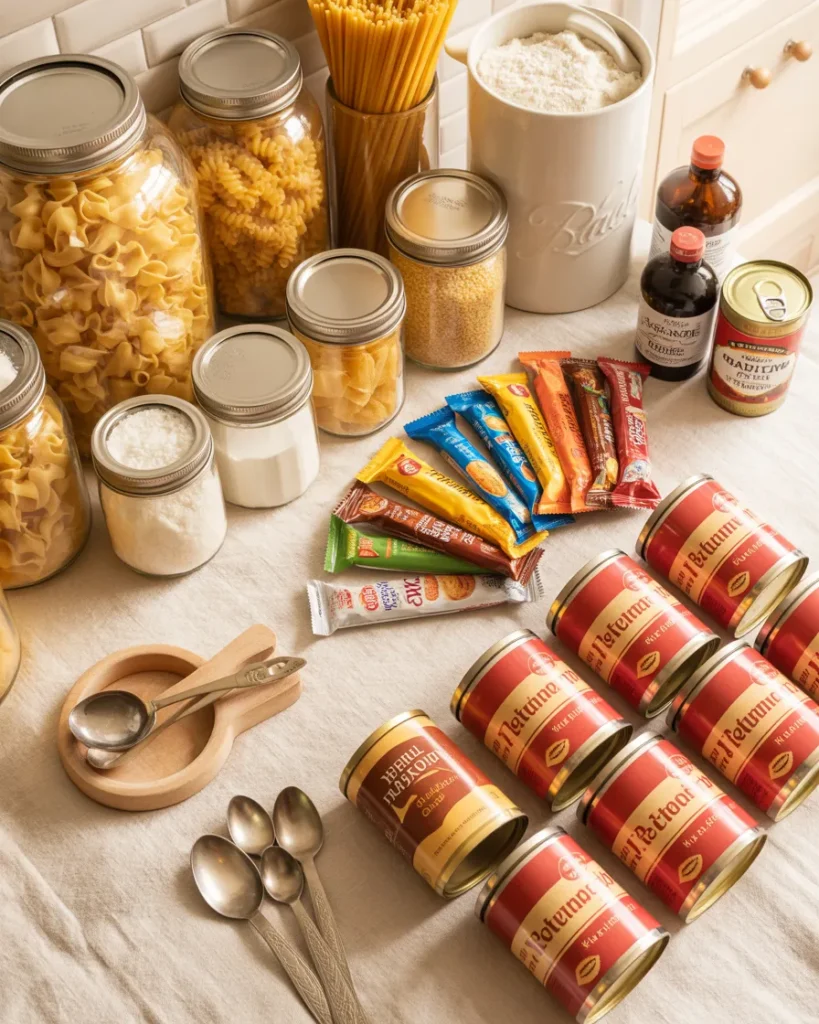
Decant cereal and snacks into containers you already own
Why it works: matching containers eliminate the visual chaos of competing brand colors, which is what makes most pantries read “messy” even when they’re technically tidy.
How: raid your cabinets for empty Mason jars, OXO bins you forgot about, or even clean glass pasta-sauce jars with the labels soaked off. Pour cereal, granola, pretzels, and rice into them. Done.
Move the toaster, blender, or air fryer in (if there’s room)
Why it works: hiding small appliances clears your counters, which makes the whole kitchen feel renovated even though you only moved one thing.
How: measure your pantry depth (most builder-grade pantries are 14 to 16 inches deep) and check if the appliance fits. If yes, stash it on a lower shelf and pull it out only when you use it.
Step 3: Under $10 Buys That Punch Above Their Price
This is where Dollar Tree earns its keep. Almost everything here runs $1.25 to $5.
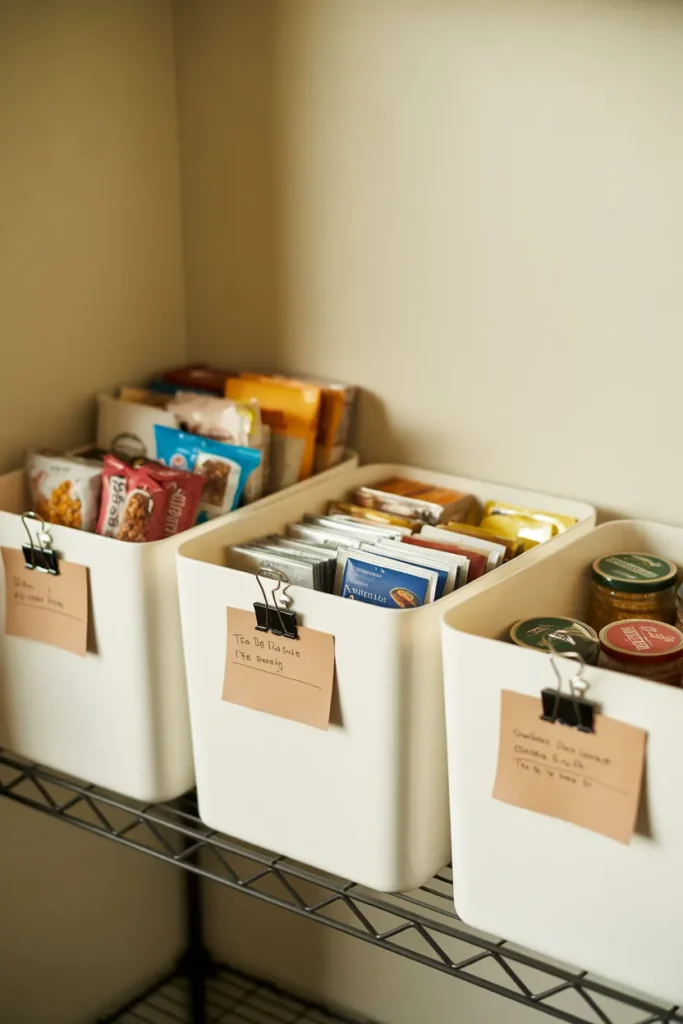
Plastic bins from Dollar Tree ($1.25 to $5 each)
What it is: rectangular open-top bins, usually 8 inches by 12 inches by 5 inches deep, in white, clear, or beige.
Why it works: corralling loose items (snack bars, seasoning packets, tea bags) into bins is the single biggest “after photo” upgrade for the lowest dollar amount. Pull the bin, grab what you need, push it back. No avalanche.
How: buy six to eight bins, sort by category (kid snacks, breakfast bars, baking add-ins, tea and coffee), and line them up on one shelf. The OXO bin alternative that costs half as much, more or less, lives at Dollar Tree.
Adhesive shelf liner ($4 to $7 a roll)
What it is: a peel-and-stick paper or vinyl liner that covers the existing shelf surface.
Why it works: it hides shelf damage, protects against spills, and gives you a designer “shelf paper” look without paint or commitment. Rental-friendly because it peels off when you move.
How: roll out, cut to fit with a craft knife, peel and stick. Cream, oat, light wood grain, or simple stripes photograph best for the modern farmhouse look. Avoid loud florals (they’ll fight your jars).
A pack of clip-on labels ($1.25 at Dollar Tree)
Why it works: labels are the difference between “tidy pantry” and “this person has their life together.” Even handwritten ones work if your handwriting is decent.
How: clip one to each bin and jar. For a deeper dive on labeling systems that don’t fall off in three weeks, our pantry labels and jars guide walks through the brands worth buying.
Step 4: Under $25 Upgrades from Target and IKEA
This tier gives you the biggest “wow” moment of the whole makeover.
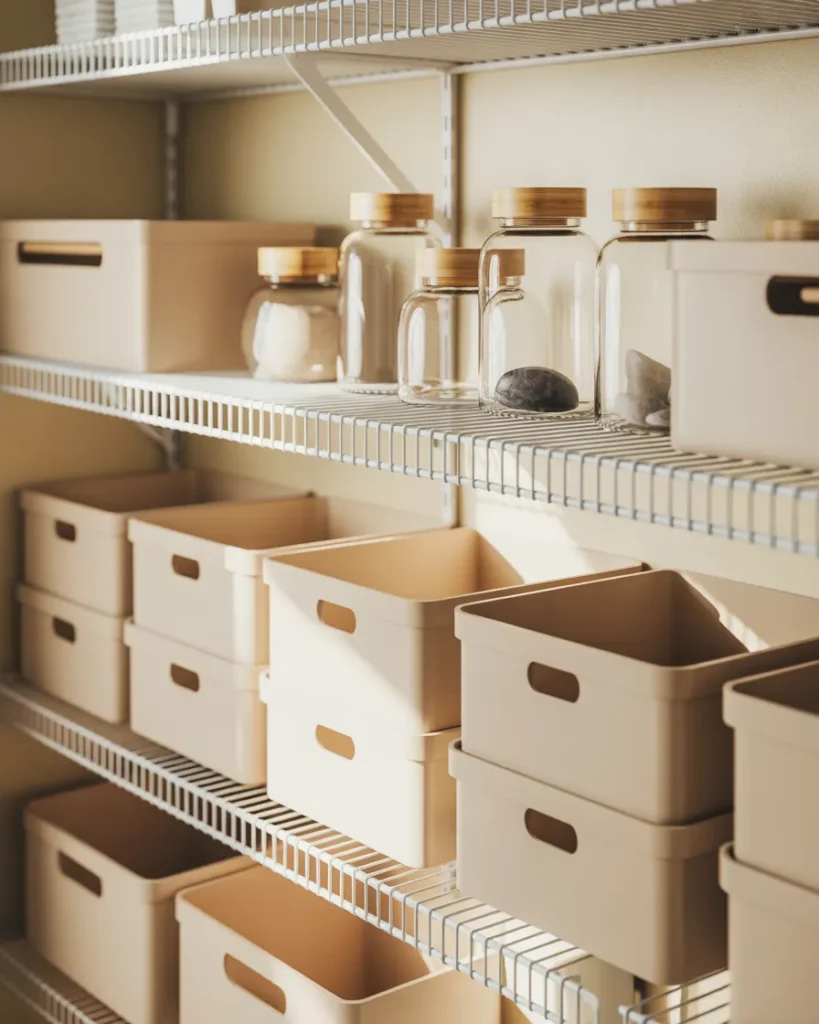
Stackable acrylic or beige bins from Target ($8 to $15 each)
What it is: Brightroom or Threshold-brand stackable bins, usually 6 to 10 inches wide, in clear acrylic or matte beige.
Why it works: stackable doubles your vertical storage instantly. Wire shelves often have 14 to 18 inches of dead air between levels, and stackable bins claim it back.
How: pick two heights (a tall one for cereal boxes, a short one for snack pouches) and build a column on each shelf.
A 4-pack of glass jars from IKEA or Amazon ($12 to $20)
What it is: 1-liter glass jars with bamboo or steel lids. The IKEA KORKEN runs about $4 each. Amazon basic 4-packs hover around $20.
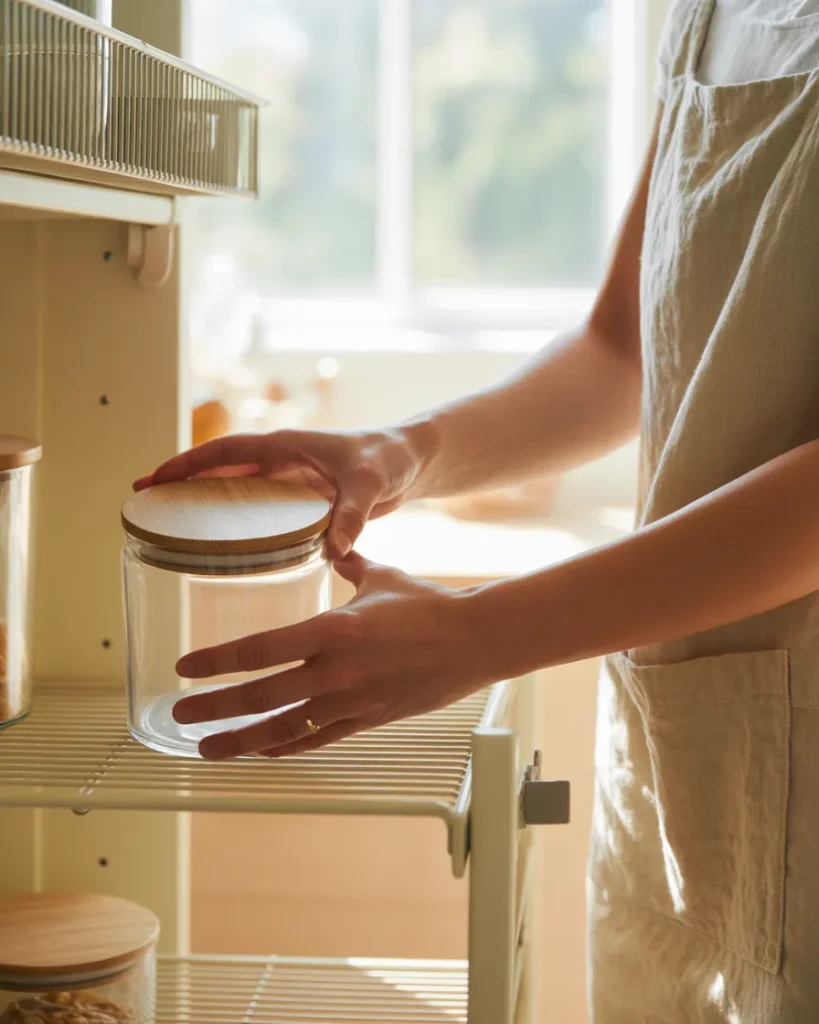
Why it works: glass jars are the single most photographed pantry product on Pinterest for a reason. They make even Walmart pasta look like it came from a specialty market. Bamboo lids lean Japandi, steel lids lean modern farmhouse.
How: decant pasta, rice, oats, flour, sugar, and coffee beans. Skip anything you don’t use weekly (jarring chia seeds you bought in 2023 is just relocating clutter).
A wire-shelf liner that turns wire into “real” shelves ($10 to $15)
What it is: a rigid clear or cream plastic liner sized to drop into standard wire shelving (the kind that comes in builder-grade pantries).
Why it works: jars, bins, and small items stop tipping through the wire grid. Visually, the shelf reads as flat and finished. This single product is the wire-shelving glow-up almost nobody talks about.
How: measure your shelf width (typical builder-grade is 16 to 24 inches), buy liners cut to size, and drop them on. No tools, no drilling, fully removable for renters.
Step 5: Your One Splurge of the Budget ($20 to $30)
You’ve got roughly $20 to $30 left. Spend it on one of these and only one.
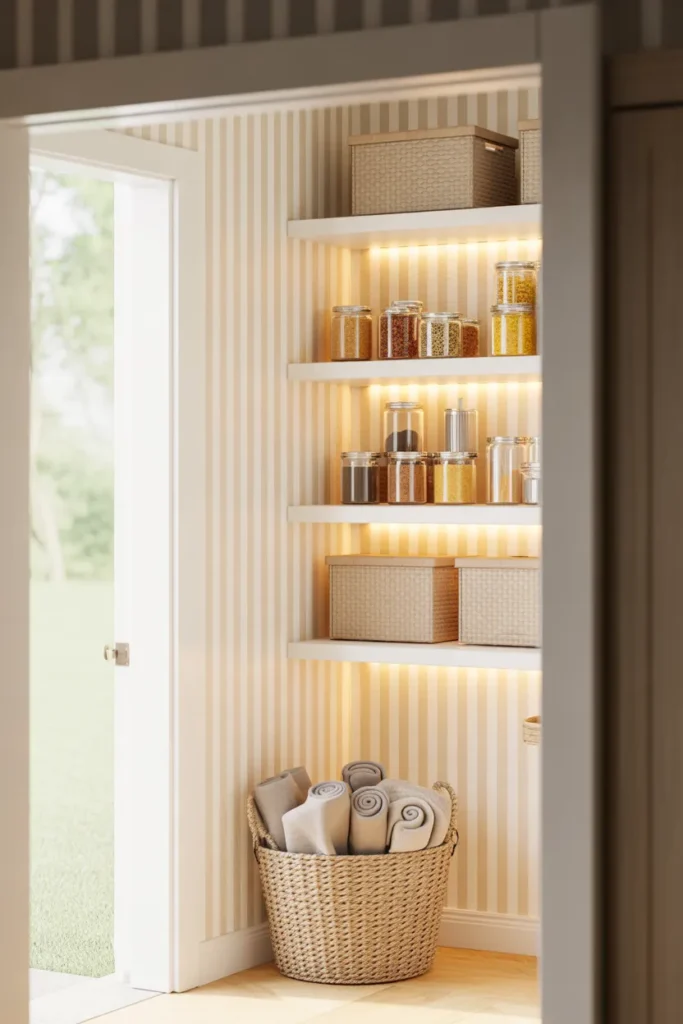
Peel-and-stick wallpaper for the back wall (about $25 a roll)
Why it works: wallpaper on the back wall of a tiny pantry is the closest thing to a free architectural upgrade. It signals “designed” instead of “stored.” Pinterest autocomplete shows “pantry makeover wallpaper” as a top long-tail search for a reason.
How: pick a small-pattern peel-and-stick (cream and oat stripes, soft botanicals, or a mini grid). Avoid huge florals in a small space (they fight the jars). One roll usually covers the back wall of a 3-foot-wide pantry. Fully removable, rental-safe.
A small woven basket for the floor ($20 to $30 at HomeGoods)
Why it works: floors are wasted real estate in most pantries. A seagrass or jute basket holds onions, potatoes, paper towel multipacks, or pet food and adds the warm-natural-texture layer that makes pantries look “styled.”
How: measure floor space (a 14 by 18-inch basket fits most closet pantries), pick a basket with handles, and stash bulk items.
An under-shelf LED motion light ($15 to $25 on Amazon)
Why it works: most builder-grade pantries have terrible lighting. A battery-operated motion light makes the space feel like a custom build for almost no money. No drilling, no electrician.
How: stick the magnetic mount under the top shelf, click the light on. Done.
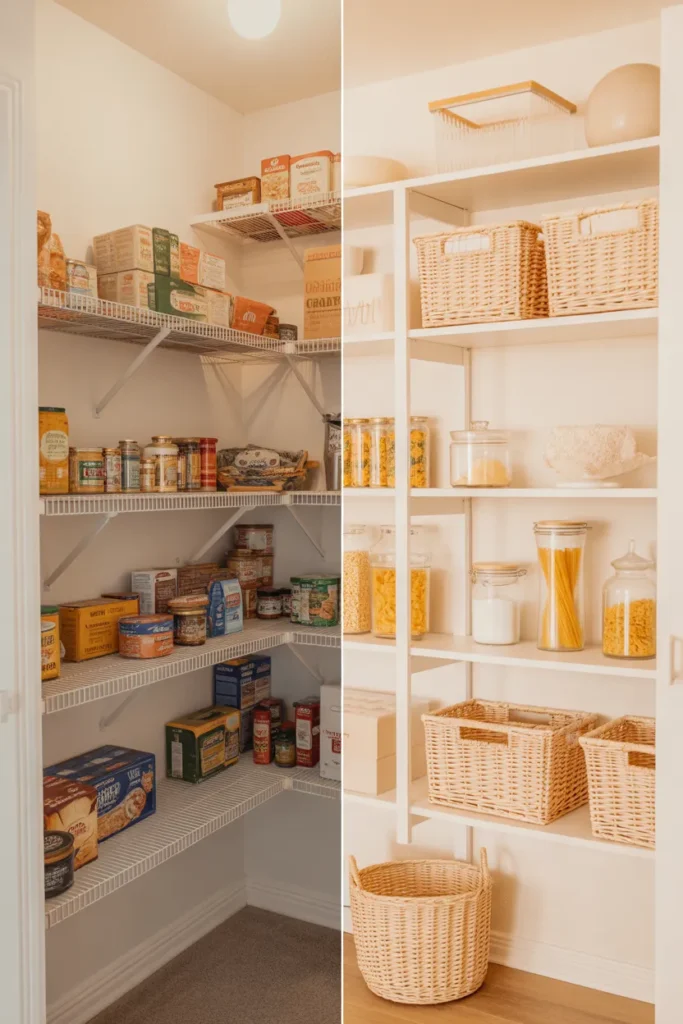
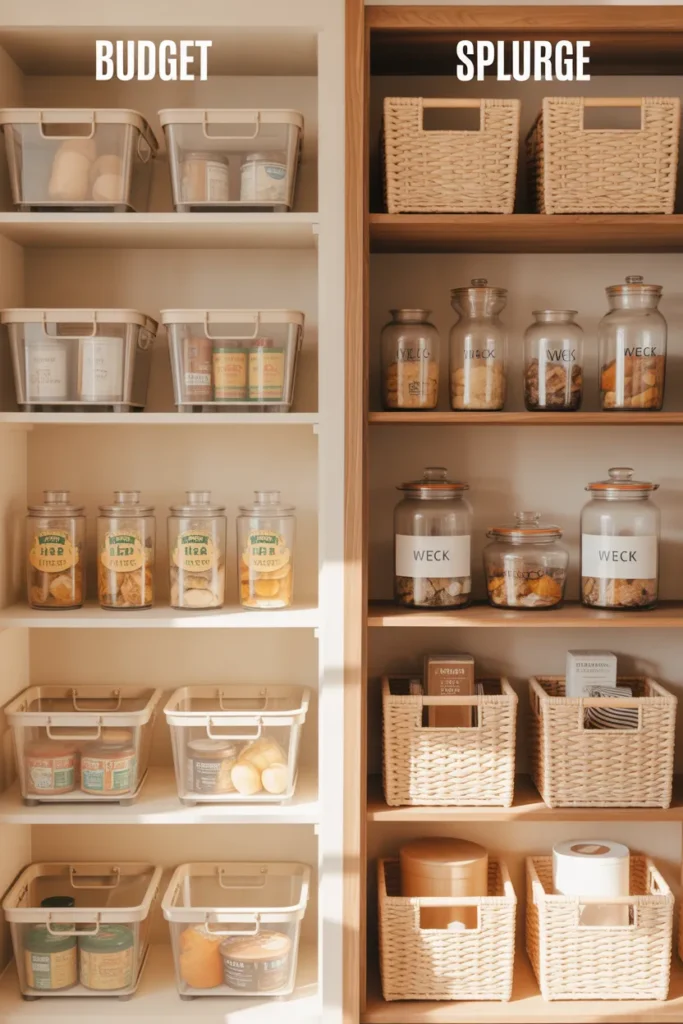
Budget Versus Splurge: The Same Pantry at Two Price Points
Here’s the same makeover at the $50 ceiling versus what a no-budget version would run, so you can see exactly what you’re trading off.
| Item | Budget version ($50 ceiling) | Splurge version ($300+) |
|---|---|---|
| Bins | Dollar Tree plastic, $1.25 each | Open Spaces beige, $32 each |
| Jars | IKEA KORKEN, $4 each | Weck or West Elm glass, $18 to $24 each |
| Shelf upgrade | Plastic shelf liners, $10 | Custom wood shelf inserts, $80+ |
| Wall treatment | Peel-and-stick wallpaper, $25 | Real wallpaper, $90+ install |
| Lighting | Battery LED puck, $15 | Hardwired LED strip, $120 |
| Basket | HomeGoods seagrass, $25 | West Elm woven, $69 |
The honest truth: at the $50 tier you’ll lose the high-end material weight (real glass, hardwood, hardwired light) but the visual impact in photos is 80% of the splurge version. For a rental or starter home, the budget version is the smarter spend.
Small Pantry Layout Rules That Make $50 Look Like $500
A makeover is half product, half placement. These rules apply whether you spent $20 or $200.
- Eye level is prime real estate. Put your most-used items (coffee, breakfast, kid snacks) at eye level. Bury baking supplies you use twice a year up top.
- Heavy on bottom. Flour, sugar, large appliances, and the seagrass basket of potatoes go low so the pantry doesn’t tip-feel.
- Repeat colors in threes. Three glass jars, three cream bins, three kraft labels. The eye reads repetition as “designed.”
- Leave 20% empty space. A pantry crammed to the ceiling reads “stored.” A pantry with breathing room reads “styled.” This is the rule no Pinterest tutorial mentions and it’s the difference between a real makeover and a relabeling project.
- Match metals or skip them. If your jar lids are bamboo, don’t add chrome bins. If your hardware is matte black, lean into it.
Common Pantry Makeover Mistakes to Avoid
I’ve talked to dozens of readers who redid their pantry, hated it three months later, and started over. Here’s where it usually goes wrong.
- Buying bins before measuring. Builder-grade pantry shelves vary from 11 to 16 inches deep. A 14-inch bin in an 11-inch shelf is a $30 mistake. Measure first, shop second.
- Decanting things you don’t use weekly. A jar of quinoa you bought during the 2022 health kick is a dust collector with extra steps. Only decant high-turnover items.
- Choosing five different bin styles. Mixing wire, plastic, fabric, woven, and acrylic in one space reads as chaos no matter how nice each piece is on its own. Pick two materials max.
- Over-labeling. Labels on every jar of pasta, rice, and salt are a Pinterest fantasy. In real life you can identify pasta by looking at it. Label the things that look alike (white powders, similar grains) and skip the rest.
- Forgetting the floor. The pantry floor is storage square footage you’re paying rent on. Use it.
- Skipping lighting. A dim pantry will undo every other upgrade. Spend the $15 on the LED puck.
How Long This Pantry Makeover Actually Takes
Honest timeline based on a 3 by 4-foot closet pantry:
- Empty and clean: 45 minutes.
- Shop online or in-store: 1 to 2 hours (skip if you’re using what you have).
- Liner the shelves and hang wallpaper: 1 hour.
- Decant, label, restock: 1.5 to 2 hours.
Total: a Saturday morning, start to finish. You’ll be done before lunch and posting the after photo by 1 p.m.
A $50 Pantry Makeover Shopping List (Screenshot This)
Here’s the exact breakdown if you want to spend the full $50 and walk out with a finished pantry. Adjust based on what you already own.
- 6 plastic bins from Dollar Tree at $1.25 each = $7.50
- 1 roll adhesive shelf liner = $6
- 1 pack of clip-on labels = $1.25
- 4-pack glass jars from IKEA KORKEN = $16
- 1 plastic wire-shelf liner = $10
- 1 roll peel-and-stick wallpaper for back wall = $9 (clearance) to $25 (full price)
Running total at full price: approximately $50 to $65 depending on your pantry size and what you already have at home. Skip the wallpaper or buy a smaller jar pack to stay strictly at $50.
The beauty of this makeover is it’s modular. Buy one tier this paycheck, the next tier next month. The pantry will look better at every stop.
FAQ
How do I revamp my pantry on a tight budget?
Start by emptying it completely, then layer in upgrades by price tier. Free wins (turning cans label-out, decanting into jars you already own) cost nothing. Add Dollar Tree bins for under $10, Target stackable bins under $25, and one splurge item like peel-and-stick wallpaper or an LED puck light to finish. The full small pantry makeover lands at $50 or less.
What is the latest trend for pantries in 2026?
The dominant pantry trends right now are warm neutrals (cream, oat, soft beige replacing stark white), natural materials (cane, seagrass, oak, linen), peel-and-stick wallpaper on the back wall, and visible glass-jar storage with bamboo or steel lids. Modern Farmhouse with Japandi accents is the most-saved aesthetic on Pinterest for kitchen pantries.
What are the most common pantry design mistakes to avoid?
Buying bins before measuring shelf depth, decanting items you only use once a year, mixing too many bin materials, over-labeling, ignoring the pantry floor, and skipping lighting. Each one of these is what separates a Pinterest-worthy pantry makeover from a project you’ll redo in six months.
How much does a pantry makeover cost on average?
Costs range wildly. A renter-friendly small pantry makeover like this one runs $30 to $50. A mid-tier refresh with Target and Container Store products is $150 to $400. A full custom-cabinet build with face frames and drawers, like the top-ranking DIY tutorials, runs $1,500 to $3,500 in materials alone, plus weekends of labor.
Do pantries add value to a home?
Pantries are consistently ranked as one of the top three most-wanted kitchen features by US homebuyers, according to the National Association of Home Builders. A well-organized, photo-ready pantry helps a home show better even if it doesn’t add direct appraisal value, and it’s one of the cheapest pre-listing upgrades a seller can make.
How do I do this pantry makeover in a small space or rental?
Every idea above is rental-friendly. Plastic shelf liners drop in without drilling. Peel-and-stick wallpaper removes cleanly. Battery LED lights stick on with adhesive. The whole makeover requires zero tools beyond a tape measure and craft knife.
What is the budget version if I don’t have $50?
Spend $15. Buy six Dollar Tree bins ($7.50), one roll of adhesive shelf liner ($6), and one pack of labels ($1.25). Skip the jars and wallpaper. The bins and liner alone deliver the biggest visual punch.
What if I don’t have a walk-in pantry?
Closet pantries (the standard 24 to 36-inch wide cabinet style) actually photograph better than walk-ins because the shallow depth keeps everything visible. Every product in this guide works in a closet pantry. For even tighter spaces, our linen closet organization guide covers similar tricks for cabinets under 24 inches.
How long does this pantry makeover take?
A Saturday morning. Plan on roughly 4 to 5 hours total: 45 minutes to empty and clean, 1 to 2 hours to shop, 1 hour to liner and wallpaper, and 2 hours to decant, label, and restock. Most readers finish before lunch.
Pin This Pantry Makeover for Later
If this small pantry makeover saved you from another doom-scroll in the storage aisle, save it to your kitchen organization board so you’ve got it when the weekend hits. The shopping list at the top of this post is screenshot-ready, and our pantry labels and jars guide is the natural next read once your bins arrive. You’ve got this. The pantry that finally makes sense is one Saturday morning away.
For broader kitchen-organization research, the USDA’s FoodKeeper guidance is worth bookmarking for storage timelines on everything you’re about to decant, and the National Association of Home Builders’ “What Home Buyers Really Want” report confirms why a well-styled pantry pulls weight at resale.