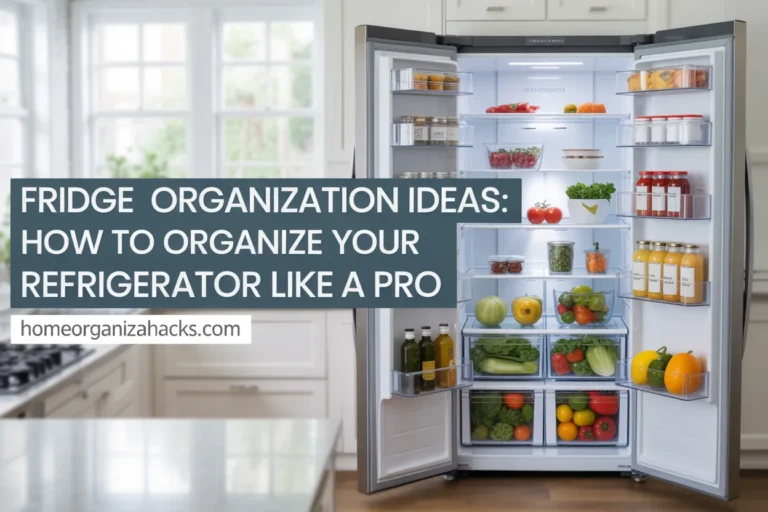
Kitchen Drawer Organization Ideas: A Drawer-by-Drawer System
You know the drawer. The one that fights back when you pull it, because a whisk handle has wedged itself against the rail again. Kitchen drawer organization is how you end that fight for good, and honestly, one focused weekend covers it. No remodel required. This guide walks every drawer in the kitchen, one at a time: silverware, utensils, knives, deep pot drawers, food storage, spices, towels, and yes, the junk drawer.
You’ll get interior measurements in inches, the exact organizers we bought from IKEA, Amazon, Target, and Dollar Tree, and a five part system that decides what belongs where before you spend a dime. Grab a tape measure. We’re going in.

The 5-Job Drawer Map: Give Every Drawer One Job
Here’s the system that makes the rest of this guide work. We call it the 5-Job Drawer Map: every drawer in your kitchen gets assigned exactly one job from a list of five, and every item earns its drawer by matching that job. The five jobs are Prep (knives, cutting boards, measuring tools), Cook (utensils, oven mitts, pots), Serve (flatware, napkins, everyday dishes), Store (containers, wraps, bags), and Reset (chargers, pens, tape, the honest catch-alls).
The map isn’t a gimmick. Kitchen planners have organized storage around work centers for decades, and the University of Missouri Extension’s kitchen work centers guide still recommends keeping leftover supplies near the sink and cooking tools beside the range so you stop crossing the room mid-recipe. The 5-Job Drawer Map simply applies that thinking at drawer level. Stand where you use a thing. Whatever drawer sits within arm’s reach of that spot gets the matching job.
Before we moved a single fork, we wrote the five jobs on a sticky note, stuck it to the fridge, and lived with the assignments for a week. Two changed. The flatware drawer we’d planned near the stove moved next to the dishwasher instead, because unloading is where flatware actually gets handled. Do the paper version first. It’s the cheapest kitchen drawer organization move there is, and it saves you from reorganizing twice.
Assign jobs now, before any shopping. Kitchen drawer organization fails most often when people buy pretty trays first and force the contents to fit later.
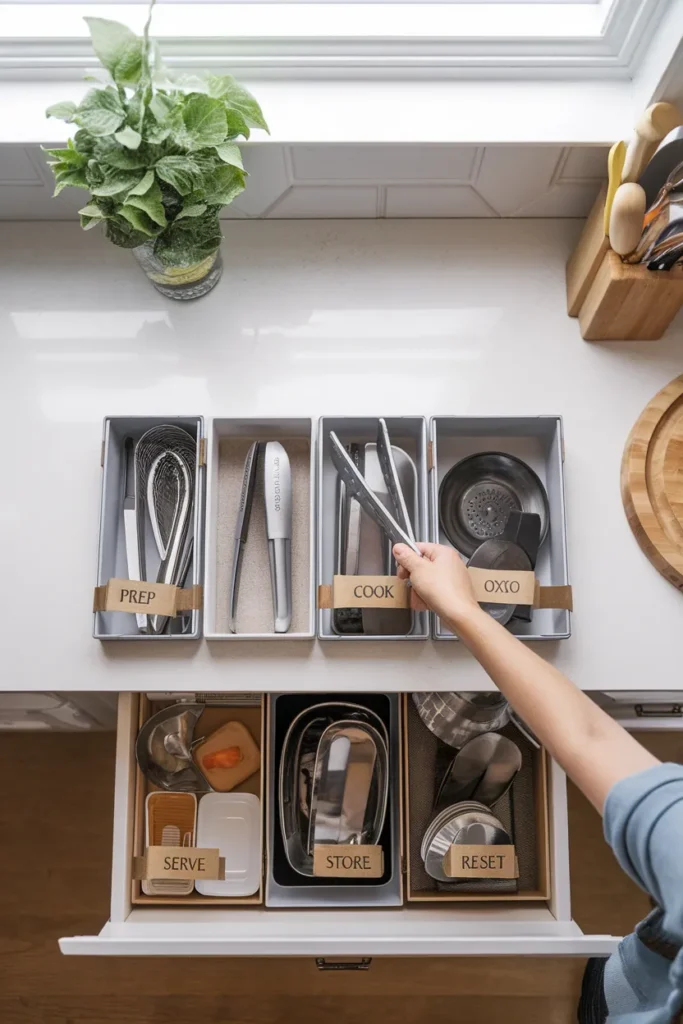
How to Organize Kitchen Drawers: The 15-Minute Empty and Edit
Every drawer in this guide gets the same 15-minute treatment before anything new goes in. Set a timer and run these four steps in order:
- Empty the entire drawer onto the counter. This is the single highest-value move in the whole project, so it goes first. You cannot zone around clutter you can’t see, and a full dump forces every item to argue its way back in.
- Wipe the drawer, then measure it. Interior width, depth front to back, and height, all in inches. Write the numbers on a strip of painter’s tape and stick it to the drawer face. Those three numbers make every purchase later a two-minute decision.
- Edit hard. Duplicates leave (three peelers were living in ours, one stayed). Broken tools leave. Anything you might use someday goes into a “maybe” bin with a date written on the lid, 30 days out. If the date passes untouched, the bin gets donated unopened.
- Return items by job, most-used up front. Daily tools sit in the front two thirds of the drawer. Holiday-only pieces ride in the back row or move to a lower drawer.
A ten drawer kitchen at 15 minutes each is about two and a half hours. One long podcast. That pace is realistic because you’re deciding, and honest kitchen drawer organization is mostly decisions, only a little shopping.
The Silverware Drawer: Measure First, Then Pick a Tray
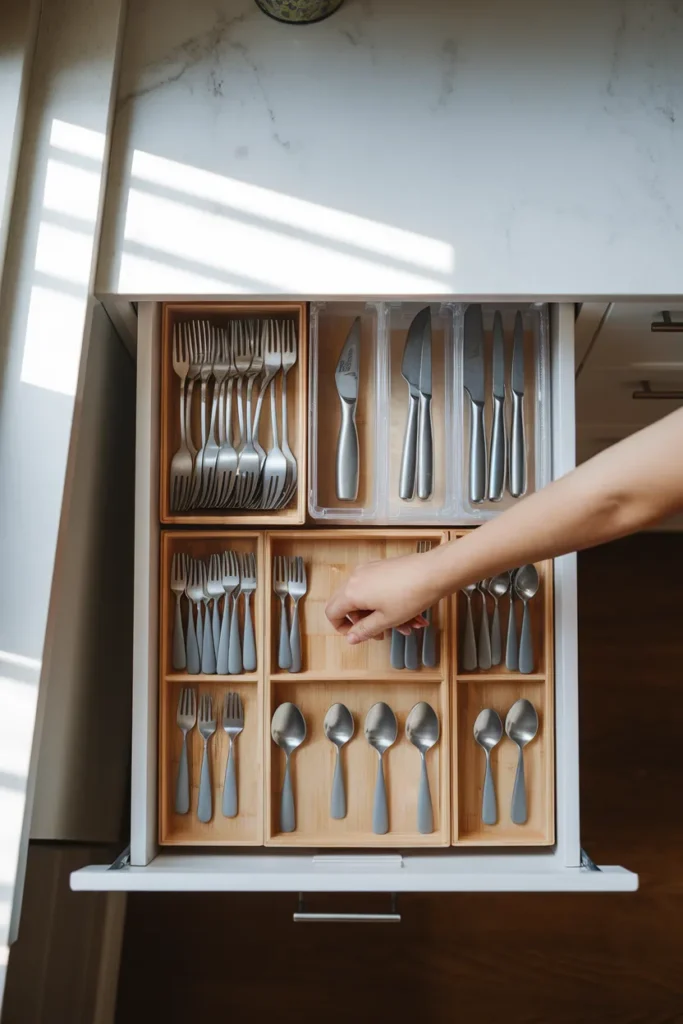
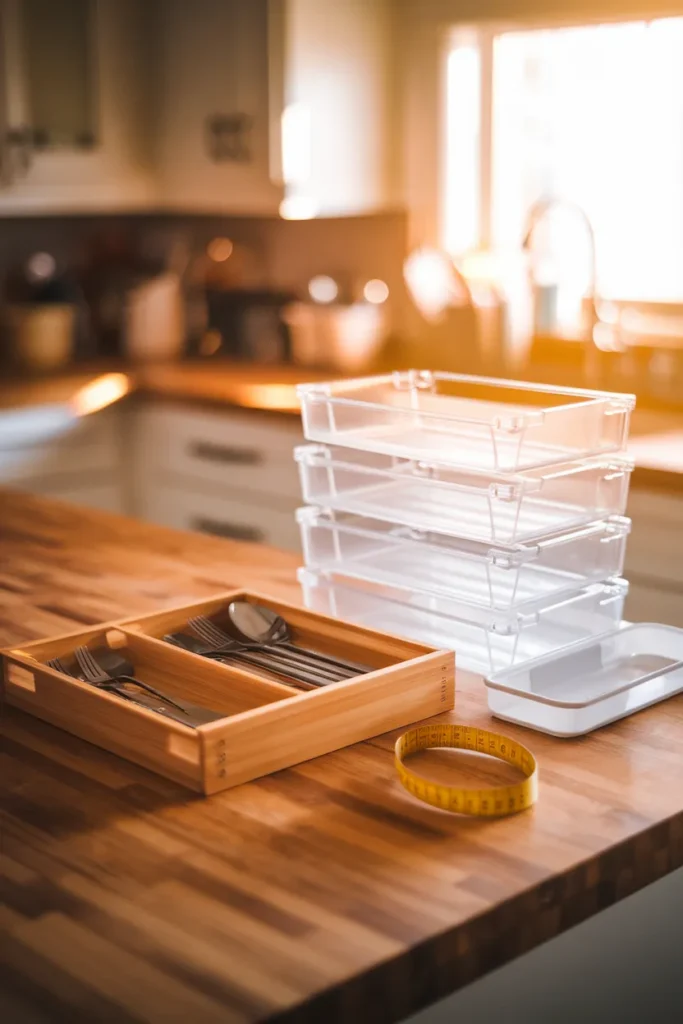
Start here, because you touch this drawer more than any other. Standard top drawer boxes run about 4 inches deep, which limits you to a single layer, so width is the number that matters. IKEA’s drawer sizing guide is a handy cheat sheet even if your cabinets came from somewhere else: an 18 inch drawer usually gives you about 15 inches of interior width, and a 24 inch drawer gives you about 21, enough to pair a 15 inch flatware tray with a 6 inch utensil tray beside it.
We learned the material lesson the annoying way. Our first tray was a plastic expandable model, and everyday forks and spoons are heavier than they look. The tray sagged in the middle, crept out of its extended position, and slid an inch every time the drawer closed. The fix was an expandable bamboo organizer, about $30 on Amazon, heavy enough to sit still under a full set of flatware. It hasn’t shifted in over a year. Bamboo also reads warmer than plastic when the drawer opens, a small daily upgrade that costs nothing extra.
Two placement rules finish the job. Run the tray front to back if that orientation leaves less dead space, and park this drawer as close to the dishwasher as your layout allows. Unloading flatware without taking a step is the kind of tiny win that makes kitchen drawer organization feel worth the Saturday. Odd extras, like cheese knives or the gold set for holidays, go in small acrylic bins behind the main tray.
The Utensil Drawer: Dividers Beat Trays for Odd Shapes
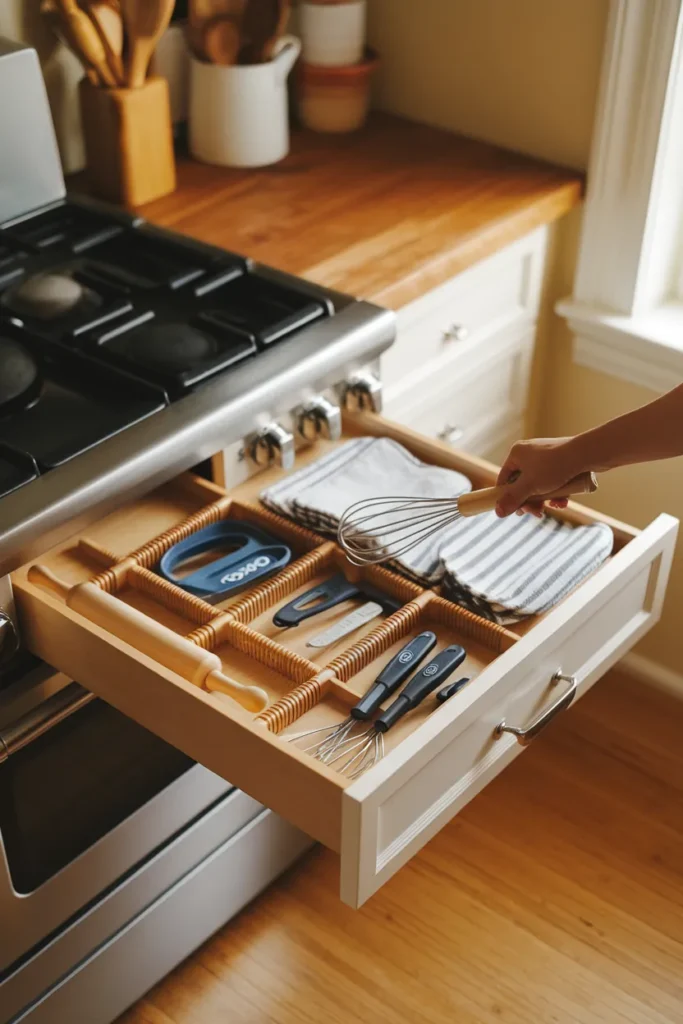
Utensils are where fixed trays fall apart. A rolling pin, a ladle, and a garlic press share no common footprint, so instead of hunting for a tray with the right compartments, build your own lanes. Spring-loaded expandable bamboo dividers, sold in four packs for roughly $25 to $35, press against the drawer walls and hold their position without screws or adhesive. Set a skinny lane for the rolling pin, a wide one for hot pads, and mid-size lanes for the everyday tools.
Then apply the working-set rule. One pair of OXO Good Grips tongs, one whisk, one spatula, one peeler, and one can opener live in the front lanes. Everything specialty, the avocado slicer, the corn holders, the second pizza cutter, moves to the back lane or straight into the maybe bin from the edit step. We kept a single mesh tray from our old setup inside one lane for the smallest items, because using what you already own beats matching for its own sake.
If your drawer walls are shallow or the dividers won’t grip, mDesign and Target’s Brightroom line both make low modular trays that do the same lane work sitting loose. Add a strip of non-slip liner underneath and nothing travels. That one strip quietly solves more kitchen drawer organization complaints than any tray.
The Knife Drawer: Safer Than a Block on the Counter
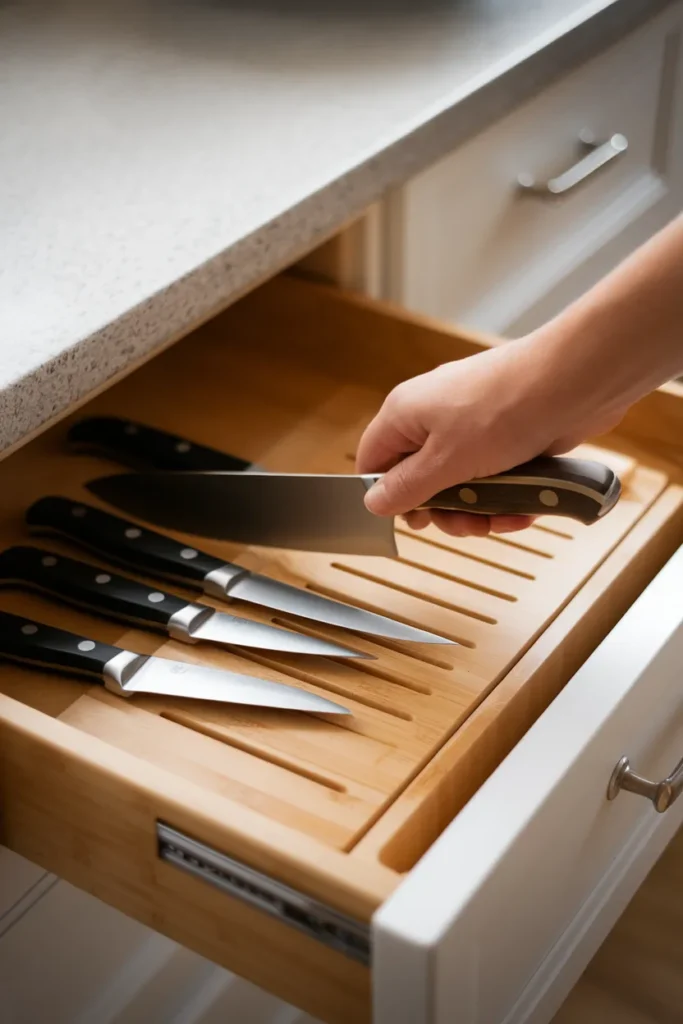
An in-drawer knife block does two jobs at once. It clears a bulky block off the counter, and it covers every edge so nobody grabs a blade while feeling around for a spatula. The bamboo versions run about $40, hold each knife edge-down in its own angled slot, and come in sizes from 7 slots up to 14 or more, so a full set plus steak knives can share one drawer. If little kids live in your house, pair the drawer with a simple latch and you’ve built safer knife storage than any counter block offers.
One installation trick matters. A loose block slides every time the drawer closes, which defeats the point, so pin it in place with the same expandable dividers from the utensil drawer or a strip of non-slip liner cut to size. Leave one open slot for a honing rod if you use one.
And please, no loose knife jumbles. A drawer of bare blades stacked over each other is exactly how you cut a knuckle at 7 a.m. while reaching for the paring knife. Kitchen drawer organization is mostly about speed and calm, but in this one drawer it’s genuinely about not bleeding.
Deep Kitchen Drawer Organization for Pots, Pans, and Lids
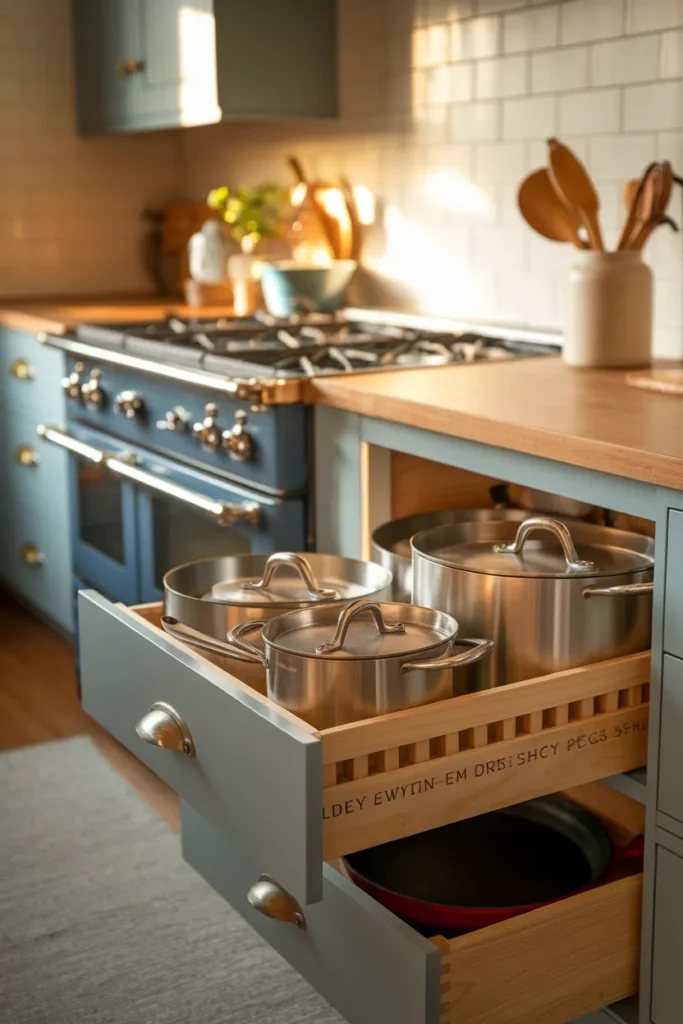
Deep drawers changed how we cook, and they’re the reason drawer-heavy kitchens keep winning. Where standard top drawers run about 4 inches deep, the deep pot drawers in our kitchen run 8, and that doubled height is exactly what pots, mixing bowls, and small appliances need. Deep kitchen drawer organization comes down to three moves.
First, sort by weight and frequency. Everyday pans, the 2 quart saucepan and the 10 inch skillet, live in the upper deep drawer where lifting is easy. Cast iron and the Dutch oven sink to the lowest drawer, because a 12 pound skillet at knee height beats one at shoulder height every time.
Second, solve the lids. You have two good options. File them upright between adjustable pegs or in a wire lid rack, sorted flat lids from domed, so the right one lifts out without an avalanche. Or skip the matching game entirely and store each lid on its own pot, which costs a little vertical space and saves the nightly lid hunt. We ran the on-the-pot method for a year and never went back.
Third, go vertical with the flat stuff. Cutting boards, sheet pans, and cooling racks stand on edge between dividers like files in a cabinet, visible and grabbable in one motion. Then enforce the two-drawer rule: if the cookware collection can’t live comfortably in two deep drawers, a pan leaves. Ours did, and dinner has not suffered.
The Food Storage Drawer: Containers, Lids, and the Two-Size Rule
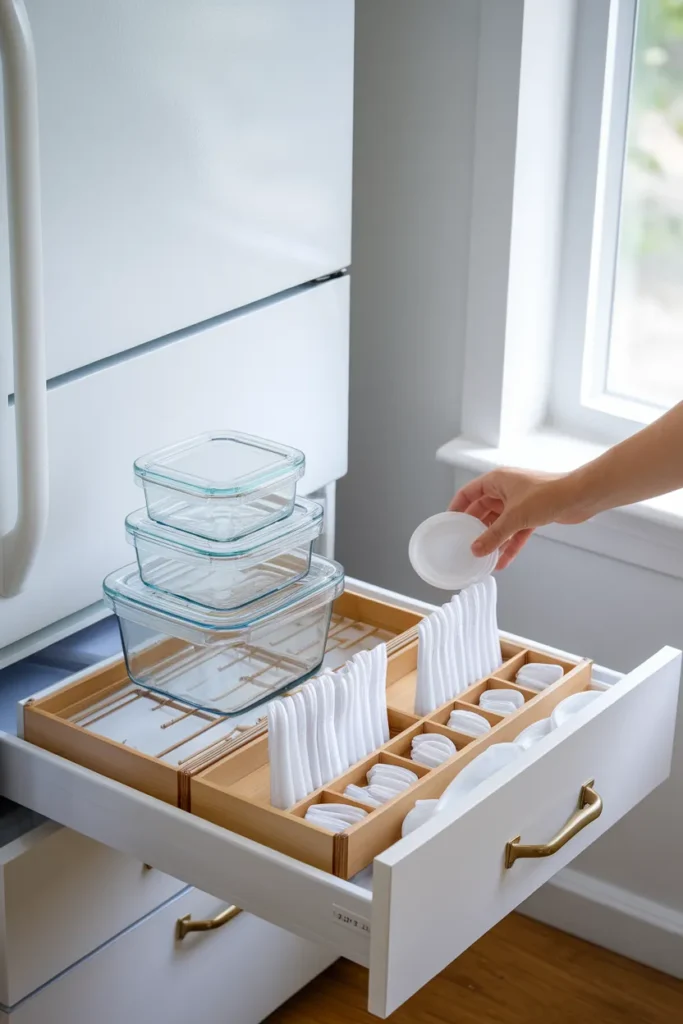
This drawer holds the Store job, so put it near wherever leftovers actually get packed, usually the stretch of counter between stove and fridge. Then adopt the rule that ends the mismatched container pile forever: own exactly two sizes. One small, one large, in a square shape, because square containers nest tighter than round ones and waste far less drawer width.
Rubbermaid Brilliance and basic glass sets both come in clean two-size stacks, and batch cookers can add a couple of restaurant-style Cambro quarts for soups. Bases stack in short towers, and lids stand upright in a divider lane or a slim bamboo box, sorted by size, so pairing takes one reach. Our full food container organization system breaks down the whole cabinet version if your collection outgrows a drawer.
Wraps and zip bags share this job. Slim bamboo boxes decant sandwich and gallon bags so you pull one bag instead of wrestling a cardboard sleeve, and foil or parchment rolls lie flat in the back row. Stick to food-safe containers for anything that touches food directly.
One safety habit earns permanent space here: tape the FoodSafety.gov cold food storage chart inside the drawer face. Shallow containers cool leftovers faster, and most cooked leftovers hold 3 to 4 days in the refrigerator, so the chart settles the “is this still good” debate before anyone tastes to check. And if after-school raids wreck your kitchen drawer organization by 4 p.m., split off a kid-height drawer using our snack drawer organization guide, and the container drawer stays yours.
The Spice Drawer: Flat Jars You Can Read From Above
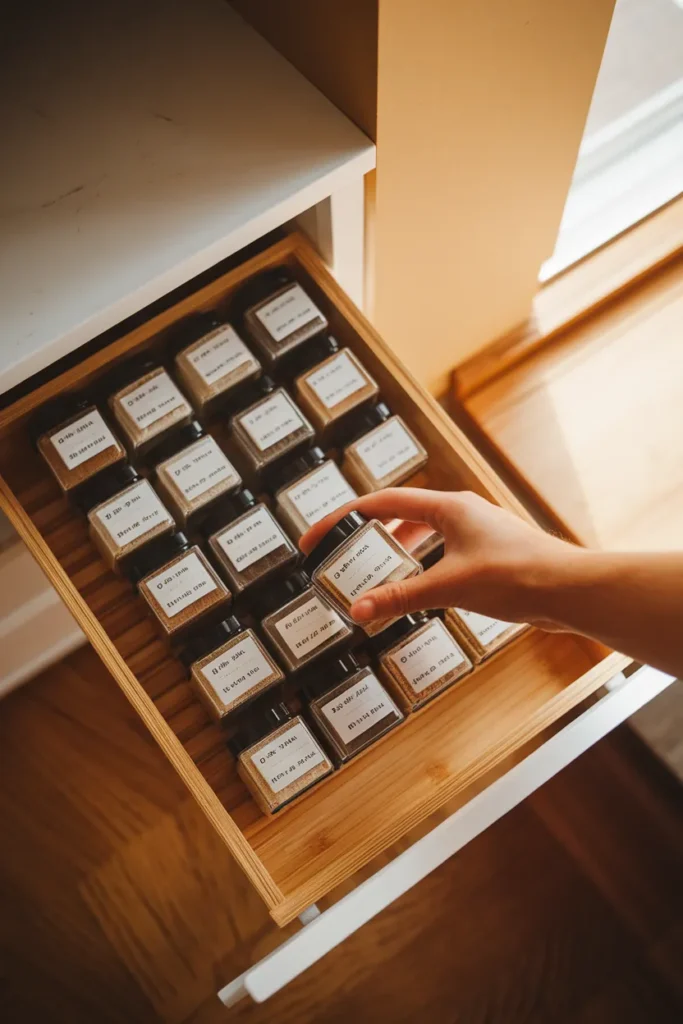
A spice drawer beats a spice cabinet for one reason: you read every label at once. Tiered inserts lay jars at a gentle angle, label side up, in neat staggered rows, and matching 4 ounce jars with printed lid labels turn the whole drawer into a menu. It’s the prettiest corner of kitchen drawer organization, no contest. Target’s Brightroom tiered insert and the bamboo versions on Amazon both drop straight in; measure your interior width first and buy the insert that fills it edge to edge so jars can’t slide into the gaps.
Sort alphabetically if you cook from recipes, or by cuisine cluster (taco night jars together, baking spices together) if you cook from memory. Keep the drawer in Prep territory near the cutting board counter, and away from the drawer directly beside the oven, since steady heat shortens spice life. Refill from bulk bags stored in the pantry so the drawer stays pretty and the backstock stays cheap.
Not sure a flat layout suits your space? We compared flat versus vertical spice drawer setups in a full head-to-head, including which drawer depths rule out the vertical style.
The Junk Drawer, Reframed as the Reset Drawer
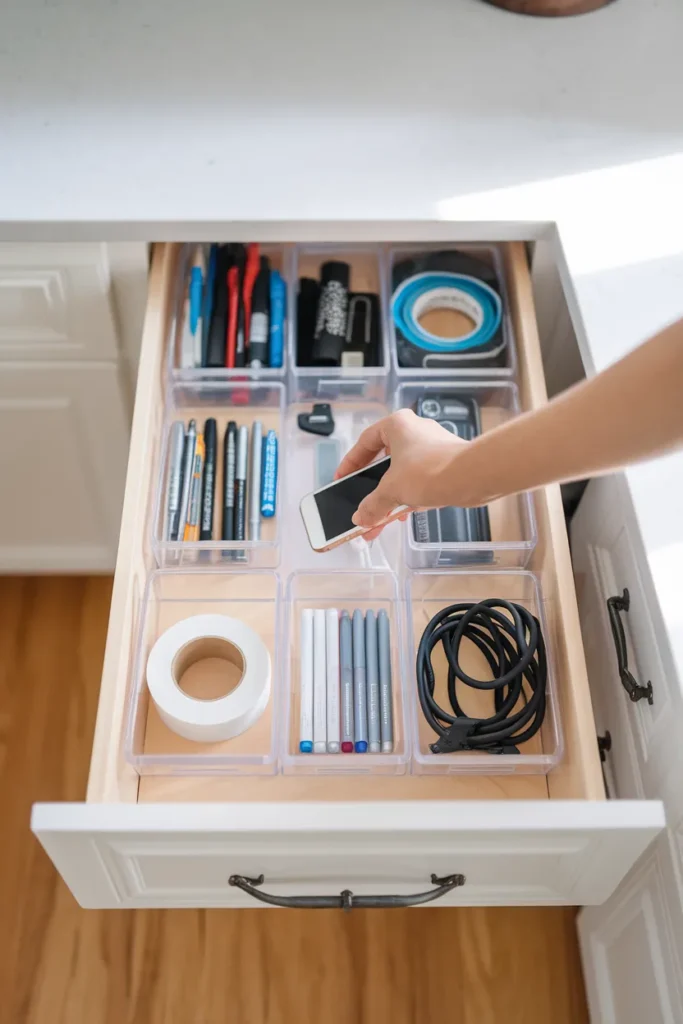
Does a drawer really need a job title? This one does, or it quietly eats the whole kitchen. Rename the junk drawer the Reset drawer and give it a roster: phone chargers, pens, scissors, tape, batteries, a flashlight, stamps. Anything outside the roster is a visitor, and visitors get walked home during the weekly pass.
Clear acrylic modular bins are the tool here, and this is the cheapest fix in the whole project. Target’s Brightroom bins run a few dollars each, The Home Edit style sets mix and match by the piece, and Dollar Tree sells workable clear bins for $1.25 that handle pens and tape just fine. The clear part matters more than the brand. When you can see the drawer bottom between bins, the drawer is edited; when the bottom disappears, it’s time for a two-minute pass. We call that the visible-bottom test, and it keeps this drawer honest with almost no effort.
Two upgrades if you’re feeling fancy. A snap-shut battery case ends the loose-battery rattle and sorts AAs from AAAs at a glance. And if you ever have an electrician over, an outlet installed inside the drawer turns it into a hidden charging station, phones out of sight, counters clear. That one’s a pro job, not a weekend DIY, but it’s the single best kitchen drawer organization splurge we know.
The Towel and Linens Drawer: Roll, Don’t Fold Flat
Shallow drawer, bulky contents, easy fix. Rolling kitchen towels instead of folding them flat roughly doubles what a 4 inch drawer holds, and every roll stays visible from above so you never excavate. A bamboo towel organizer with adjustable divider slats keeps the rolls standing in tidy rows; two of them side by side fill a standard drawer with room left over for a stack of cloth napkins.
Rolling is the rare kitchen drawer organization trick that costs zero dollars. We’ve rolled ours for years and added one rule that keeps the drawer closed without a fight: one in, one out. A new towel comes home, the raggediest one gets demoted to the rag bin under the sink. Flat-weave Turkish style towels roll tighter than fluffy terry if you’re short on space, and they dry faster on the oven handle too. Park this drawer a step from the sink and dishwasher, squarely in Serve and cleanup territory, and hand-drying stops involving a walk.
The Baking and Serving Drawer: Home for the Sometimes Stuff
Every kitchen has a layer of sometimes stuff: the rolling pin, the cookie cutters, the gravy ladle, the serving pieces that only come out at Thanksgiving. Give it all one drawer, assign that drawer the Serve job’s slow lane, and place it low. The top-drawers-for-daily rule applies in reverse here, since holiday tools can afford the bend.
Group by occasion instead of by item type. KraftMaid’s designers push the same idea for built-ins, a baking drawer that holds the rolling pin, whisks, cookie cutters, and cupcake liners together, so one pull sets up the whole project. We run ours the same way with clear modular bins: one for baking, one for grill tools, one for the party servers. The bins lift out and ride to the counter like little toolboxes, then slide home when the guests leave.
Two edits keep this drawer from swelling. Cap measuring cups and spoons at two sets (magnetic measuring spoons nest flat and end the strays), and give stand mixer attachments their own bin so they quit migrating into the utensil lanes. Of all the kitchen drawer storage ideas in this guide, the lift-out occasion bin is the one visitors ask about, because an entire baking setup lands on the counter in one move. It’s kitchen drawer organization for the ten days a year you host, sized so it never crowds the other 355.
Kitchen Drawer Organizer Ideas Worth Buying (and One to Skip)
You’ve measured every drawer, so buying takes ten minutes. Here’s the short list we’d hand a friend, screenshot it and go:
| Organizer | Typical price | Best drawer | Why it earns the spot |
|---|---|---|---|
| Expandable bamboo flatware tray | About $30 | Silverware | Heavy enough to stay put under full flatware, expands to your exact width |
| Spring-loaded bamboo dividers, 4 pack | $25 to $35 | Utensils, deep drawers | Custom lanes for odd shapes, no screws, moves out with you |
| Clear acrylic modular bins | $1.25 to $12 | Reset drawer, spices | You can see the drawer bottom, which keeps the drawer edited |
| In-drawer bamboo knife block | About $40 | Knives | Clears the counter and covers every edge |
| Thin plastic expandable tray | Under $10 | Light contents only | The skip for flatware: sags and slides under real weight |
A few notes on that table. The under-$10 plastic tray isn’t junk, it’s just miscast; it works fine for napkins, straws, or birthday candles. Trim-to-fit inserts, the kind you cut down to your exact interior like a custom install, are the polished option from The Container Store and Rev-A-Shelf if you want the built-in look without the built-in price. Walmart’s Mainstays trays cover the same jobs at the lowest cost. And whatever you buy, lay non-slip liner underneath first. Kitchen drawer organizer ideas succeed or fail on whether things stay where you put them, and a $6 roll of liner settles that for the whole kitchen. Good kitchen drawer organization spends money on maybe four products, total.
Renting? Organize Kitchen Drawers Without a Remodel
Every idea above drops in and lifts out, which makes this whole system renter-proof. That’s worth saying plainly, because the big remodel tours ranking for this topic lean on installed hardware: tiered cutlery pullouts near $200, rollout tray sets near $500, blind corner units pushing $800. Beautiful, sure. Also bolted to someone else’s cabinets, which makes that brand of kitchen drawer organization useless the day your lease ends.
The drop-in path costs a rounding error by comparison. Peel-and-stick drawer liner protects worn drawer bottoms, wipes clean, and peels away at move-out with no residue. Non-slip liner under trays kills the sliding problem without any adhesive at all. Spring-loaded dividers grip by tension, so nothing gets drilled, and every bamboo tray, acrylic bin, and knife block travels to the next kitchen in one box. A two-drawer starter setup from Dollar Tree bins plus a Mainstays tray lands under $15.
One honest limitation: you can’t change drawer depth or count in a rental, so the 5-Job Drawer Map does the heavy lifting. If you’re short on drawers, jobs double up by neighborhood, Prep and Cook sharing one deep drawer near the stove, Serve and Store splitting the run by the dishwasher. The map flexes. The lease survives.
The 10-Minute Drawer Reset That Keeps It This Way
Nobody ranks for this part, and it’s the part that decides whether your work lasts past Labor Day. Organized drawers drift, so schedule the drift out with three tiny habits.
Weekly, give the Reset drawer two minutes while the coffee brews. Walk the visitors home, straighten the bins, done. Monthly, pick one job from the map, Serve this month, Cook next, and run a 10-minute pass: pull anything that migrated in, wipe the liner, check the visible-bottom test. Seasonally, hold verdict day for the maybe bin. Whatever sat untouched for the season gets donated without a farewell tour.
The map makes drift diagnosable instead of mysterious. A garlic press in the towel drawer isn’t chaos, it’s an item in the wrong job, and it takes four seconds to fix once the jobs exist. Total upkeep runs maybe 25 minutes a month, which is less time than one full re-do of a single drawer. That trade is the entire case for doing kitchen drawer organization as a system instead of a mood.
FAQ: Kitchen Drawer Organization Questions, Answered
What is the best way to organize kitchen drawers?
Empty one drawer completely, measure the interior in inches, edit out duplicates and broken tools, assign the drawer one job from the 5-Job Drawer Map, and only then buy organizers sized to your numbers. Buying first is the classic kitchen drawer organization mistake.
What should go in each kitchen drawer?
Match contents to location. Flatware and towels near the dishwasher, utensils and oven mitts beside the range, knives and measuring tools by the prep counter, food storage containers near where you pack leftovers, and one Reset drawer for chargers, pens, and tape.
How do you organize deep kitchen drawers?
Nest everyday pots in the upper deep drawer and send cast iron to the lowest one. File lids upright between adjustable pegs or in a lid rack, and stand cutting boards and sheet pans on edge like files so nothing stacks blind. Vertical filing does more for deep kitchen drawer organization than any single product.
Should everyday items go in top or bottom drawers?
Top. Designers consistently point to a frequency rule: the most-used items live in the easiest-to-reach drawers, roughly waist height, while holiday and specialty pieces sink to the bottom or move out of the kitchen’s prime real estate.
How do I keep a junk drawer organized?
Rename it, cap its roster, and sort it into clear bins so the drawer bottom stays visible. Then give it two minutes a week. A junk drawer with a job description and see-through bins stops regrowing on its own.
Do drawer organizers need to fit exactly?
Close counts, exact wins. Measure interior width, depth, and height first, then choose expandable or trim-to-fit organizers to bridge the last inch. A strip of non-slip liner underneath stops any remaining shimmy, which matters most for kitchen drawer organization in older cabinets with worn glides.
One Weekend, Ten Drawers, Zero Fights
That’s the whole system. Five jobs, one 15-minute edit per drawer, a handful of drop-in organizers matched to real measurements, and a 25-minute monthly habit that keeps every drawer gliding shut on the first try. Kitchen drawer organization isn’t a personality trait; it’s a map plus a tape measure, and you now hold both. Start with the one drawer that annoys you most, tonight even, and let the momentum carry you through the rest this weekend. Save this guide to your kitchen board so it’s waiting when you are, and while the coffee’s still hot, poke around our other kitchen and pantry systems. Your drawers are about to become the most relaxing thing you open all day.