How to Set Up a Snack Drawer Organization System That Actually Stays Neat
You open the snack drawer at 4 p.m., a kid hovering at your elbow, and it looks like a granola bar fight broke out in there. Crushed crackers. A lone fruit snack pouch wedged in the back. Three open bags of pretzels, all of them stale.
Snack drawer organization is the fastest win in the whole kitchen, and most people skip it because they think it means buying forty matching containers. It doesn’t. You can sort the drawer you already have in about twenty minutes flat, and the right setup keeps it neat long after the novelty wears off.
Here’s the promise. By the end of this, you’ll have a real system: four simple zones, a refill rhythm that stops food from going stale, and a kid-height version that lets your six-year-old grab their own snack without dismantling the whole drawer. I built this in my own kitchen last spring after the third stale-pretzel incident, and honestly, it stuck better than any fancy pantry makeover I’ve ever attempted.
Why Most Snack Drawer Organization Fails in a Week
The drawer falls apart for one reason: there’s no logic to where things go. You dump snacks in, everyone digs, and within days it’s chaos again. A pretty bin doesn’t fix that. A system does.
The fix is to stop thinking of it as one drawer and start thinking of it as four small jobs. Most failed snack drawers mix daily grab-and-go items with backup boxes and fresh fruit all in one pile, so the fast stuff gets buried and the slow stuff goes stale. Separate those, and the drawer practically maintains itself.
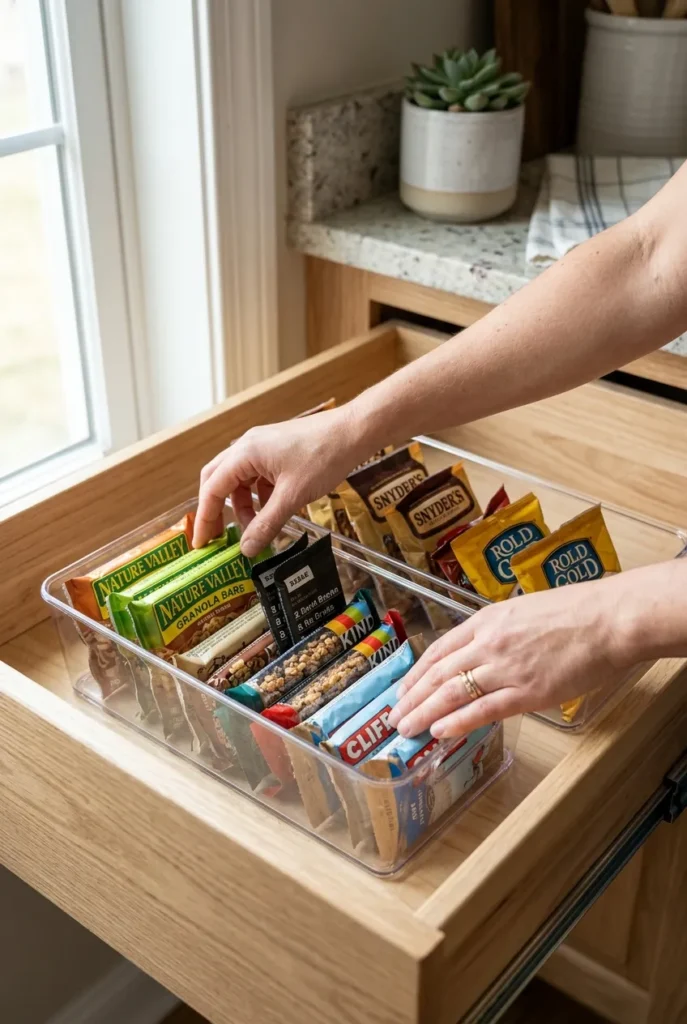
I tested five bin brands before landing on clear ones with low sides. You want to see what’s inside at a glance, and you want little hands to reach in without tipping the whole thing. The Container Store’s clear shallow bins and Target Brightroom drawer organizers both work well here, and Dollar Tree clear trays do the job for under a buck if you’re starting cheap.
The 4-Zone Snack Drawer Rule (My Core System)
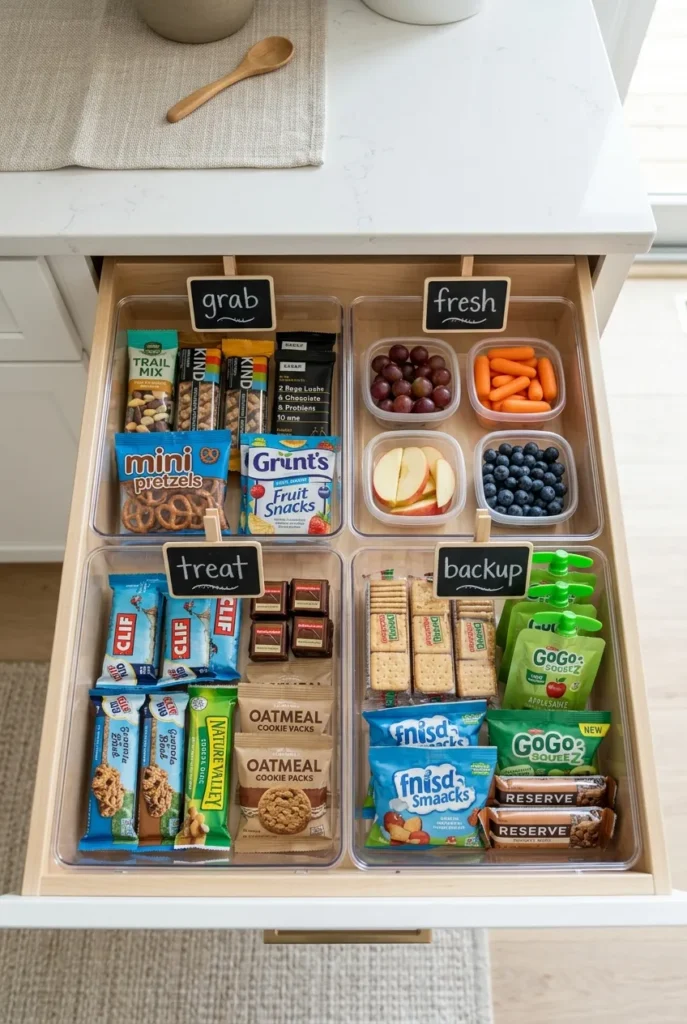
This is the framework everything else hangs on. The 4-Zone Snack Drawer Rule splits your drawer into four named sections: Grab, Fresh, Treat, and Backup. Each zone has one job, and once your family learns the four spots, the drawer stops sliding back into mess because everyone knows where things live.
Here’s how the four zones break down:
- Grab zone (front and center): the daily, no-fuss, everyone-says-yes snacks. Cheese crackers, pretzel cups, applesauce pouches. This is your highest-traffic spot, so it goes right at the front where short arms reach first.
- Fresh zone: anything with a shorter shelf life that needs eating soon. Clementines, string cheese if your drawer is a fridge drawer, a small bin of cut veggies. Front-load this so fresh food gets eaten before it turns.
- Treat zone: the cookies, the fruit snacks, the chocolate. Keeping treats in their own labeled corner makes portioning easier and ends the “can I have a cookie” negotiation, because the answer is built into the zone.
- Backup zone (back of the drawer): sealed boxes and refill stock. This is your reserve, tucked behind the daily stuff so the front never looks empty and you always know when you’re running low.
Front-load your single best snack in the Grab zone. Pinterest visitors and hungry kids both bounce fast, so the highest-value item should be the first thing a hand lands on.
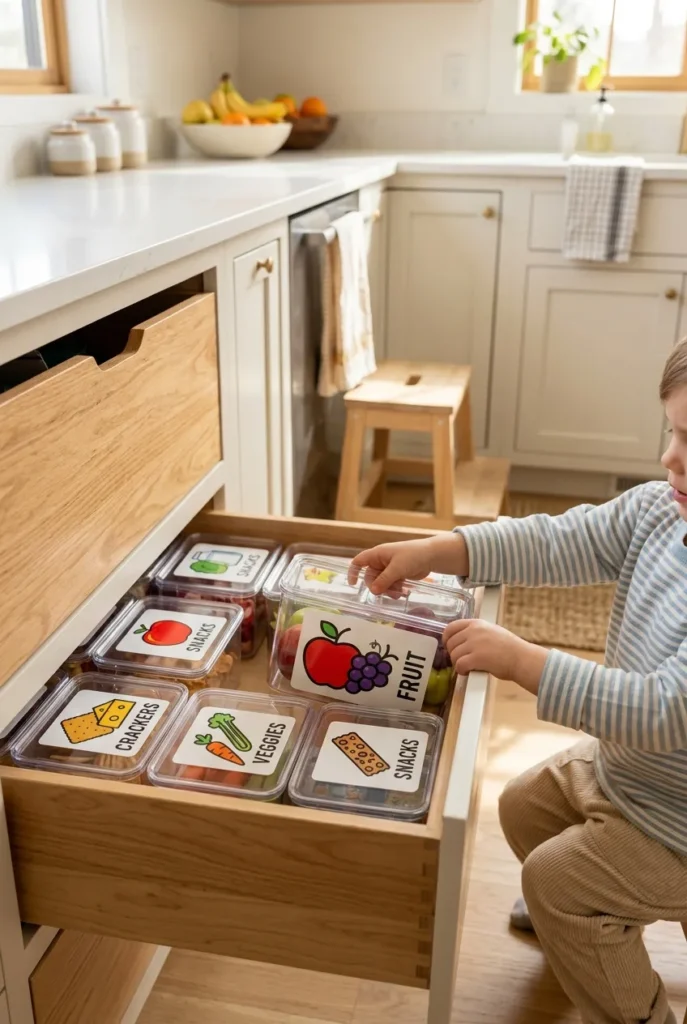
Kids Snack Drawer Organization That Builds Independence
Here’s the catch with a kid-friendly setup: the drawer has to work at their height and their reading level. A snack drawer your toddler can’t reach or read isn’t a system, it’s just storage you control.
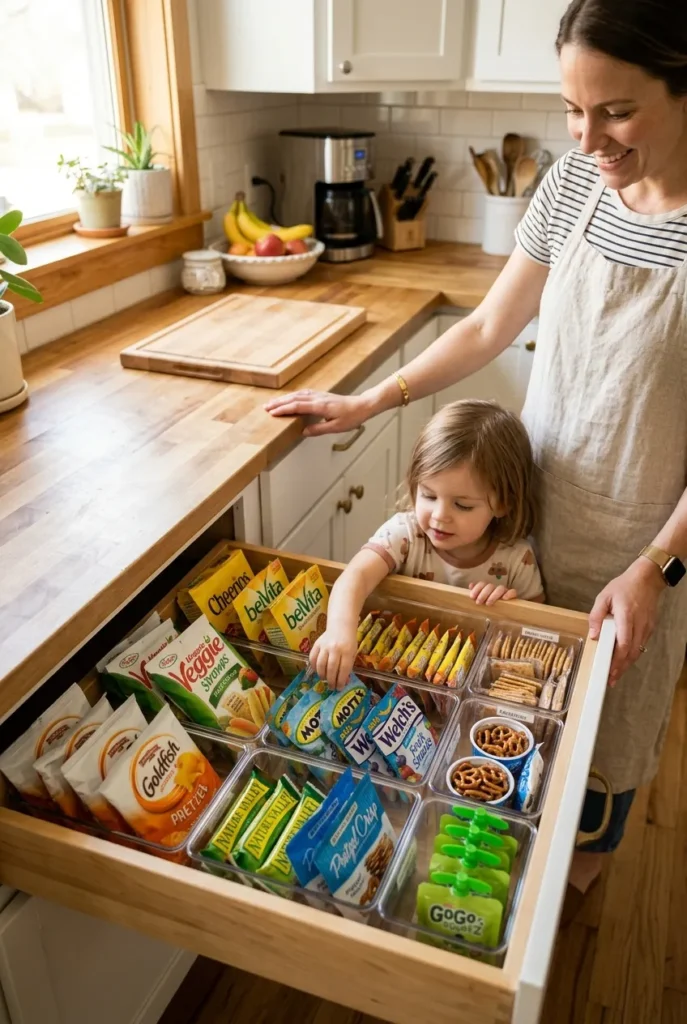
Put the kid zones low. If you’re using a base cabinet drawer or a low fridge drawer, that’s perfect. Fill the Grab and Treat zones with pre-portioned snacks so one trip equals one snack, not half the box. I keep about six to eight portions visible at a time, which is enough to feel abundant without inviting a free-for-all.
Labels matter more than you’d think. Picture labels (a little cracker icon, a fruit icon) let pre-readers find their own snack, which is the whole point. If you want a head start, my guide to DIY pantry labels kids can read walks through icon labels with a free printable set you can size down for drawer bins.
The independence payoff is real. Once kids know the zones and can read the labels, they serve themselves, and you get your afternoon back. To keep the system fair, a simple visual cue helps, and our free printable chore chart by age pairs nicely with a “restock the snack drawer” task for older kids.
Best Snack Drawer Containers and Organizers (Compared)
You don’t need much, but the right bin makes the difference between a drawer that stays neat and one that collapses by Wednesday. Here’s a quick comparison of three I’ve actually used, with the criteria that matter: price, size, and material.
| Organizer | Price | Best size | Material | Why it works |
|---|---|---|---|---|
| Dollar Tree clear trays | $1.25 each | ~9 x 6 inches | Lightweight plastic | Cheapest way to test zones before committing |
| Target Brightroom drawer bins | $5 to $8 | 6 x 9 and 9 x 12 inches | Sturdy clear plastic | Stackable, holds shape, easy to wipe |
| OXO Good Grips compact bins | $10 to $15 | ~1.6-quart cube | BPA-free, durable | Best for refill stock that gets handled daily |
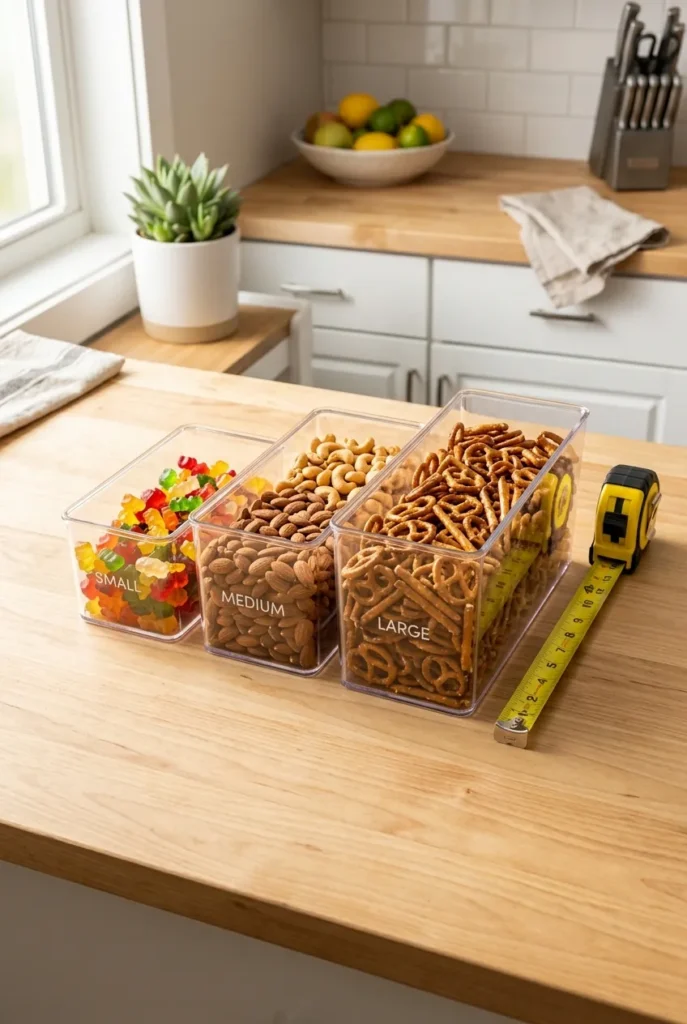
A few notes from testing. The Dollar Tree trays warp if you load them heavy, so use those for light items like fruit pouches. The Brightroom bins are the sweet spot for most families. And if you’re decanting bulk snacks into a sealed container, keep them food-grade, never repurpose a non-food bin for loose crackers or anything that touches food directly.
Measure before you buy. Most kitchen drawers run 4 to 6 inches deep, so a bin taller than that wastes vertical space and hides the snacks underneath. Pull your drawer out, run a tape measure across the inside, and shop to that number.
Healthy Snack Drawer Organization Without the Battle
You want the good stuff to win, so make the good stuff the easy stuff. Healthy snack drawer organization isn’t about banning treats, it’s about placement. Whatever sits at eye level and front-of-drawer gets eaten first.
Load the Fresh and Grab zones with the snacks you actually want chosen: clementines, string cheese, whole-grain crackers, veggie cups, little cups of nuts for the older kids. Keep treats present but tucked into the Treat zone, so nobody feels deprived and you’re not fighting a daily battle.
A note on balance rather than rules. General nutrition guidance from the U.S. Department of Agriculture suggests building snacks around fruits, vegetables, whole grains, and protein, which maps cleanly onto the Fresh and Grab zones. You can read the official guidance at MyPlate snacking tips on the USDA site. I am not a dietitian, so treat this as general information and check with a qualified professional for your family’s specific needs.

Snack Drawer Organization Without a Pantry (Small Spaces and Fridge Drawers)
No pantry? No problem. Plenty of apartments and small kitchens have zero pantry space, and the snack drawer is honestly a better solution anyway because everything lives in one reachable spot.
If you’re working a fridge drawer, the same four zones apply. Use the clear crisper drawer for the Fresh zone and add a small bin caddy on a shelf above for shelf-stable Grab and Treat items. A snack drawer organizer for the fridge keeps yogurt tubes and cheese sticks corralled instead of rolling to the back where they’re forgotten.
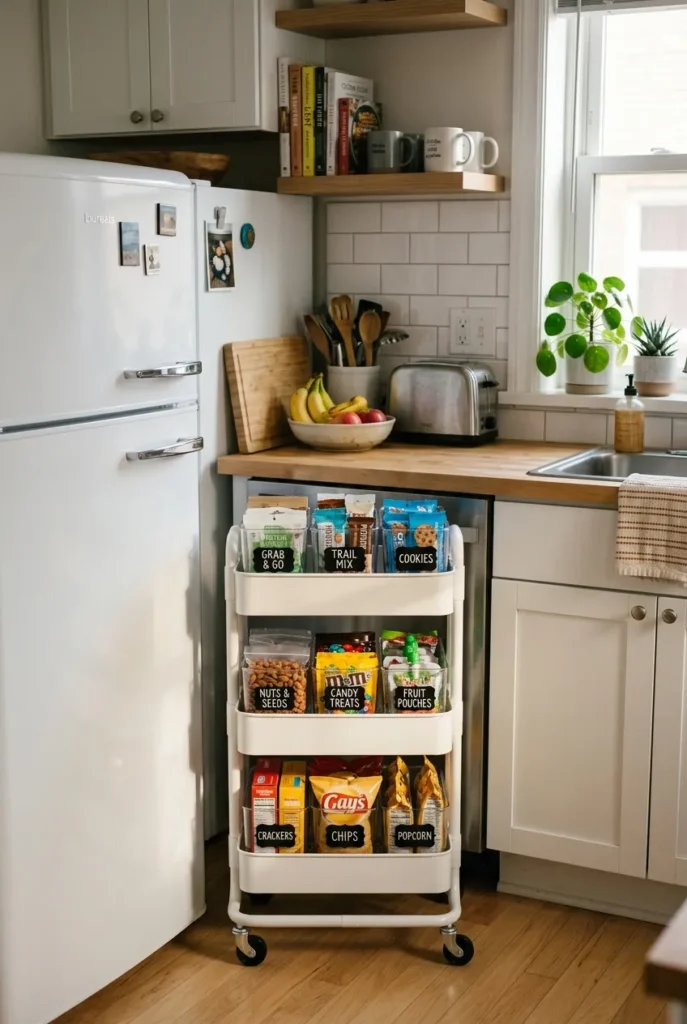
For tiny kitchens with no spare drawer, a single rolling cart works as a portable snack station. Three tiers, four zones, parked wherever there’s a gap. The thing is, you don’t need square footage, you need the system. For more on squeezing storage out of nothing, our DIY drawer dividers comparison shows how to split any drawer into clean sections without buying custom inserts.
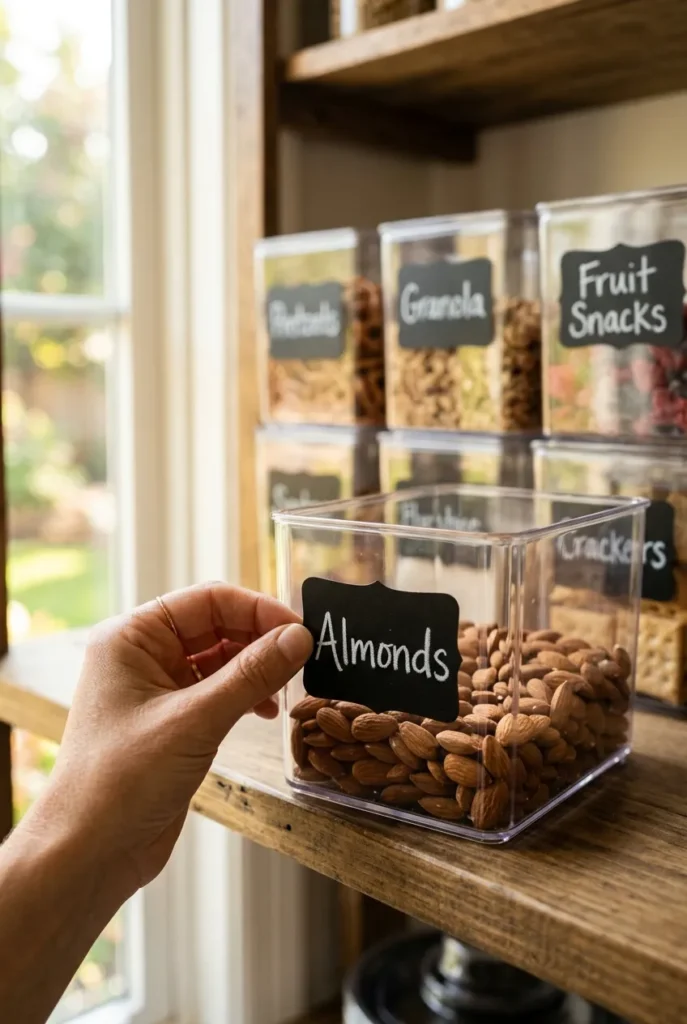
Creative Label Ideas That Keep the Drawer Honest
Labels are what turn a one-time cleanup into a lasting system, because a labeled spot has a memory and a bare bin does not. When every zone has a name, snacks go back where they belong without anyone thinking about it.
Try a few approaches. Chalkboard labels look great and wipe clean when your stock changes. Printed picture labels work for little kids. And a simple label-maker strip across the front of each bin is the no-fuss option that survives sticky fingers. Whatever you pick, label the four zones first, then label individual bins only if you want the extra polish.
Beyond the Kitchen: Office, Bedroom, and Dorm Snack Drawers
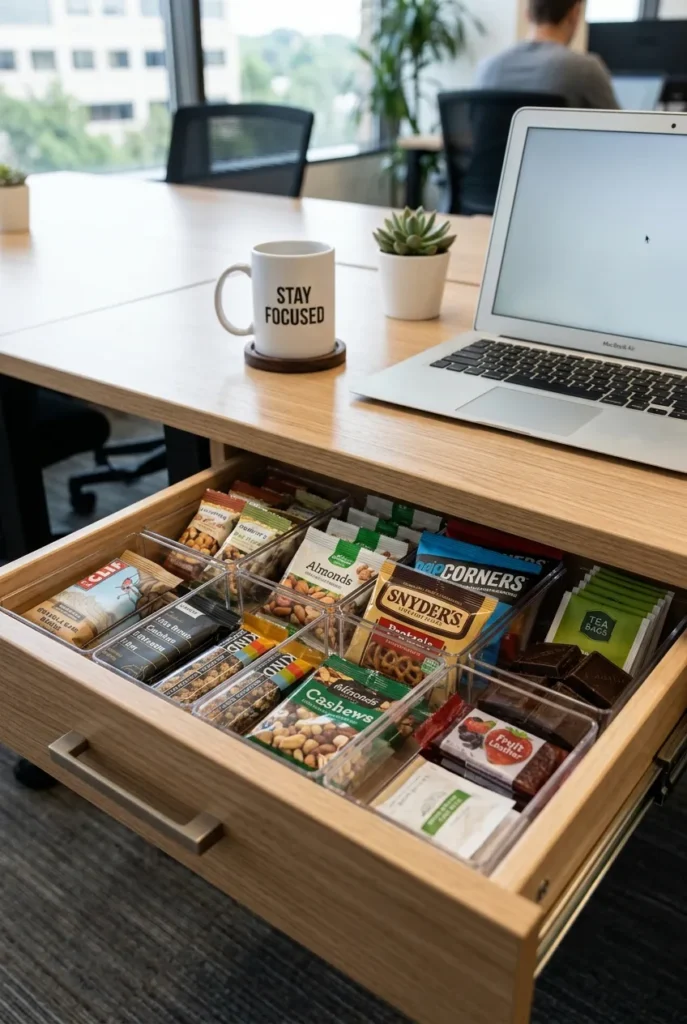
Here’s an angle nobody else covers, and it’s one of the most-searched: the snack drawer that lives away from the kitchen. Your desk drawer at work, a bedroom nightstand, a dorm setup. Same four zones, smaller footprint.
For an office snack drawer, skip the Fresh zone (no fridge nearby) and lean into shelf-stable Grab and Backup: nuts, jerky, individually wrapped bars, a sealed bag of trail mix. A single divided drawer organizer keeps it from turning into crumb soup by Friday. For a dorm, a clear stackable bin caddy on a desk does the job where there’s no drawer at all, and it travels home for breaks.
The trick for these spots is restraint. One small drawer, two or three zones, restocked weekly. Overstuff a desk drawer and you’re back to the granola-bar fight, just at work this time.
The Sunday Snack Refill: Keeping It Neat for Good
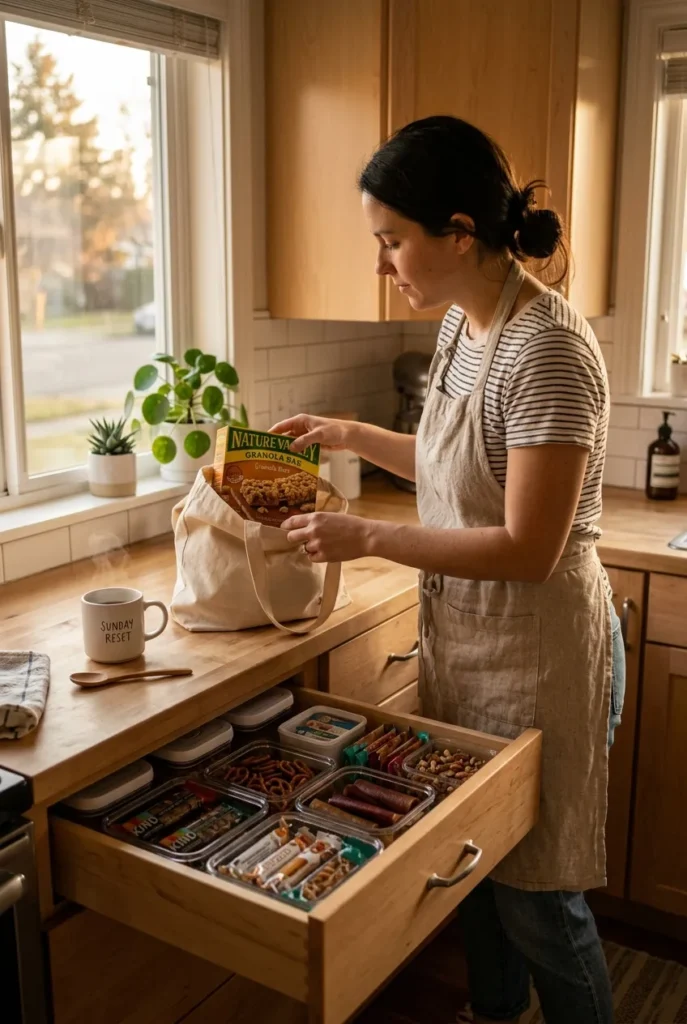
A system only stays neat if it gets reset, and this is the step everyone skips. The Sunday Snack Refill is a five-minute weekly habit: top off the Grab zone, pull anything stale, move Backup stock forward, and add the week’s fresh items. Five minutes, once a week, and the drawer never spirals.
This is also your food-waste fix. By rotating older snacks to the front during the refill (first in, first out), nothing gets buried and forgotten until it’s stale. I started doing this on Sunday evenings while the coffee maker was still warm from the afternoon, and the stale-pretzel era ended for good.
Build the refill into a habit you already have. Sunday grocery unload, Sunday meal prep, whatever your rhythm is, the snack drawer reset rides along with it. According to general food-safety guidance from the FDA, checking and rotating stored food regularly helps you catch items past their prime, which you can review at FDA food storage and safety guidance. That weekly pass is what separates a drawer that stays neat from one that quietly rots in the back.
Frequently Asked Questions
What is the best way to store snacks?
Sort them into zones by how often they’re eaten and how long they last. Keep daily grab-and-go snacks at the front, fresh items where they’ll get eaten first, treats in their own corner, and sealed backup stock in the back. Clear, low-sided bins let you see everything at a glance, which is what keeps the drawer from collapsing.
How can I organize snacks without a pantry?
Use a single drawer or a fridge crisper drawer as your snack station, or a three-tier rolling cart if you have no spare drawer. The four-zone system works in any of these. You don’t need a pantry, you need clear bins and a labeled spot for each type of snack.
What containers are best for snack drawer organization?
Clear, low-sided, food-grade bins that fit your drawer depth (most drawers run 4 to 6 inches). Target Brightroom bins are the all-rounder, Dollar Tree trays are great for testing on a budget, and OXO compact bins hold up to daily handling. Measure your drawer before buying so nothing sits taller than the space.
How do I label snack drawer bins so kids can use them?
Use picture labels with a simple icon for pre-readers, and a label-maker strip or chalkboard tag for everyone else. Label the four zones first, then individual bins if you want the extra polish. Picture labels are what let little kids serve themselves.
How often should I restock and rotate the snack drawer?
Once a week, ideally on a day you’re already in the kitchen. Top off the daily zone, pull anything stale, and rotate older snacks to the front so they get eaten first. This weekly five-minute reset is the single habit that prevents food waste.
How do I keep the snack drawer from being raided?
Pre-portion snacks so one reach equals one serving, keep only six to eight portions visible at a time, and put treats in their own labeled zone. When the limits are built into the setup, you stop policing and the drawer stays balanced on its own.
Your Snack Drawer Starts Today
The whole thing comes down to four zones, the right clear bins, and a five-minute Sunday reset. That’s it. Set up Grab, Fresh, Treat, and Backup this weekend, label the spots, and watch how much calmer 4 p.m. gets when everyone knows where the snacks live.
So which zone is your drawer missing right now, the Fresh one that keeps fruit from turning, or the Backup that stops the front from going bare? Pick that one, fix it first, and you’re already halfway to a snack drawer that finally stays neat.
General information only. For nutrition or food-safety questions specific to your household, consult a qualified US professional.