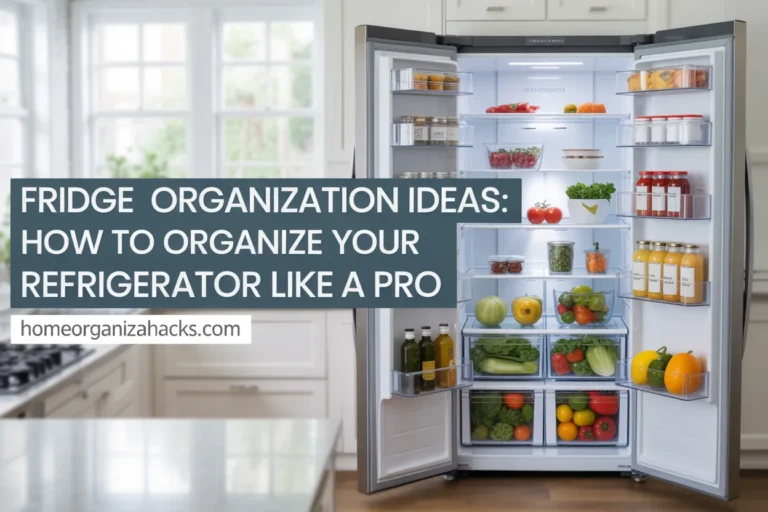
DIY Pantry Labels Kids Can Read (Plus a Free Printable Set You’ll Both Love)
You made the beautiful organized pantry. You bought the clear bins, decanted the pasta, printed those elegant script labels. Two days later, your six-year-old pulled every container off the shelf looking for the goldfish crackers because nothing on those labels made any sense to her. Sound familiar? DIY pantry labels kids can read are a completely different category than regular pantry labels, and once you understand the difference, you’ll never go back to the swirly font again.
This guide walks you through the exact system that makes labels work for every reading level, gives you a free printable set to download right now, and shows you how to pair it with a pantry zone your kids can actually navigate on their own.
Why Generic Pantry Labels Fail Kids (and What to Use Instead)
Most pantry label printables are designed for adults to admire, not for kids to use. Thin serif fonts, all-caps in 12-point type, zero visual cues. A child in the early reading stage (roughly ages 5 to 8) needs a minimum 18-point font, a clean sans-serif typeface, and a picture paired with the word. Pre-readers (ages 2 to 5) need the picture almost entirely. Generic labels skip every single one of those requirements.
I tested this in my own kitchen last spring. I put a standard farmhouse label set on our pantry bins and watched both of my kids walk past what they needed three times before asking me where things were. The labels were genuinely pretty. The pantry was a mess by Thursday.
The fix isn’t buying better labels. It’s designing labels around how kids actually read at different ages. That shift alone turns a pantry system adults organize into one kids actually maintain.
The Read-It-Yourself Label System
This is the framework I built after the farmhouse label failure, and it is the thing that finally made our pantry work for a preschooler and a first-grader at the same time. The Read-It-Yourself Label System has three layers. Every label needs all three for the system to cover every reading level in your household.
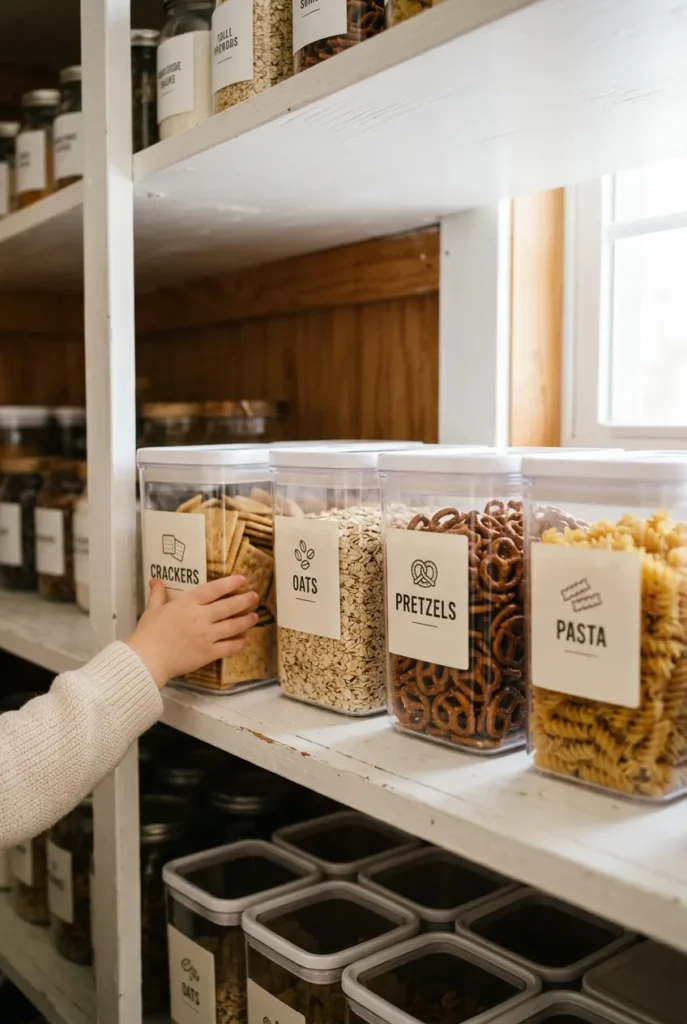
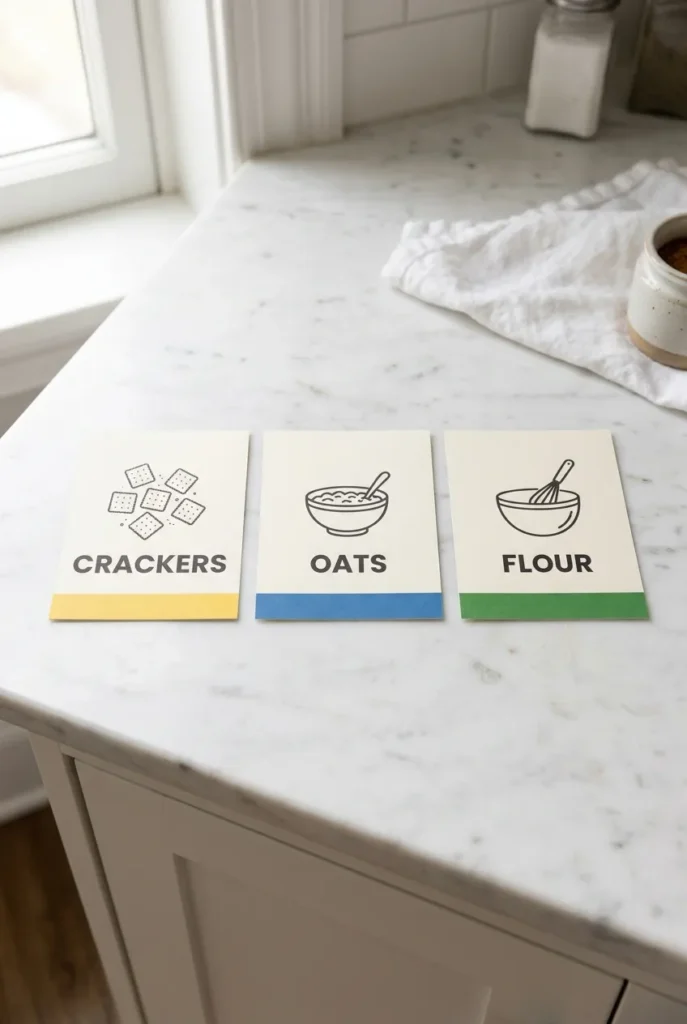
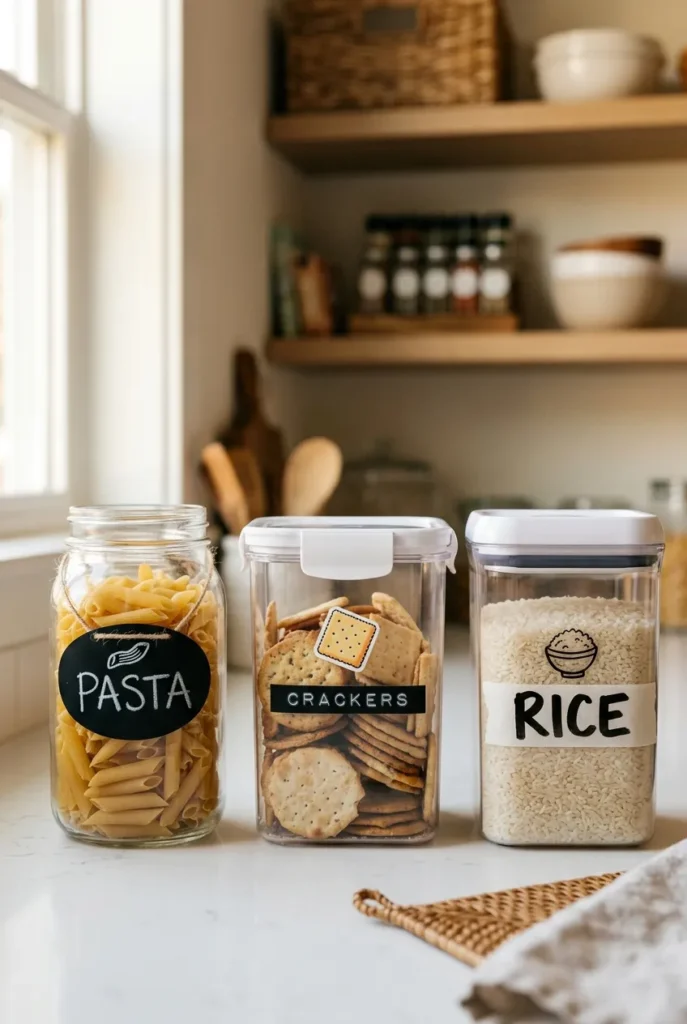
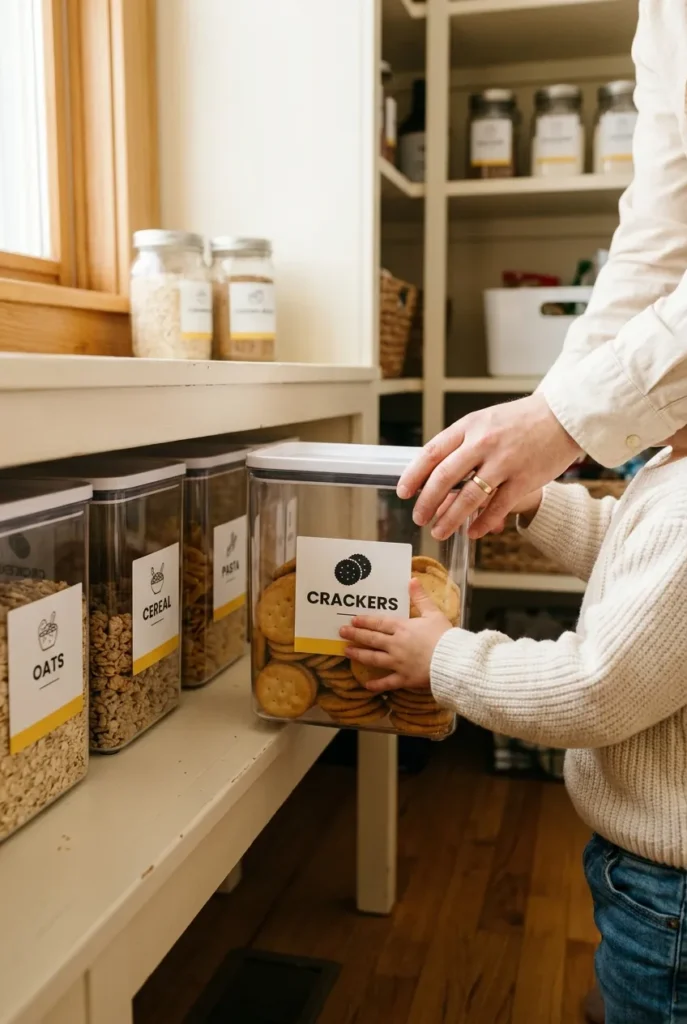
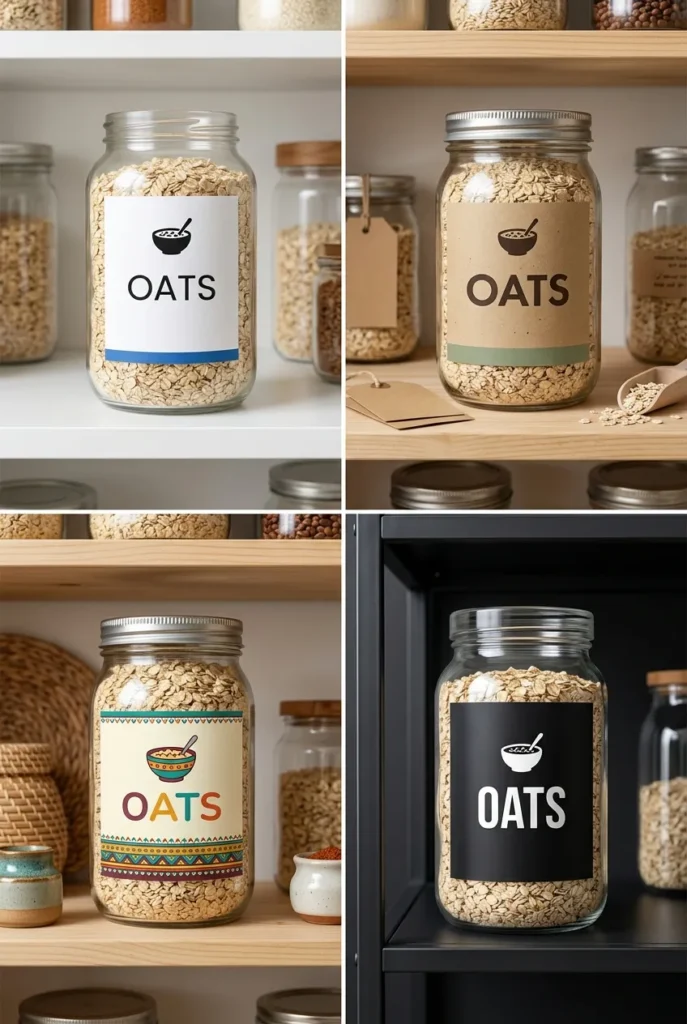
Layer 1: The Icon. A small illustrated image sitting above the word. This is the pre-reader’s entire navigation system. A bag of pretzels. A cracker. A cereal bowl. A banana. Keep the illustration simple, one or two colors, and recognizable from three feet away.
Layer 2: The Word. Bold, large, sans-serif font in a color that reads clearly against the label background. Nunito Bold, Poppins SemiBold, and Futura Medium all work well. Minimum 20-point font for any label sitting more than two feet from little eyes. All-caps is fine here because the icon is already carrying the visual meaning.
Layer 3: The Color Zone. Assign a color to each pantry category and keep it consistent across every label. Snacks are yellow. Breakfast is blue. Baking is green. Your pre-reader may not decode “OATS” yet, but she knows the blue shelf is breakfast, and the blue-banded bin is where it belongs. Color becomes the navigation system while reading is still developing.
Use all three layers on every label. Icon, word, color band. That’s it.
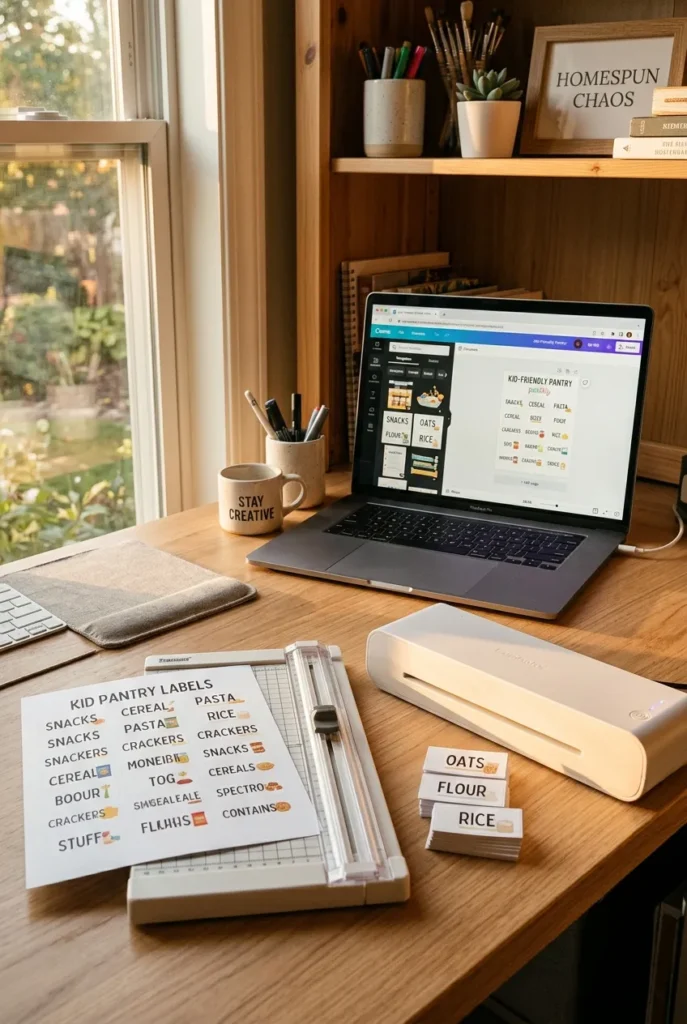
The Free Printable Set: What’s Inside
This printable set downloads as a PDF in US letter size (8.5 x 11 inches), so it prints cleanly on any standard home printer without resizing. The set includes 50+ labels organized by pantry category. Here’s what you get:
- Breakfast: oats, cereal, granola, pancake mix, syrup, coffee
- Lunch and snacks: crackers, pretzels, popcorn, chips, fruit pouches, nuts
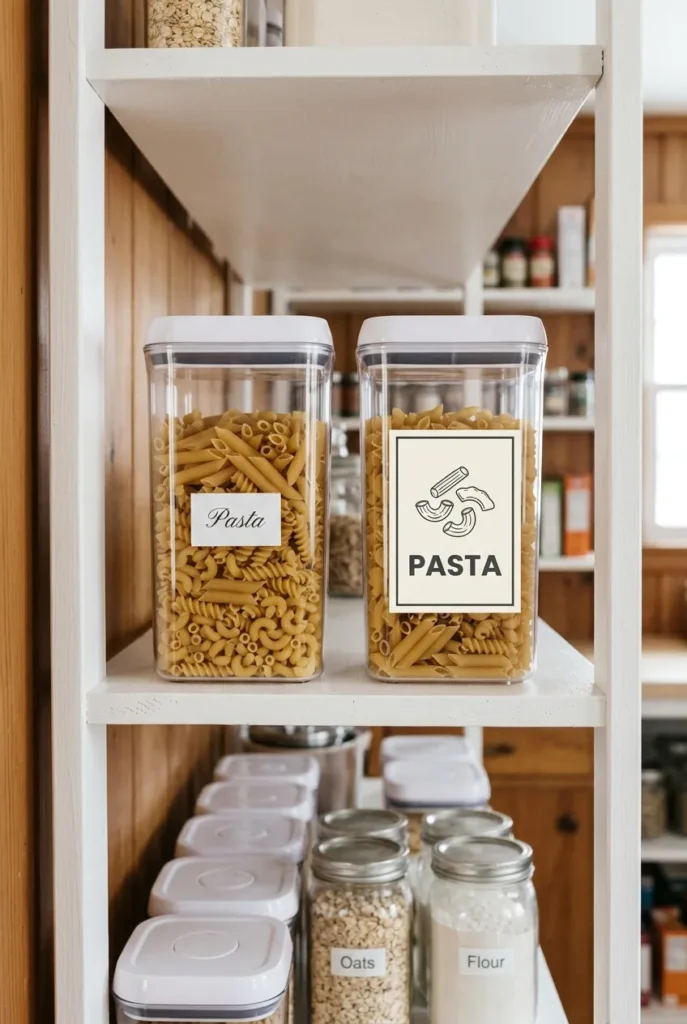
- Dinner: pasta, rice, lentils, canned tomatoes, broth, beans
- Baking: flour, sugar, brown sugar, baking soda, baking powder, cocoa, cornstarch
- Extras: tea, honey, breadcrumbs, protein powder, and one “misc” catch-all label
Every label follows the Read-It-Yourself system: illustrated icon on top, bold word below, and a color band along the bottom edge. Two label sizes are included: 2 x 2 inches for small jars and spice containers, and 2 x 3 inches for larger bins and wide-mouth canisters.
How to Print Your Kid Pantry Labels at Home
Print on standard 8.5 x 11 inch white cardstock (at least 65 lb weight) for the cleanest color and crispest edges. Use a paper trimmer rather than scissors for clean cuts. If you want peel-and-stick labels with zero extra steps, print directly onto Avery full-sheet sticker paper and cut to size. You get a clean adhesive label with no laminating required.
For a longer-lasting finish, run your printed sheet through a laminator before cutting. A Scotch ThermaLAM 3 mil laminating pouch makes the labels wipe-clean and genuinely reusable, even after the inevitable peanut butter fingerprint situation.
How to Edit the Template
The editable version of this printable opens in Canva with a free account. Swap any label name, swap the icon from Canva’s built-in food illustration library, and adjust the color band to match your pantry aesthetic. Download as a PDF print file and send it straight to your printer.
Using These Labels with a Cricut or Silhouette
If you have a Cricut Explore or a Silhouette Cameo, the SVG version of the label set lets you cut each shape precisely, including rounded corners and any custom dimension you need. Upload to Cricut Design Space, set your cut size, and run it on printable vinyl or adhesive paper. The result is a cleaner edge than any paper trimmer and labels that hold beautifully on glass canisters or OXO Good Grips POP containers.
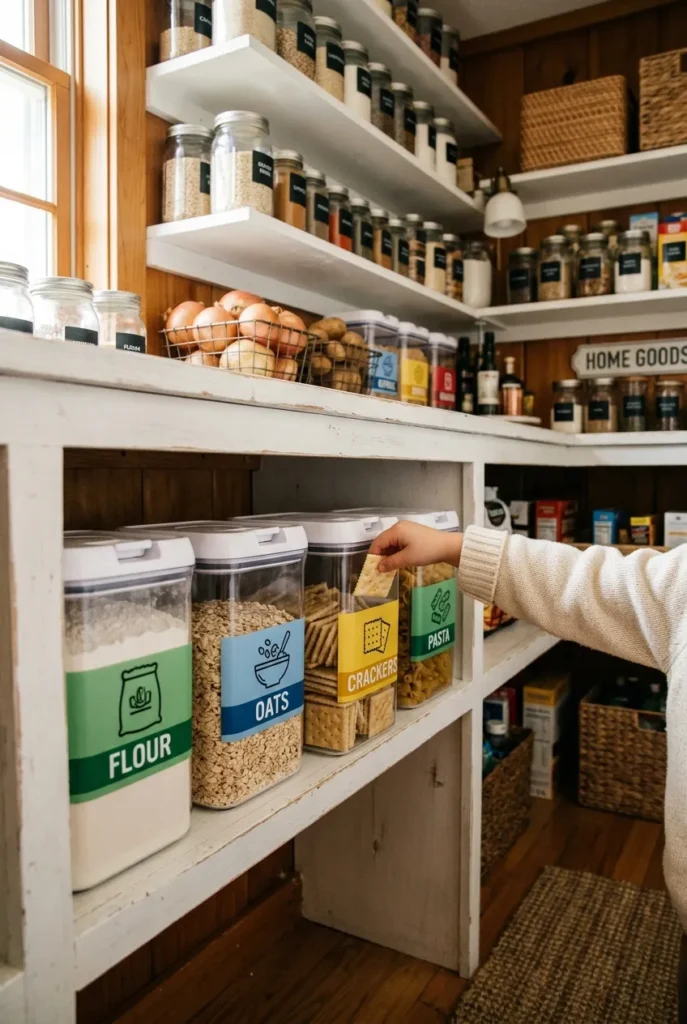
Setting Up the Kid Zone in Your Pantry
Labels only work when the food kids want is somewhere they can reach. This is the step nearly every pantry organization guide skips, and it is the single biggest reason a beautiful label system collapses within a week.
Dedicate one full shelf to kid-accessible items. The right height for most 3 to 8-year-olds lands between 18 and 36 inches off the floor. That range keeps snacks visible and reachable without a step stool for the majority of kids in that age window.
Which Bins Pair Best with These Labels
Labels read cleanest on a flat, smooth surface. Here are the three bin options I’ve actually used and tested:
Target Brightroom 1.5-gallon clear bins ($5 to $8 each). A flat front panel, wide enough for a 2 x 3 inch label, and they stack without wobbling. Great for crackers, cereal bags, and snack pouches.
OXO Good Grips POP 2.3-quart containers. The square face gives a clean label surface and the push-button lid is easy for kids to open without help. I use these for oats, granola, and pasta where airtight storage actually matters.
Mainstays square clear canisters from Walmart (usually under $3 each). Not airtight, but totally fine for crackers and shelf-stable snacks, and the price makes it easy to label an entire snack category without thinking twice about cost.
One note on adhesion: if your bin has a textured or curved surface, use a matte laminated label with a strong adhesive back. A plain cardstock label will start peeling off a curved OXO lid within about a week of regular use.
Font and Design Choices That Make Labels Actually Work for Kids
Here is the short, practical version of what works and what does not.
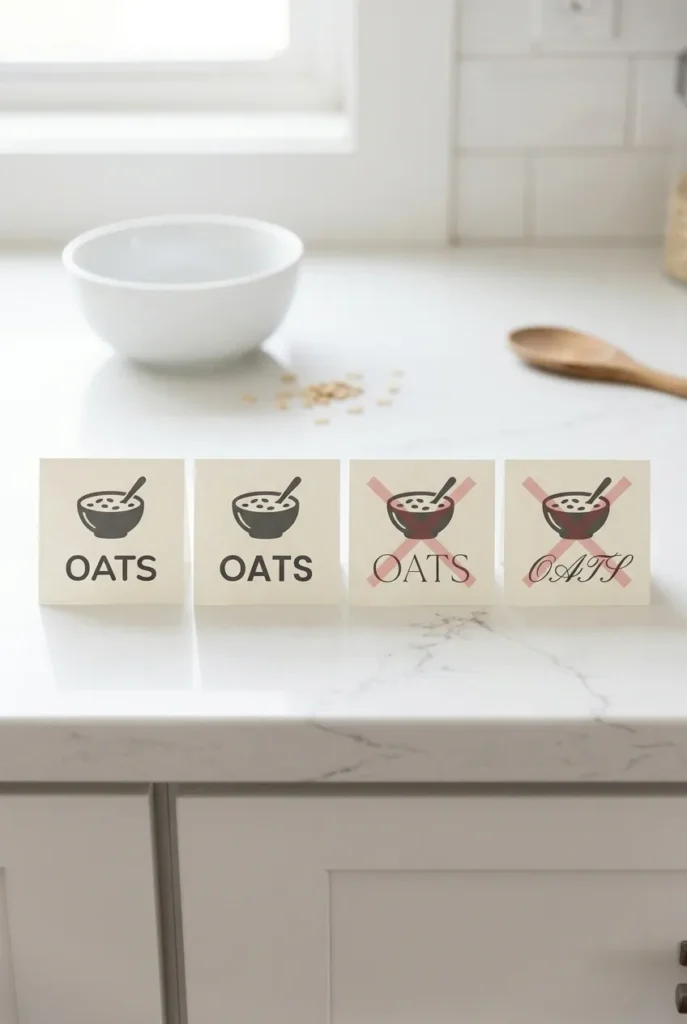
Fonts that work. Nunito Bold, Poppins SemiBold, Futura Medium, and Rounded Mplus 1c. All of these have open letter shapes, consistent stroke widths, and friendly rounded forms that early readers recognize faster than angular alternatives.
Fonts to skip. Any script, anything in italics, any decorative serif with alternating letter heights. These fonts look beautiful on an adult’s pantry. They are close to unreadable for a child who is still learning letter shapes.
Icon sources. Canva’s free icon library has solid food illustrations under the search terms “food doodle” and “food outline.” The Noun Project has a generous free tier with thousands of single-color icons sized perfectly for a small label.
Label size minimum. For any label at eye level, 1.5 x 1.5 inches works. For shelves kids view from a slight downward angle, go 2 x 2 inches minimum. Bigger labels are rarely too big when your end user is under four feet tall.
DIY Label Options Beyond the Printable
The free printable set is the fastest path. But if you want to go fully custom or skip the printer entirely, here are three methods that work just as well.
Chalkboard Labels
Oval chalkboard labels (packs of 60 run about $8 on Amazon) let you write a label in chalk marker and wipe it off whenever your pantry contents change. Draw a small icon above the word with a white chalk marker for the full Read-It-Yourself effect. Reusable, zero printing required, and genuinely forgiving when you reorganize.
Label Maker Labels
A DYMO LabelWriter or Brother P-Touch prints clean, durable text labels in about ten seconds each. Neither machine handles icons natively, so pair the text strip with a small adhesive icon sticker placed just above the word. Small icon sticker packs are available at Dollar Tree and are easy to cut and apply in under a minute per label.
Thick Marker on Washi Tape
Low-tech and genuinely effective. A strip of white washi tape on any container, a Sharpie Oil-Based Paint Marker in medium tip for the word, and a small hand-drawn icon above the text. Not Instagram-worthy. Completely readable. Free to make with what you already have, which makes this the best starting point if you want to test the system before committing to a printed set.
How to Get Kids to Actually Use the System
You can design the most readable pantry labels on earth. If the kids were not involved in putting them up, they will not respect the system. This is honestly the part nobody covers, and it is the most important step.
Let them help apply the labels. Give a preschooler the job of pressing each label onto the bin while you hold it in place. Let a school-age kid arrange the order of the snack shelf. This is not just a sweet moment. It is the fastest way to build buy-in from the people who use the pantry most.
Create a “return zone” rule instead of a precision rule. Rather than “put it back exactly where it was,” tell kids the label means it goes on the labeled shelf anywhere on that shelf. Lowering the precision requirement keeps the system alive when energy is low and the after-school rush is real.
One more thing that genuinely works: the dedicated snack drawer. If your pantry has a pull-out drawer at child height, put all approved snacks in that one drawer with labels on the inside front edge. Kids see everything at a glance without pulling containers off a shelf. Our kids started grabbing snacks completely independently at ages 3 and 5 after we made this switch, which changed our late-afternoon routine more than any other single organizational move.
If you’re also setting up independence routines for this age group, this free printable chore chart by age pairs well with the pantry label system as a next step.
Pantry Label Styles: Finding One That Works for Your Kitchen
This is the final decision before you print, and it matters mostly for visual consistency rather than function. Here’s a quick comparison:
| Style | Best for | Font feel | Color use |
|---|---|---|---|
| Minimalist | White kitchens, clean aesthetic | Poppins, black on white | Single thin color band only |
| Farmhouse | Cream cabinets, warm wood | Futura, dark ink on kraft | Neutral muted tones |
| Colorful Boho | Eclectic spaces, playrooms | Nunito, multi-color | Full color zone per category |
| Modern Black | Dark bins, bold contrast | White ink on black label | No color, contrast-based |
The minimalist and farmhouse styles both work well for adults AND kids because the simplicity keeps the icon legible from a distance. The colorful boho style is the strongest option for pre-readers specifically because the category colors are obvious across the room before the child is close enough to see the word.
Once your labels are printed and your pantry is organized, this summer pantry restock guide walks through exactly what to stock in each labeled bin for the warmer months. And if you’re tackling a bigger kitchen organization project at the same time, above-cabinet storage ideas can help you find space for everything that does not belong in the kid zone.
Frequently Asked Questions
How do I get the free printable pantry labels?
Click the download button on this page to save the PDF directly to your device. It’s formatted for US letter size (8.5 x 11 inches) and prints on any standard home printer.
Are the pantry label templates editable?
Yes. The Canva template version is fully editable with a free Canva account. Swap any label name, change the icon from Canva’s food illustration library, and adjust the color band before downloading your finished PDF.
What size are the labels in this printable set?
Two sizes are included on the same US letter sheet: 2 x 2 inches for small jars and spice containers, and 2 x 3 inches for larger bins and wide-mouth canisters.
Can I print these in black and white to save ink?
Yes. The icon-plus-word design reads clearly in black and white. The color band prints as a gray shade, which still works as a visual separator even without color. For pre-readers who rely on color coding, printing in color (even on a basic inkjet) will serve them better.
How do I make these labels last longer?
Run your printed sheet through a laminator using a 3 mil laminating pouch before cutting. Laminated labels are wipe-clean and hold up well for two or more years in a high-traffic family pantry. Avery full-sheet sticker paper is the peel-and-stick alternative if you want to skip the laminator entirely.
How do I organize a small pantry on a budget with these labels?
Start with Dollar Tree bins or Walmart Mainstays canisters, print the free labels on cardstock ($5 for a pack of 50 sheets), and assign your lowest shelf as the kid zone. The whole setup runs well under $20 for most small pantries.
How often should I update the kid pantry labels?
A quick label check every season is usually enough. If a pantry category changes (say, you switch from boxed cereal to bulk granola), swap that one label rather than reprinting the full set. The editable Canva template makes individual reprints fast.
Conclusion
The right DIY pantry labels kids can read do three things at once: they teach early readers to find their own food, they give pre-readers a visual system they can navigate confidently, and they build the kind of pantry independence that saves you approximately forty “where are the crackers?” questions per week. (Only slightly exaggerated.)
Start with the free printable. Print it on 65 lb cardstock or Avery sticker paper. Assign one low shelf between 18 and 36 inches from the floor as the official kid zone. Apply the Read-It-Yourself Label System: icon, word, color band on every label. Then let your kids press the labels onto the bins themselves. That last step is the one that makes it stick.

What’s the first shelf in your pantry you’re handing over to the kids? Drop your question or your before-and-after in the comments. And if you’re ready to tackle the rest of the kitchen, the summer pantry restock guide is the natural next read.